

Are you looking to build a WordPress landing page but aren’t quite sure where to start?
Well, look no further. We have you covered.
In this guide, we’ll cover everything there is know about WordPress landing pages including what to add to your landing page, what not to include, and different ways you can build a landing page for a WordPress website.
We’ll also walk you through how to build a landing page with step-by-step instructions. Follow along…
What is a landing page?
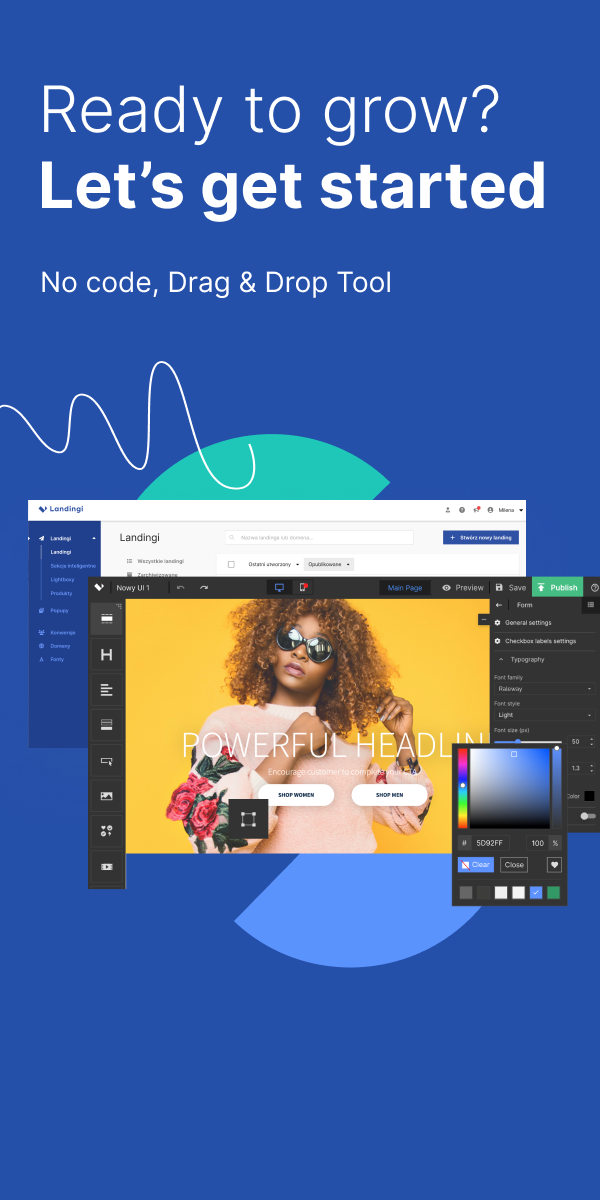
A landing page also referred to as a “squeeze page”, is the first thing that a visitor sees when he or she is redirected to your website from AdWords, Facebook, or a targeted e-mail.

This screenshot is just one of over 250+ landing page templates we have at Landingi.
It’s used to collect information from potential customers such as their name, number, email, address, etc.
A good landing page will be optimized to present an offer (the reason the visitor originally decided to click-through to your page) and to collect the visitor’s contact information.
A landing page is not your website’s homepage.
A landing page should compel the visitor to complete one specific action. On your homepage, however, there are many actions that the visitor can take. They make click a link in your menu, watch a video, click a button to see your pricing, etc. There’s too much happening on your homepage to make it a good landing page.
WordPress landing page content: what elements should you include on your landing page?
Since a landing page should be a perfectly optimized page to convert the visitor to take a specific action (like filling out your form), there are a few key elements that a successful landing page should have.
- A prominent headline enticing the offer. Make sure that the headline matches your ad copy and includes value driven words. For example, “Learn how to increase sales by 100% with our free ebook download”.
- A brief description of the offer. Focus on benefits. Talk about how the visitor will benefit from your offer.
- At least one supporting image or video. For example, you may include an image of the cover of an E-book you are offering or a video describing what the visitor will learn. However, never go overboard with images. Keep the design clean and to-the-point.
- A form to capture visitor information. Think about what information is absolutely necessary to collect from your visitors. The longer your form is, the more friction it can cause.
- Optional: You may also include social proof in the form of testimonial/reviews. A few key testimonials can demonstrate the value your offer provides and reassure the visitor.
- A pricing page transparency. Consider adding a pricing to your landing page. Customers who are familiar with prices are more eager to make an instant decision and purchase product straight away. Make time spent by your audience on your landing page valuable. And as a result of it – precious for you.
- The conversion rate booster. Make popups work in favor of a higher conversion rate. Display popups only to those visitors, who showed some interest and already had taken some actions on your landing page. Fulfilling this condition, pop ups may help boosting your landing page conversion rate.
Additionally, you may also consider removing the page’s navigation menu. This ensures that there is only one action for the visitor to take and that they won’t navigate to another page on your website.
Comparing a good vs. bad landing page
To better illustrate the key elements of a successful landing page, let’s take a look at both a good and bad landing page example. First, the bad:
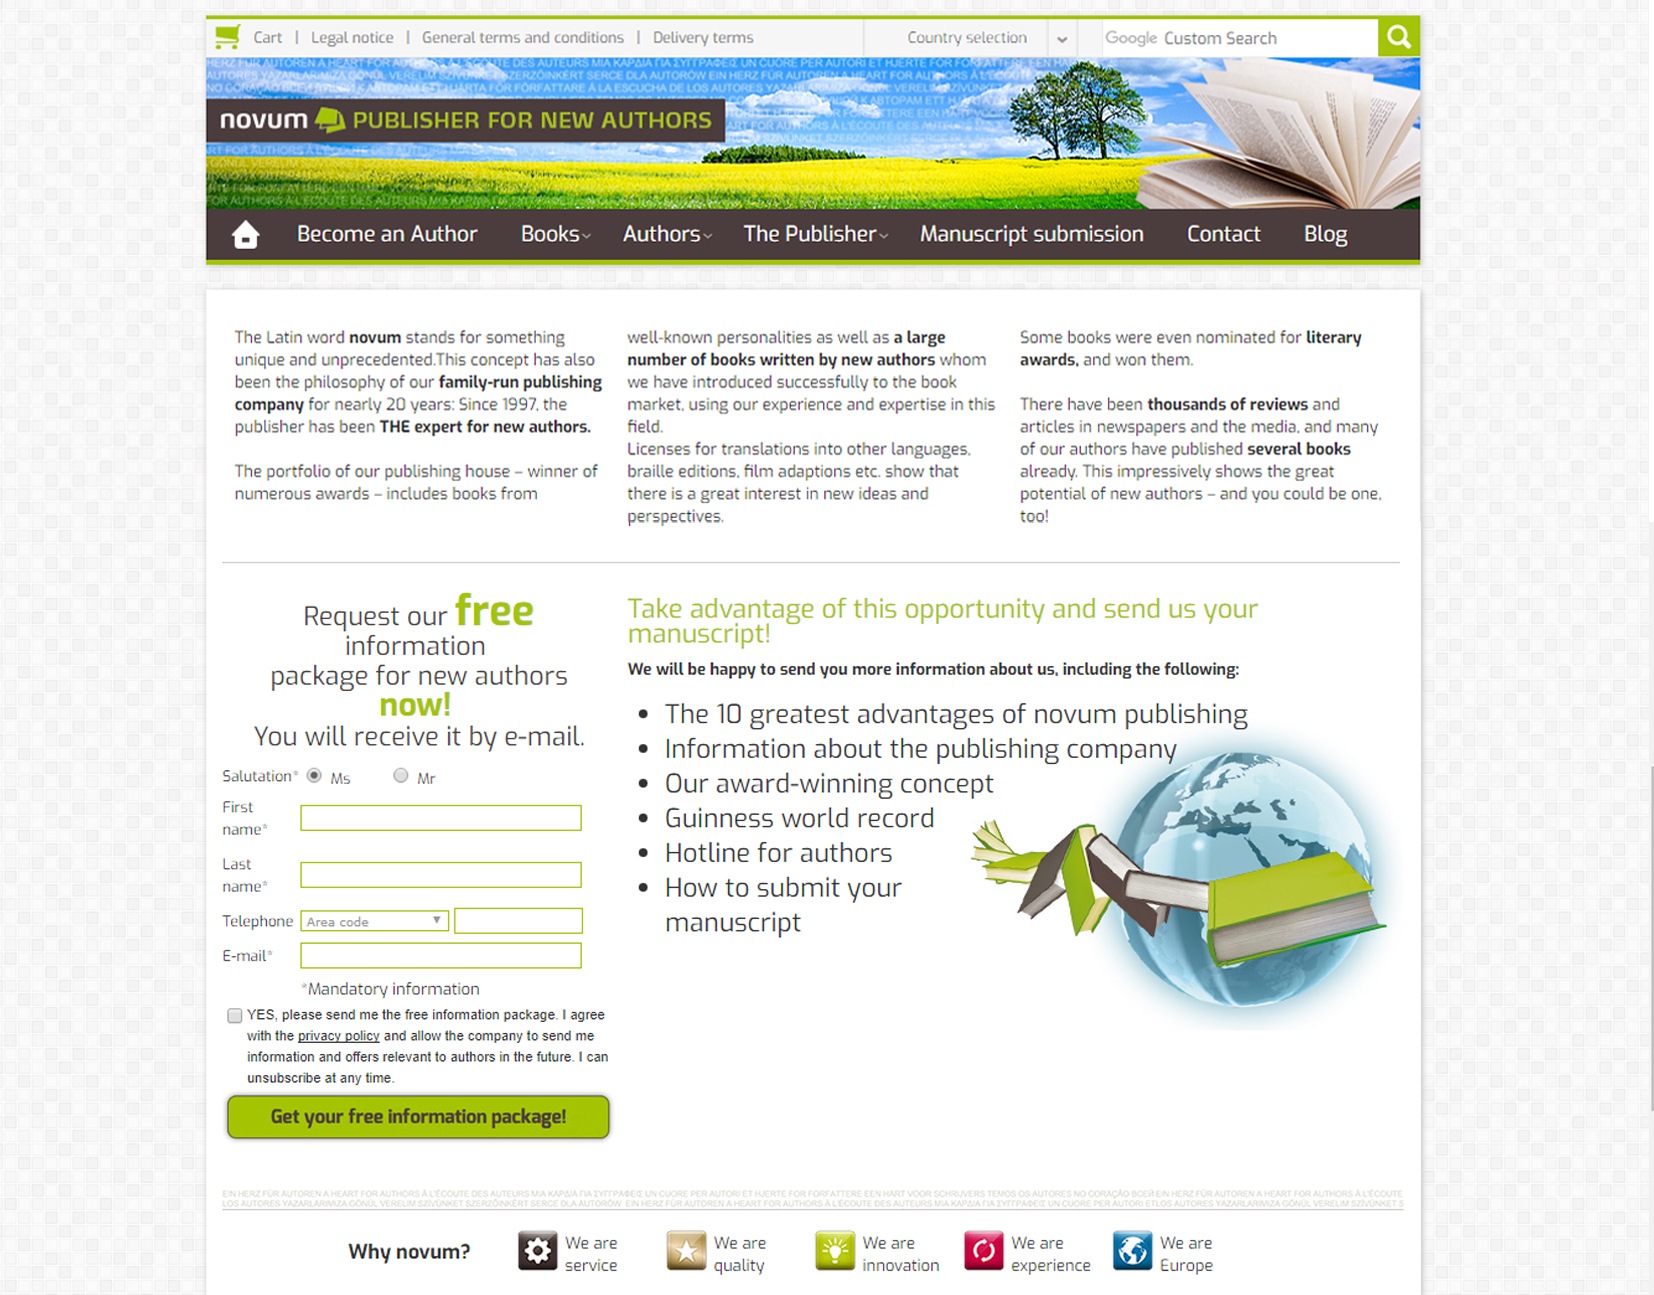
So, what makes this page a bad landing page?
- There’s way too much going on. The page design is cluttered and there’s way too much text.
- There is no clear headline. The text “Request our free information package for new authors now!” should be larger and positioned at the top of the page.
- There are too many links to go elsewhere on the site. The entire header and site navigation menu should be removed to reduce distraction.
- There is no description of why the visitor should sign up for the free offer and what they can expect to get out of it.
Now, let’s look at a good example:
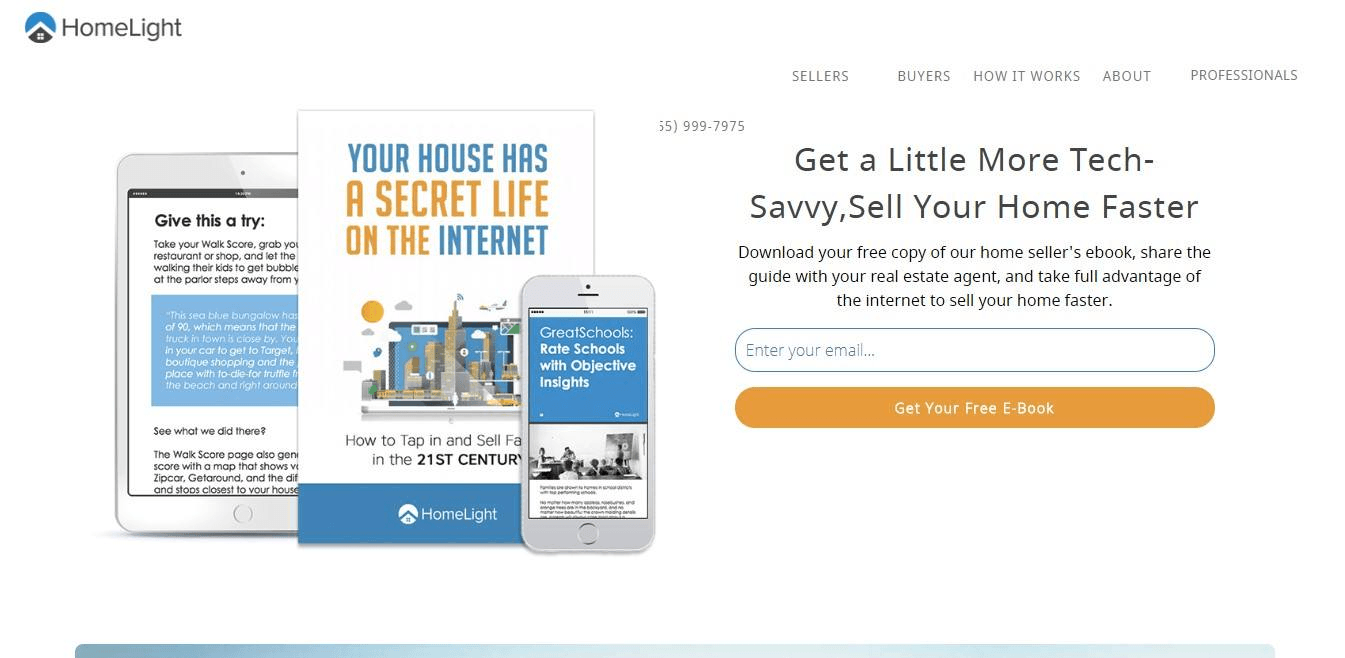
What makes this page a good landing page?
- The page has a clean, well-organized design. It’s not overly cluttered with unnecessary elements and it makes good use of color to draw attention to certain areas (like the e-book and submit button).
- The headline is clear and includes a value-driven copy (“Sell your home faster”).
- It includes an image of the e-book’s content so the visitor knows what to expect.
- It includes a form with a clear call to action (“Get your free e-book”).
4 options for building a WordPress landing page
There are quite a few ways to make a landing page in WordPress.
Of course, you can hire a design company to build a landing page for you. But with the number of plugins and stand-alone landing page platforms like Landingi that feature drag-and-drop builders, it’s possible to build compelling landing pages in just a few minutes.
First, let’s cover the ways you can build a WordPress landing page, then discuss the pros and cons of each option:
1. Landing page PHP creation
Pros:
- You’re not limited to the features available in a page builder.
- You can build any type of page or layout you can imagine, so long as you have the coding skills to do so.
Cons:
- This option requires extensive coding knowledge.
- This option will be the most time-consuming option since you are building the page from scratch.
- This option can be costly if you need to hire a web designer.
- You may still need to integrate with tools for collecting emails and other contact information.
- You won’t have access to conversion rates for each landing page.
- A/B testing won’t be available.
One way to build a landing page is to code your own PHP template within WordPress. Going this route, you can build a completely custom design that reaches beyond the limits of conventional layouts, fonts, and buttons.
However, this option will require you to have extensive knowledge of PHP and building templates in WordPress. If you don’t know how to do this, you can hire a web designer. But, building a custom PHP landing page template will be costly.
For reference, here’s a basic outline for creating a template via PHP:
- Create a child theme
- Create a style.css file
- Create a functions.php file
- Install and activate previously created child theme
- Create a new webpage based on the child theme and save it in a landing-page.php format.
- Add multimedia
- Edit the header
- Just below the line <! – .site-branding -> add a marker pointing to the file landing-page.php, so that its content can be displayed
- Add CSS styles
2. Use a WordPress landing page template/theme
Pros:
- One of the cheapest options on this list.
Cons:
- Depending on which template you go with, you may need to have coding experience.
- You won’t have access to conversion rates for each landing page.
- A/B testing won’t be available.
- You will likely need to manually integrate with additional tools like a form builder or email platform.
If you’re not a web designer and you don’t have the budget or simply don’t want to pay someone to create a landing page for you, the next option is to use a template.
While some of the options we’ll discuss later also include templates, what we’re referring to here is an HTML template or a WordPress theme.
Using a landing page theme
Your first templated option would be to purchase an entire WordPress theme that is built specifically for creating landing pages. Here are some options on Themeforest. Most of these themes will cost around $40 to $60.
With this option, you may have to create an entirely separate WordPress installation. For example, if you already have a WordPress website, you could build a new installation at www.mywebsite.com/landing-pages.
Then all of your landing pages would be located at the subdomain (ex. www.mywebsite.com/landing-pages/page-1, www.mywebsite.com/landing-pages/page-2, etc.). This can be a clunky and confusing route to go.
Using a Landing Page HTML Template
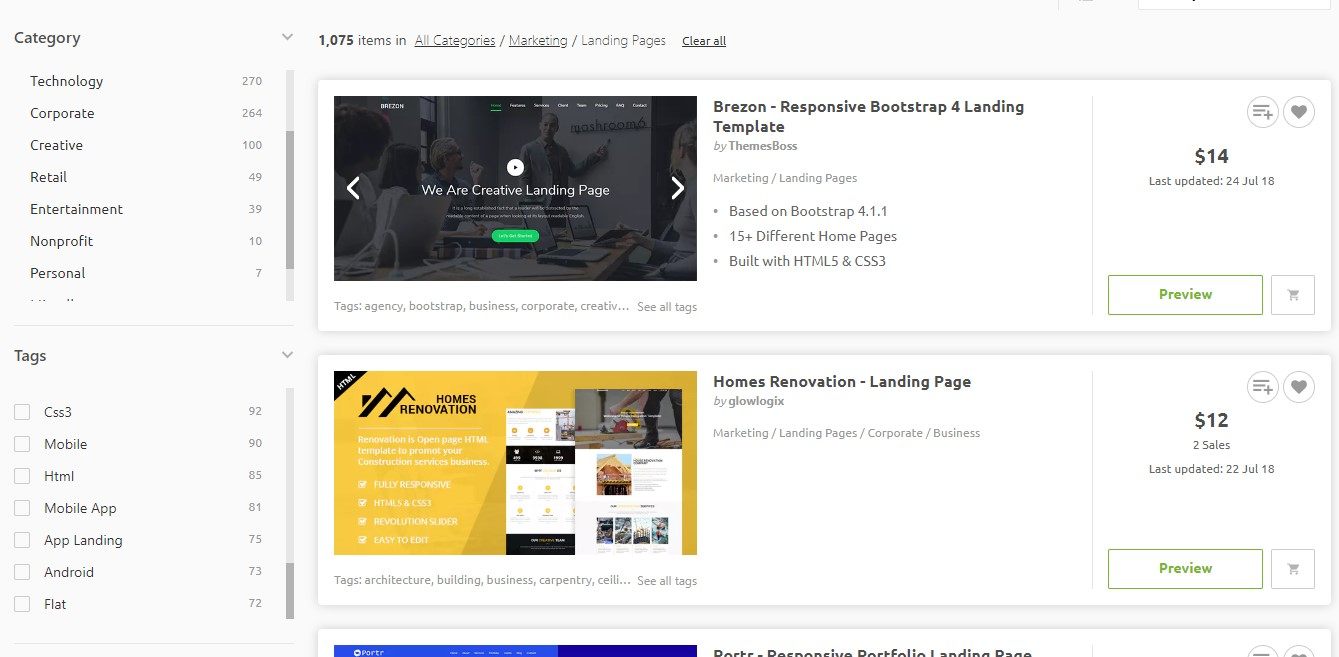
This option is strictly an HTML coded landing page. Most of the templates on Themeforest range from $12 to $20.
However, you will need to have coding experience to use them and they won’t natively integrate with WordPress. You can still use a template like this with a WordPress website, but you would have to upload it to your server and link to it accordingly (from pages on your site or from any ads you are running).
This is not the most intuitive route considering there are many drag-and-drop page builders to choose from.
3. Page Builders & Landing Page Plugins
Pros:
- Many page builders feature drag-and-drop functionality.
- Some page builders include pre-built templates.
- Some page builders, like the popular WPBakery Page Builder, already come with premium WordPress themes (so you don’t have to purchase it separately).
- You do not need to have any programming or coding experience.
Cons:
- These plugins are typically not as easy to use as a landing page builder platform (like Landingi)
- Page builder plugins don’t typically have an option for A/B testing pages or viewing conversion rates.
- There may be limited support. Some plugins offer support, but the support team is often located in foreign countries such as India. This can make communication difficult and responses times can be slow.
- You will have to integrate multiple tools or plugins to get this option to work.
Your third option for building a landing page is to use a WordPress page builder plugin. Some options include:
- Divi Page Builder
- Beaver Builder
- Coming Soon Pro
- Elementor
- WPBakery Page Builder (formerly Visual Composer)
Pricing varies but you can expect to pay around $50 to $100 for a page builder plugin. However, some premium WordPress themes may include a page builder plugin in the cost of the theme.
One of the biggest advantages of going this route is that the plugin integrates with WordPress. To build a page, you would simply add a new page in the WordPress backend and use the page builder accordingly.
One of the biggest disadvantages of going this route is that you will have to combine multiple tools in order to build a fully functioning landing page.
For example, you can build the actual landing page using the page builder plugin. But, you will still need to use an app or plugin to create a form and collect submissions. You could use the free Contact Form 7 plugin, but depending on your goals, you may need then integrate this with your CRM or email platform.
There is a myriad of ways you can set this up, but all of them will involve integrating multiple tools in order to build a complete landing page. This can make this option more time consuming, confusing, and difficult to manage.
Additionally, most page builder plugins don’t have a native way for A/B testing pages (so you can test two pages to find out which one performs the best) nor a way to view conversion rates.
4. Use a Landing Page Builder Platform
Pros:
- These platforms typically have the easiest to use page builders.
- They often have many pre-built templates to choose from and customize (Landingi has over 200+ templates to choose from).
- They have premium support. Since these platforms provide access to their tool via a monthly plan, this usually means they can offer top-notch customer support.
- You do not need to have any programming or coding experience.
- Most of these platforms provide options for A/B testing and viewing conversion rates.
Cons:
- It’s not the most expensive option but it’s not the cheapest either. It will be an ongoing cost for your business.
The last option you have is to use a landing page platform or app. Some examples include:
- Landingi
- Instapage
- Unbounce
- GetResponse
These platforms provide a drag-and-drop page builder that you can use to build your own custom landing pages.
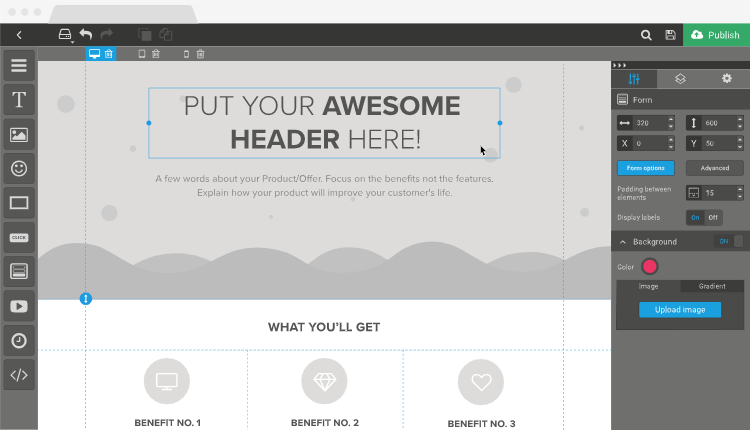
Above is a screenshot of Landingi’s landing page builder.
On top of this, most of these platforms handle the entire landing page and information collection process.
For example, with Landingi, all of your leads are organized in your account:
This allows you to view all of your leads at once and view personalized information such as the lead’s name, email, and any other information you have collected. All of this information can then be exported to an Excel CSV file or a Google Sheet.
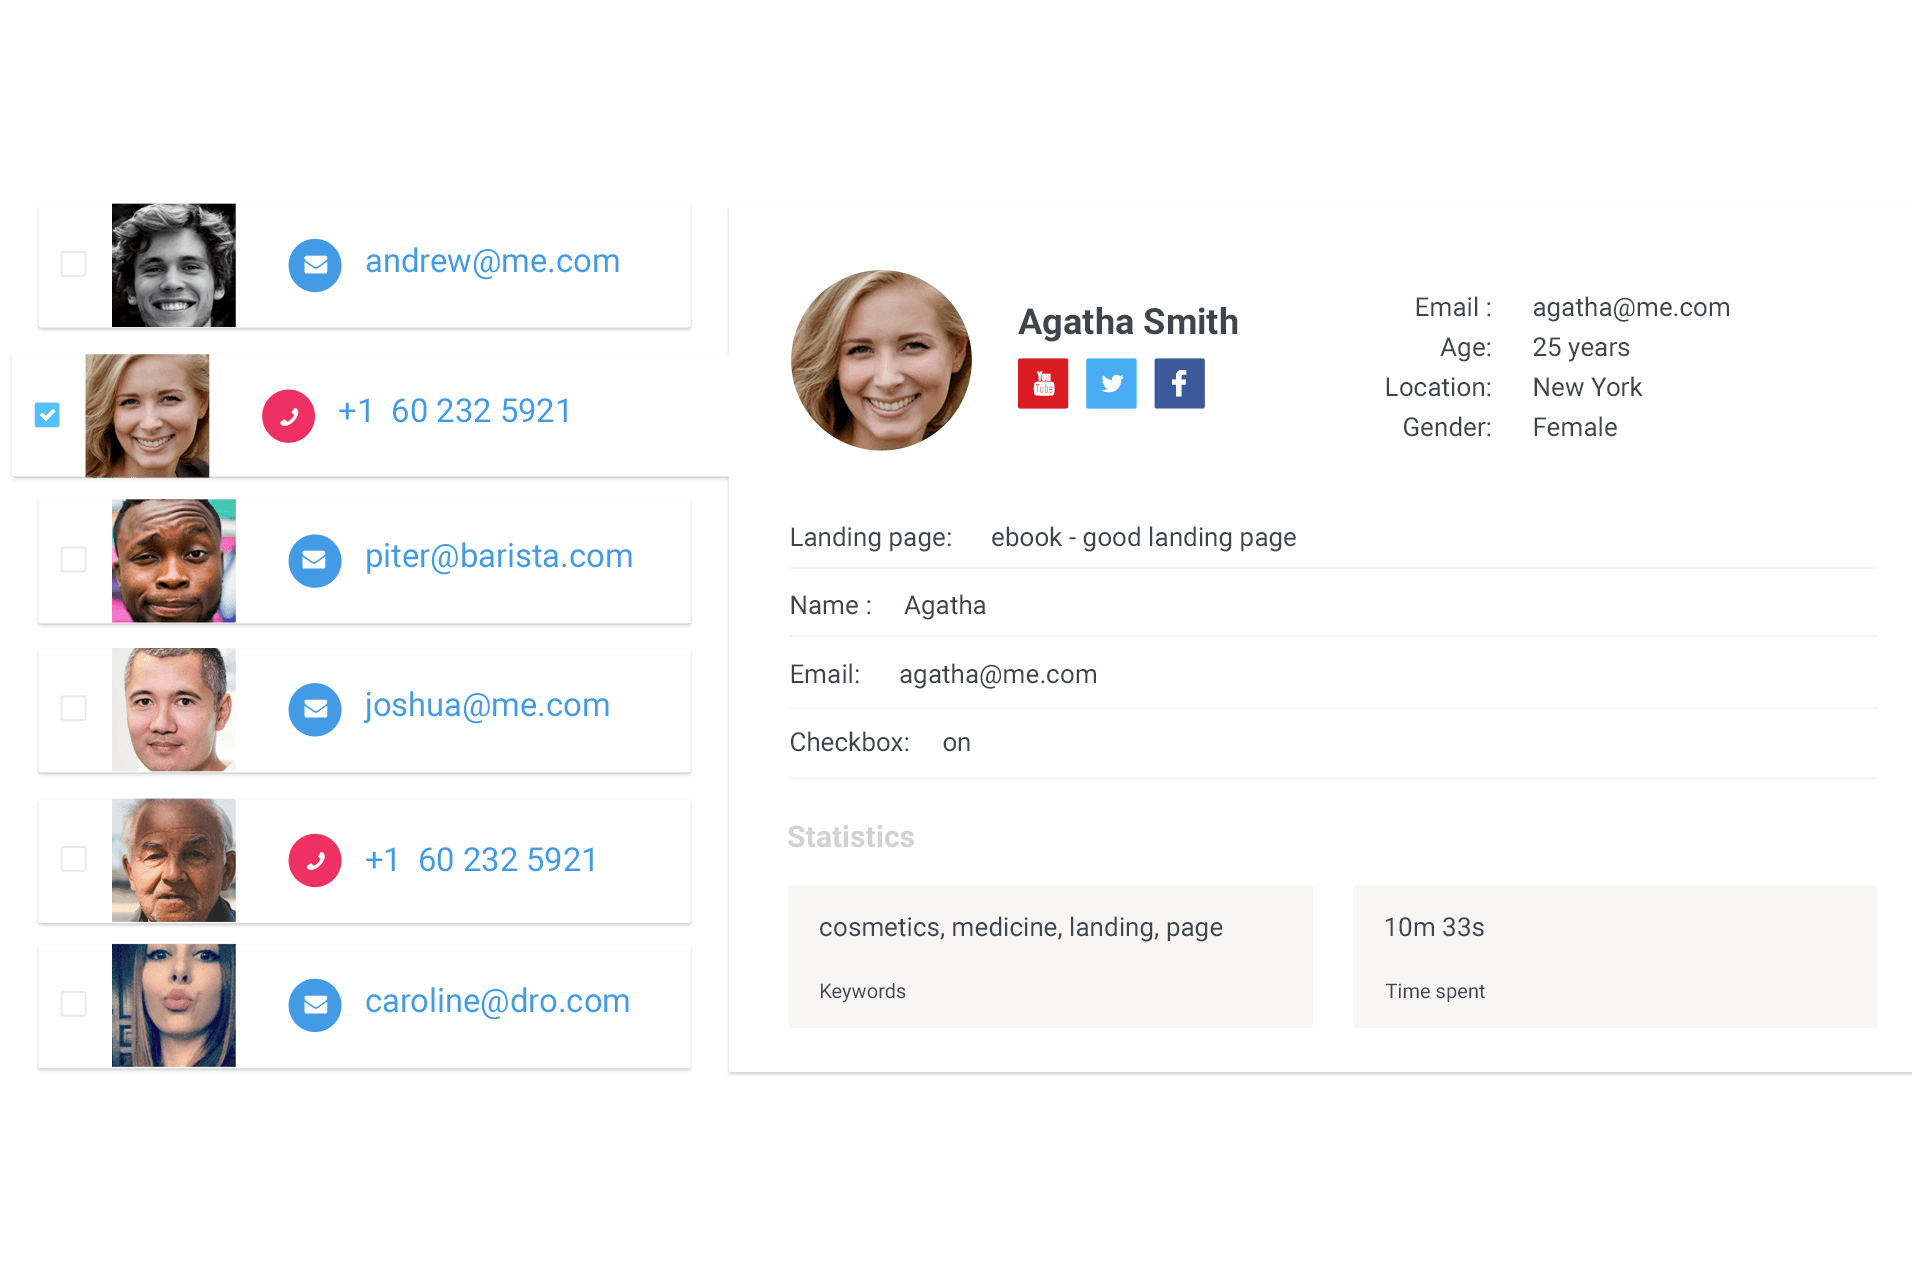
Alternatively, you can integrate with platforms such as MailChimp, Active Campaign, Hubspot, Zoho CRM, etc. so that lead information is passed to these platforms automatically.
Most landing page platforms also offer integrated A/B testing and conversion tracking.
The biggest disadvantage to this option is cost. Whereas you might pay $50 to $100 for a WordPress page builder plugin, these platforms offer ongoing plans that can range anywhere from tens of dollars each month to hundreds based on your needs. At Landingi, our pricing starts at $29/month.
Get 111 Landing Page Examples—The Ultimate Guide for FREE
How to build a landing page in WordPress using Landingi
Follow the steps below to learn how to build your own landing page with Landingi and how to integrate it with WordPress.
Step 1: Login to Your Landingi Account
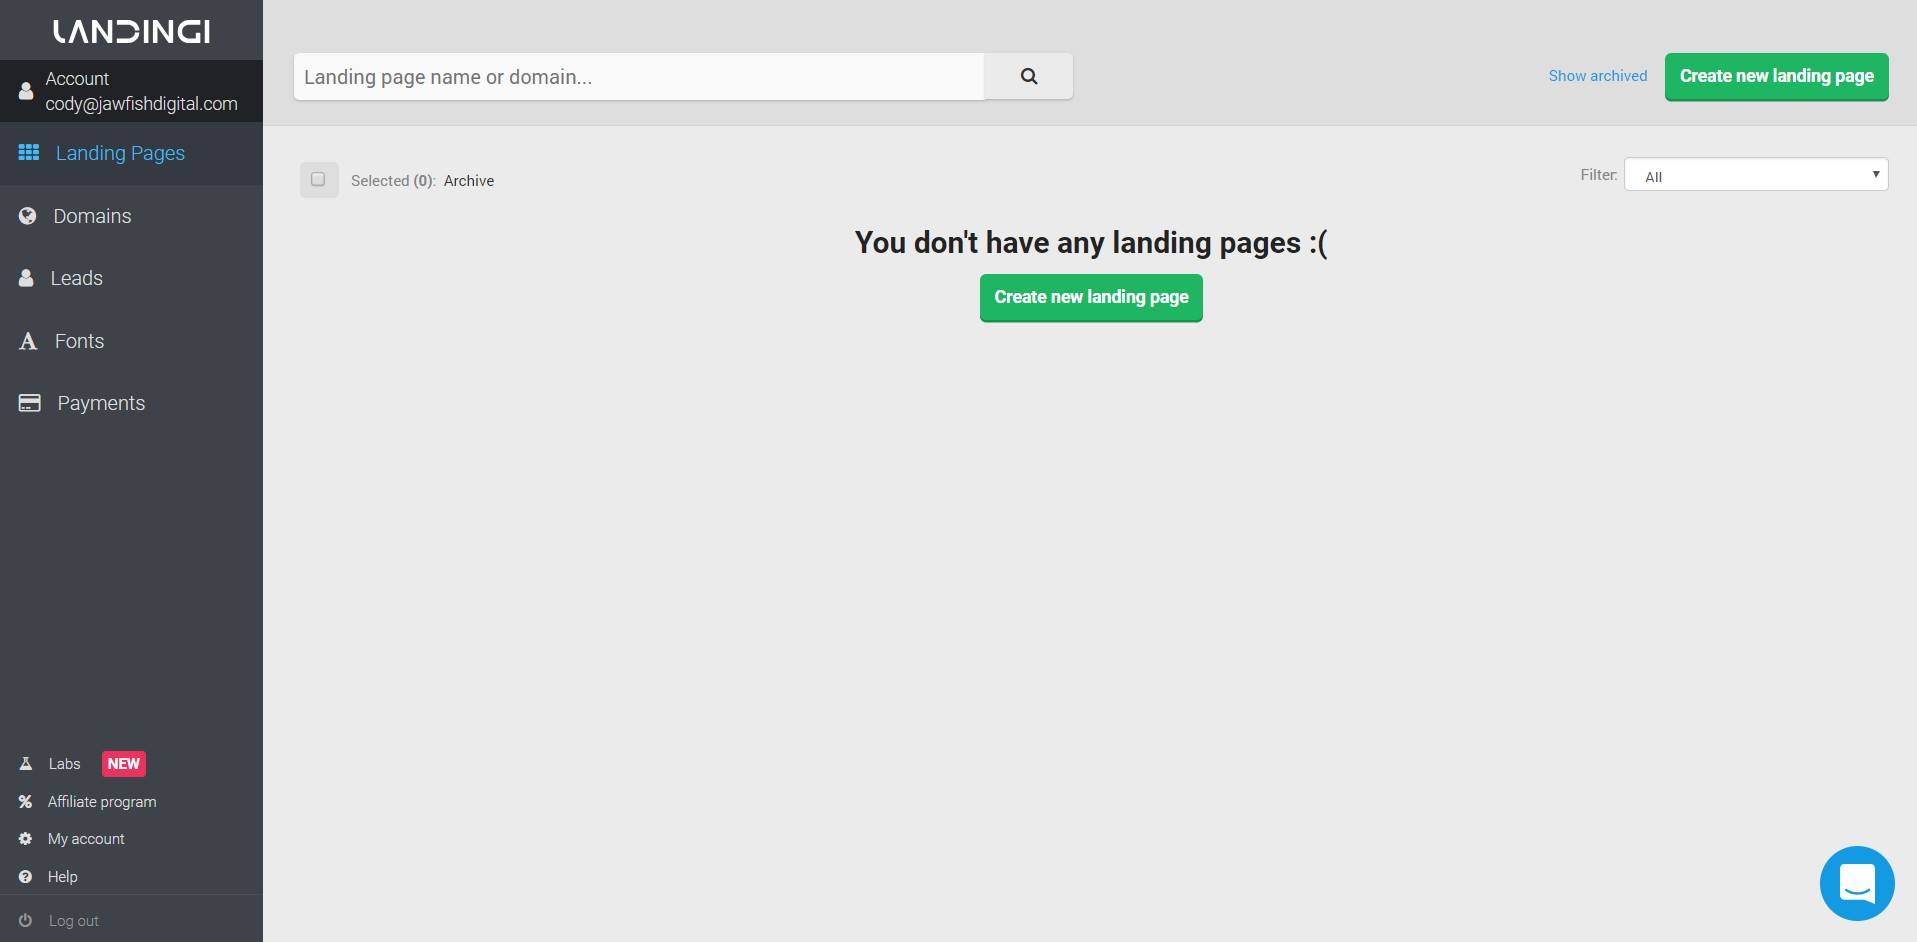
From your dashboard, click “Create new landing page”.
If you don’t have a Landingi account, sign up for a free 14-day trial here.
Step 2: Choose a landing page building option
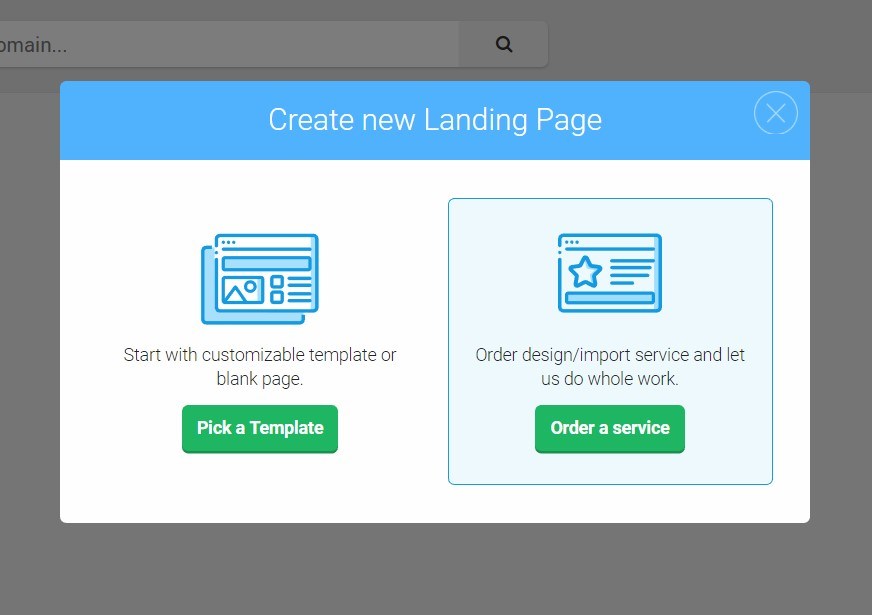
After clicking “Create new landing page”, a box will pop up with two options:
- Pick a template
- Order a service
If you’d prefer to have Landingi design and build your landing page, choose “Order a service”. If you’d prefer to build your own landing page, choose “Pick a template” to pick from over 200+ templates that you can customize.
The rest of this tutorial will assume you chose “Pick a template”.
Step 3: Select a landing page goal
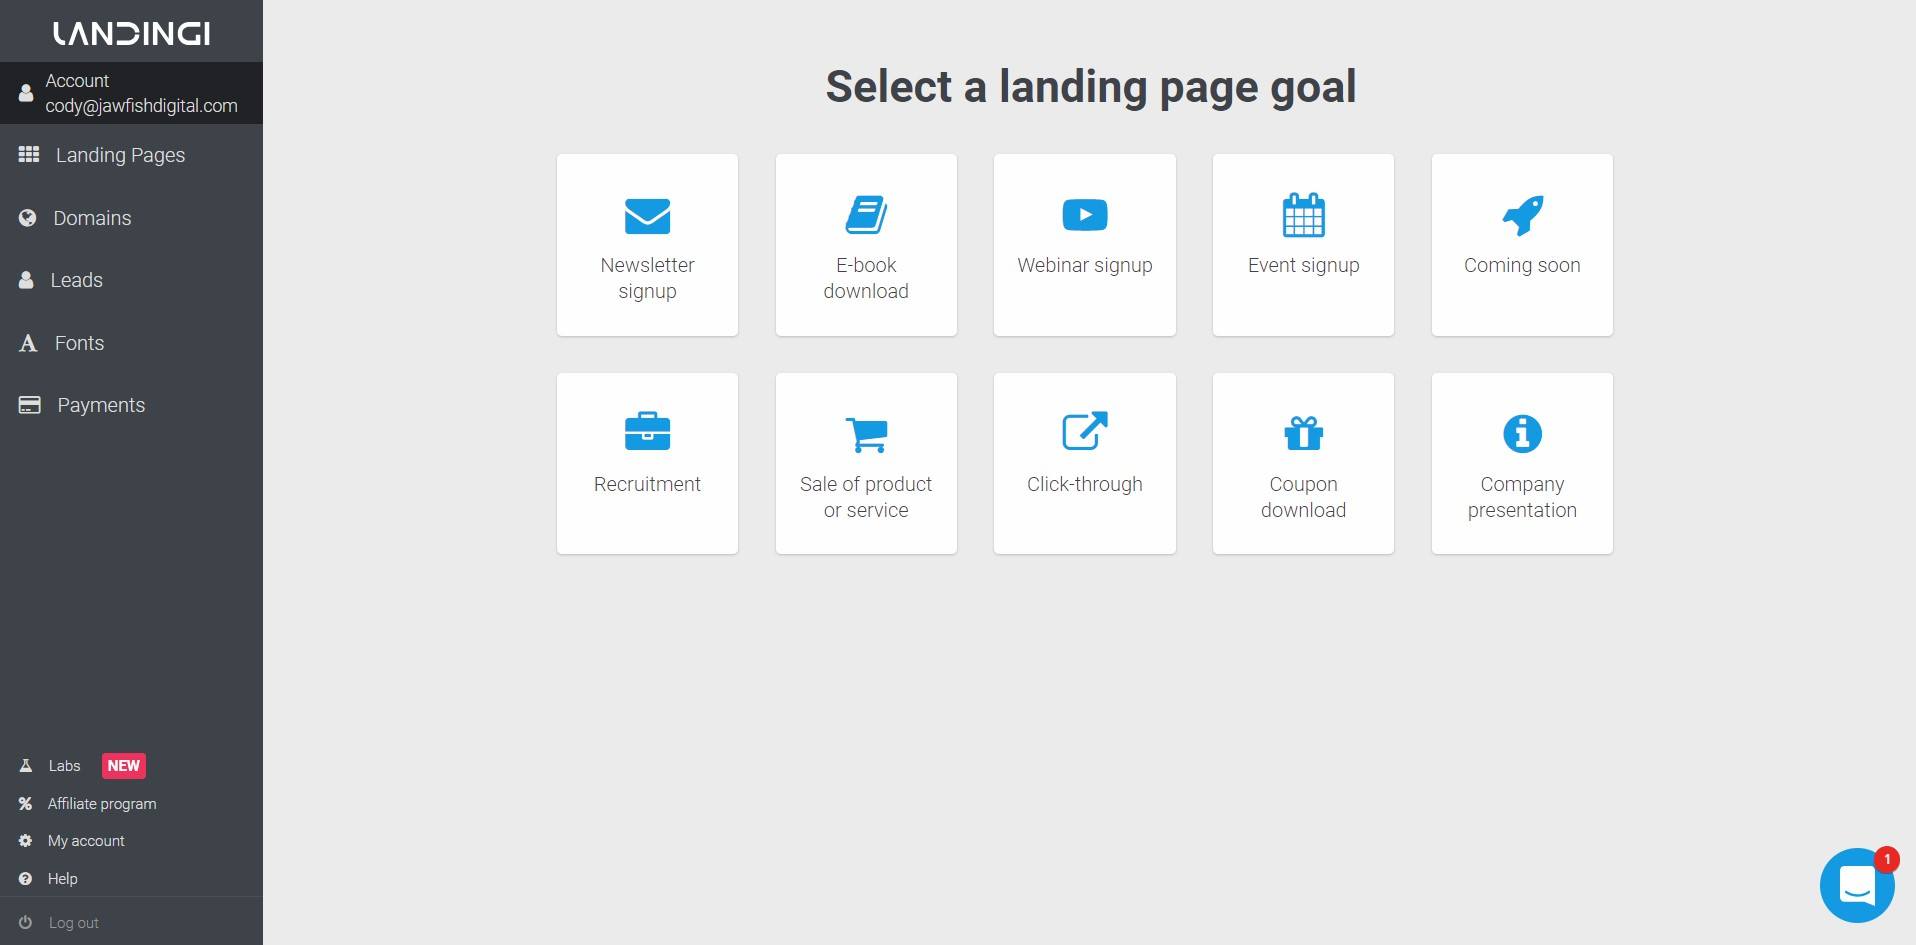
Now, it’s time to choose a goal for your landing page. Based on the specific goal you choose, Landingi will show you templates optimized to fit your desired goal.
For this tutorial, we chose “e-book download”.
Step 4: Choose the template you’d like to use
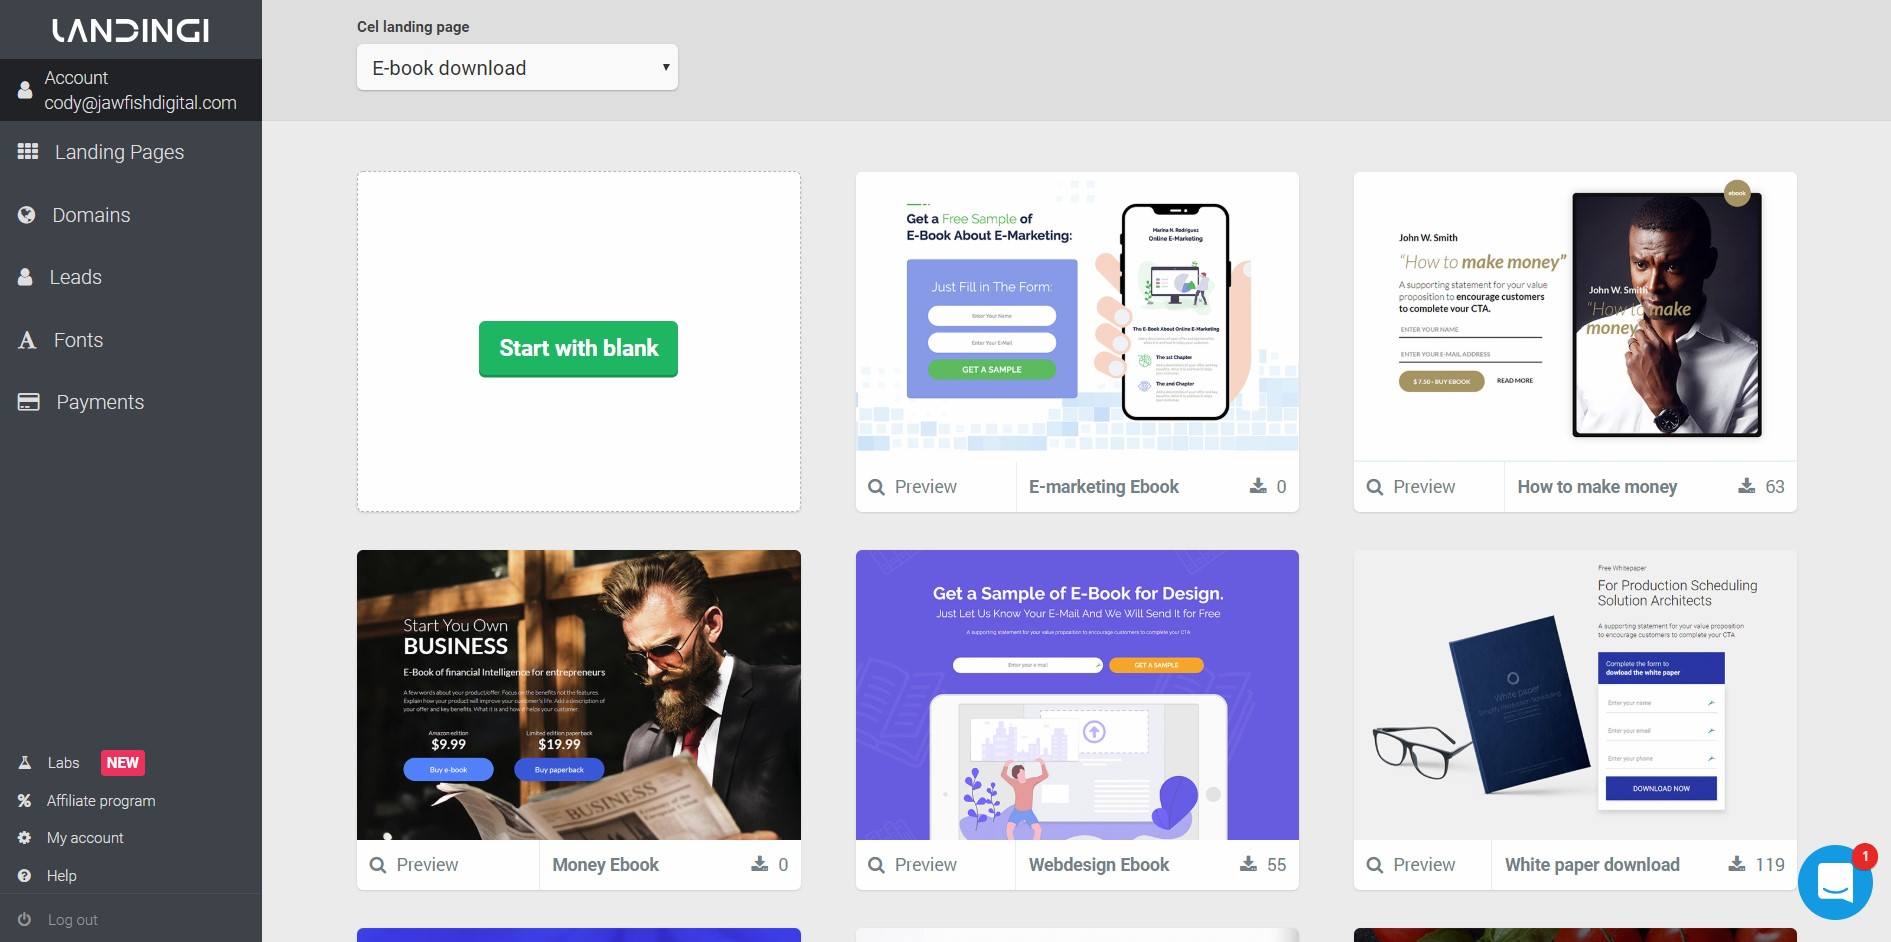
Each goal will have multiple templates to choose from. Choose the design that you like the most.
Note that you can customize any of these designs as much as you’d like using the drag-and-drop landing page builder.
Step 5: Customize your landing page
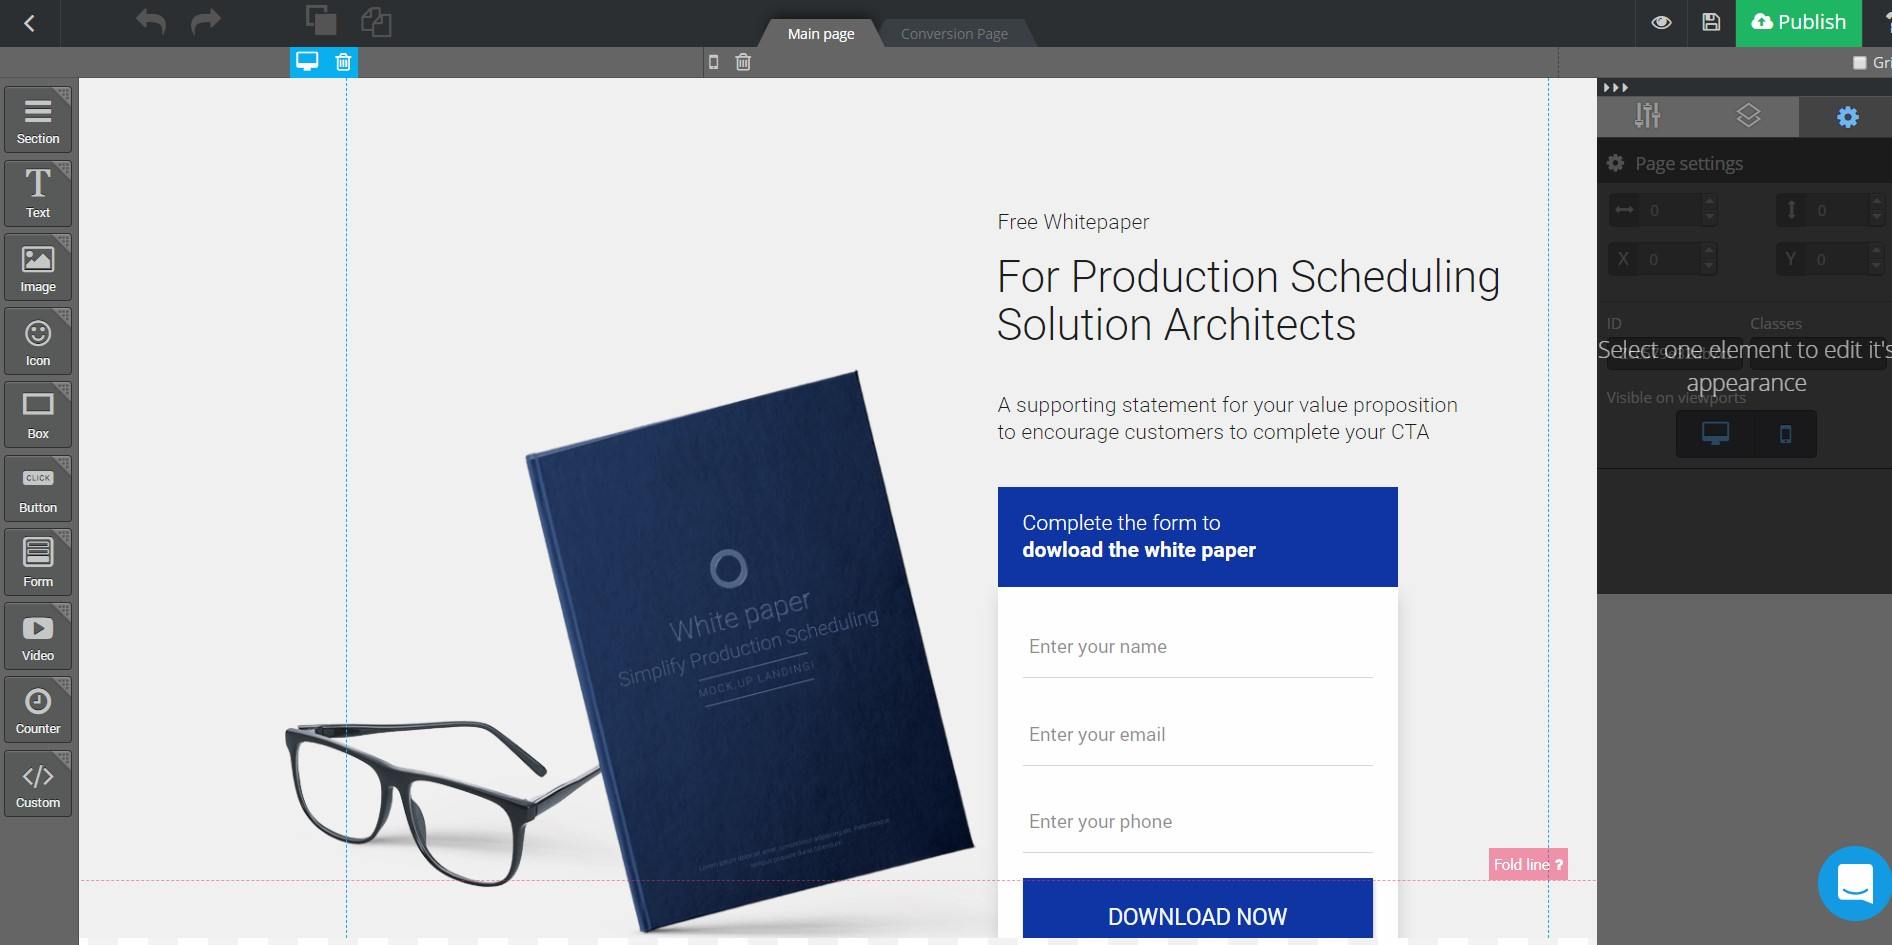
Landingi features a drag-and-drop page builder that you can use to customize the template you chose. To edit a line of text, simply click it and an edit window will appear. The same goes for any other element such as images. If you want to replace an image, just click the image, click the edit icon, and you can choose from a gallery of images or upload your own.
You can also drag new elements on to the page using the left-hand sidebar menu.
Step 6: Customize your conversion page
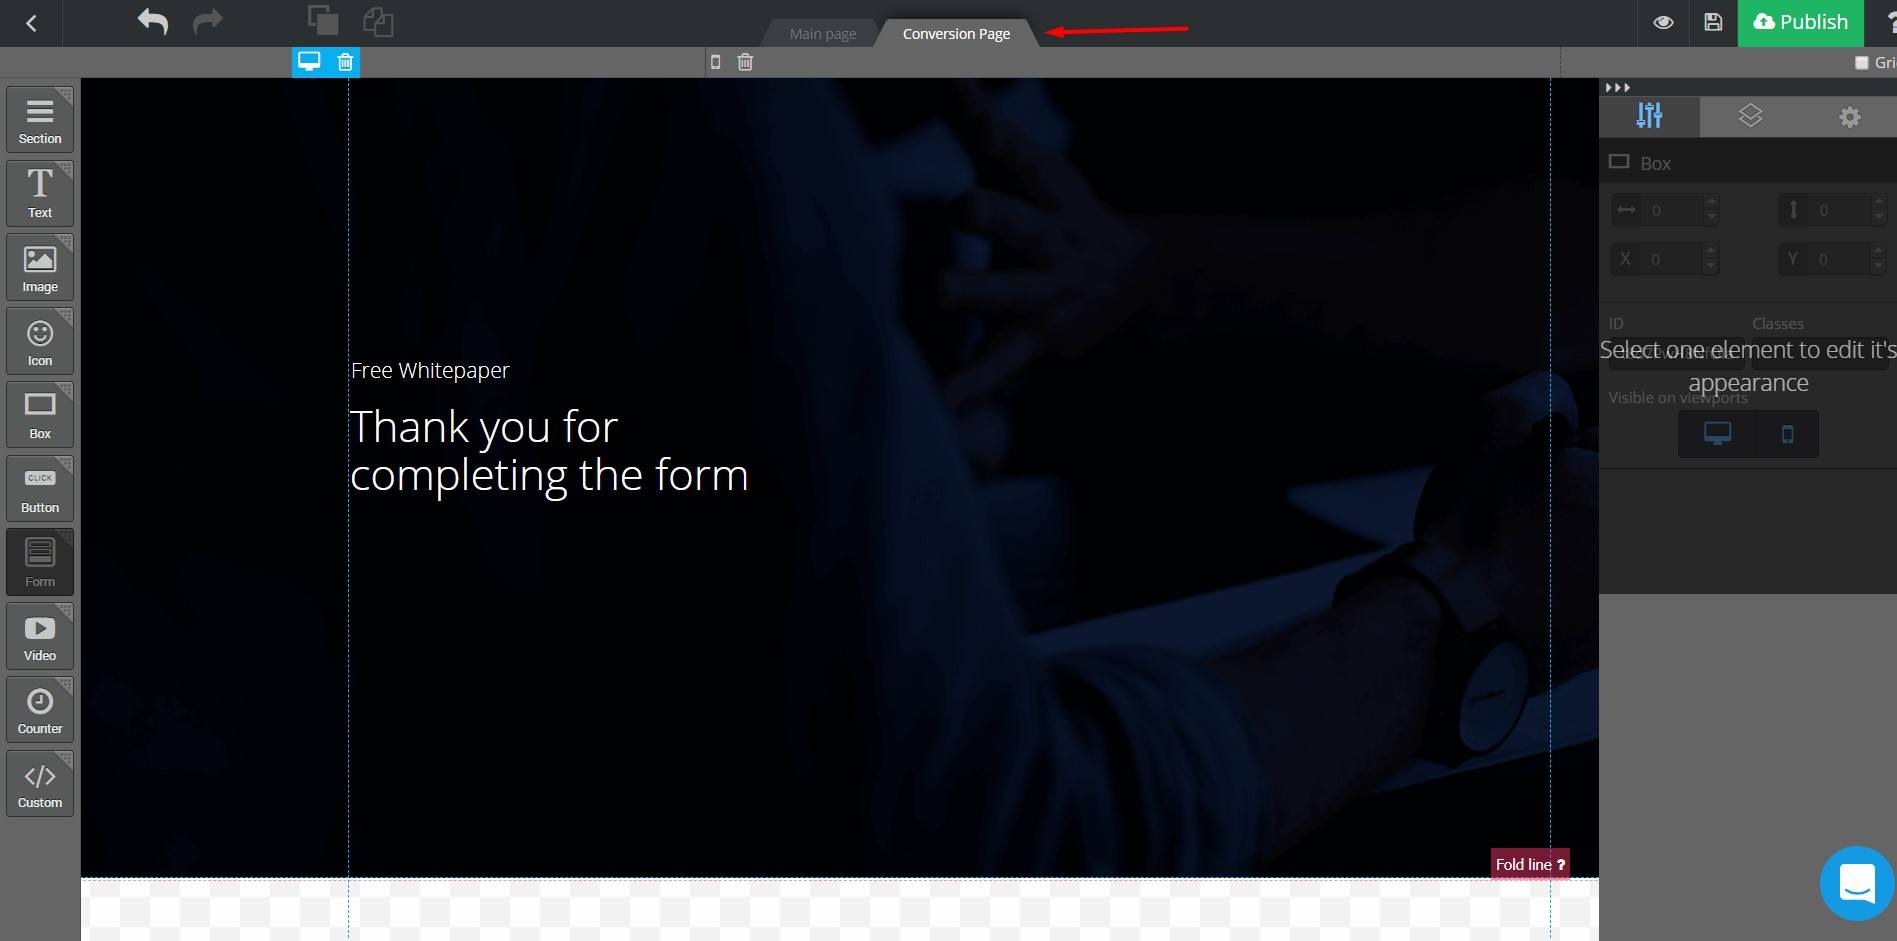
Once you’re happy with your landing page, you’ll also want to make sure to edit the conversion page. This is the page that the visitor will be directed to after filling out your form. You can edit this page by click the tab labeled “Conversion page” at the top of the editor.
Step 7: Preview Your Landing Page
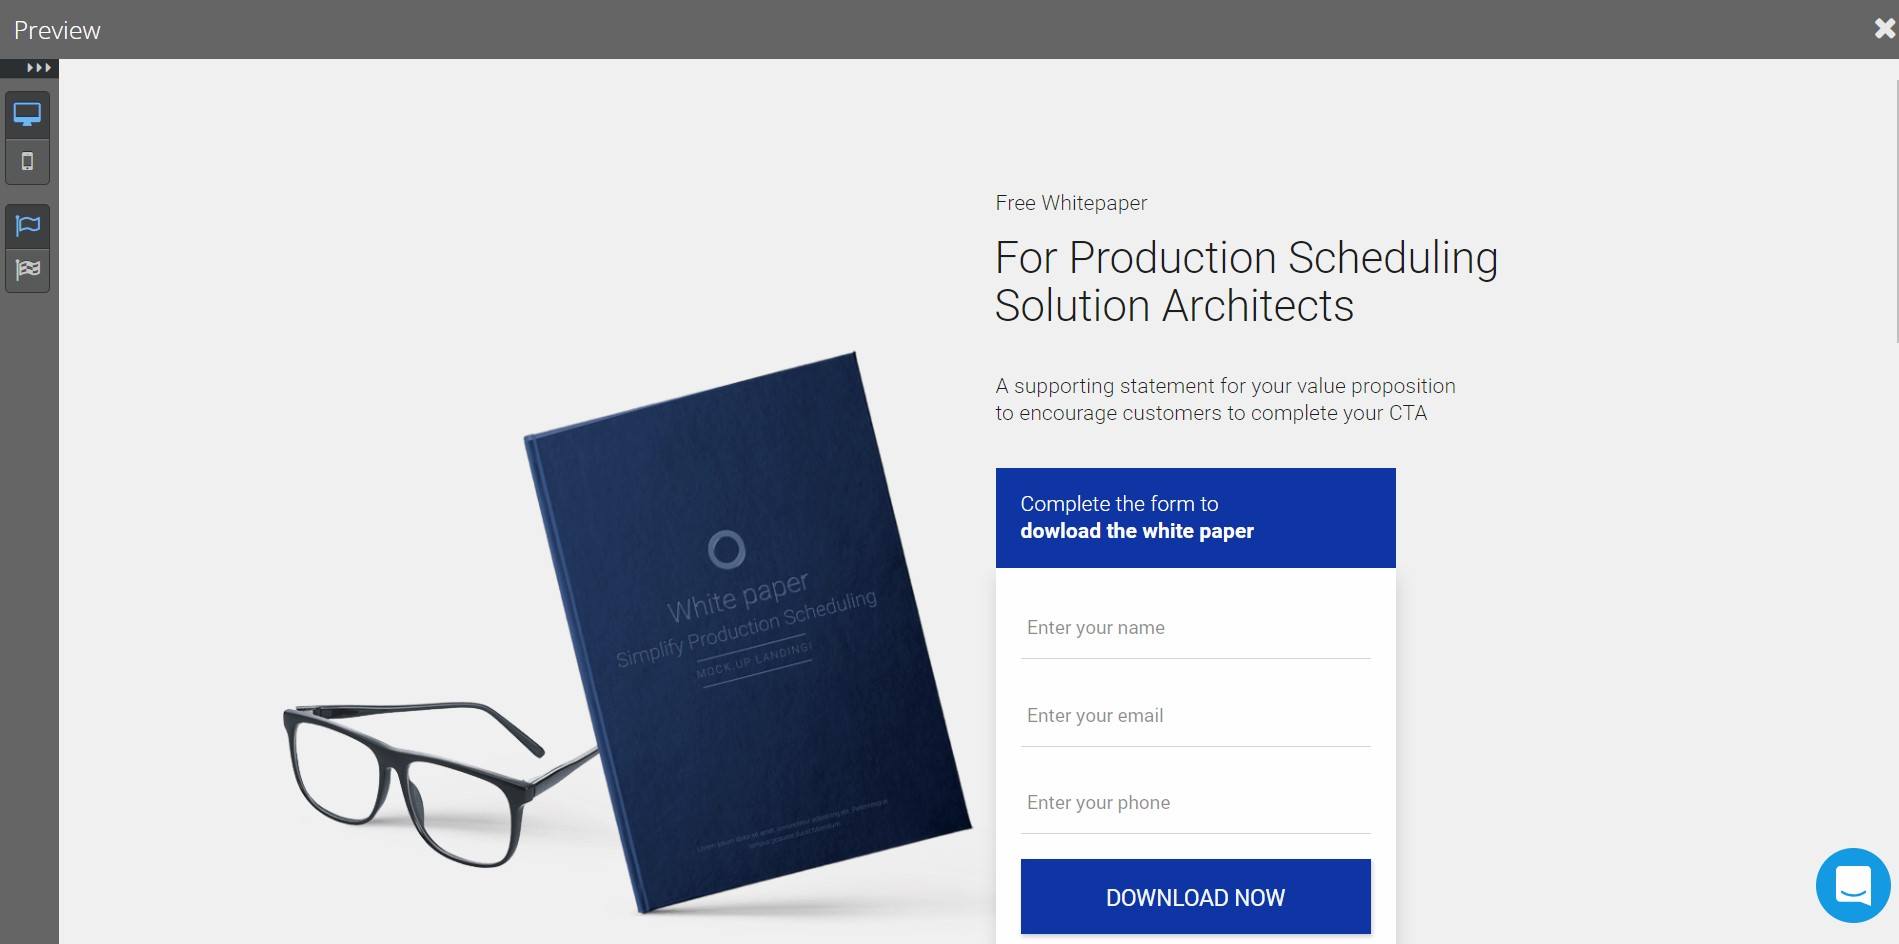
Before you publish the page, you can preview the landing page b clicking the eye icon at the top of the editor.
Step 8: Publish your landing page
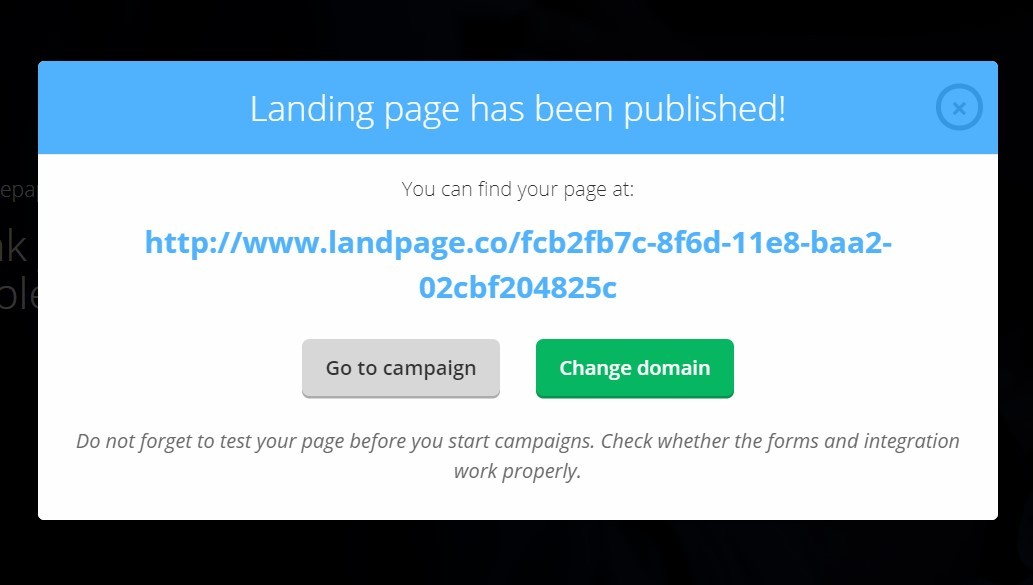
Once you’re happy with how everything looks, exit out of the preview window and click “Publish”. A popup box like the one above will appear.
In this box, you’ll find a link to your live landing page. You can copy this link and paste it as the destination URL for your ad or anywhere on your website that you want to direct visitors from. For example, if your landing page is for a free E-Book offer, you may link to it from a few of your latest blog posts.
From this box, you can also choose “Go to campaign” or “Change domain”. If you choose “Go to campaign”, you will be directed to the campaign results page:

Here you can view analytics for the landing page such as visits and conversion rates.
If you want to change the domain of your landing page, to say your own domain, then you could click “Change domain”.
This will bring up a box where you can assign the domain and change the URL path:
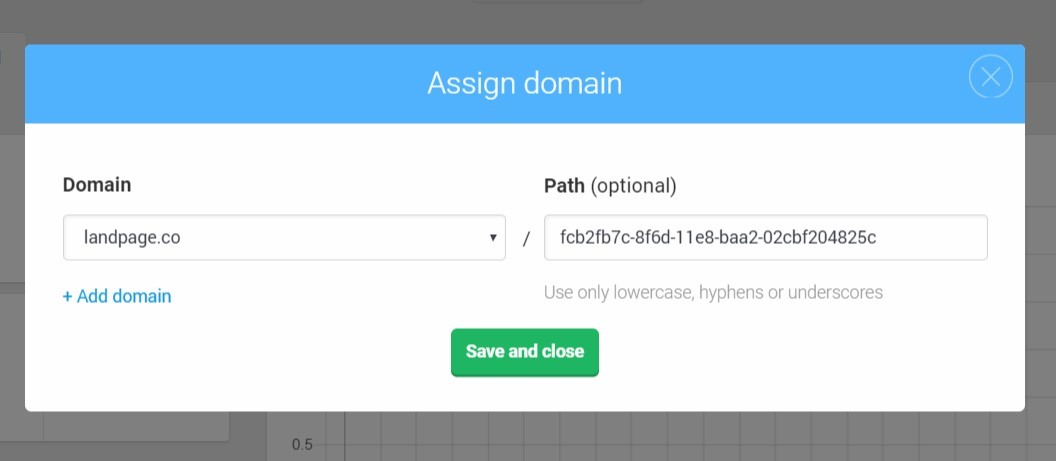
If you don’t have your domain added, click “+ Add domain”. Then, you can enter in your own domain (ex. www.mywebsite.com).
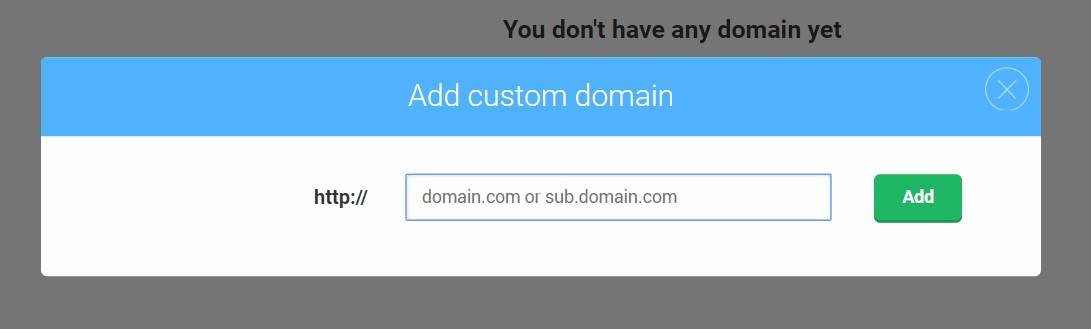
Once your domain is added, you will need to add the following records to your DNS settings:
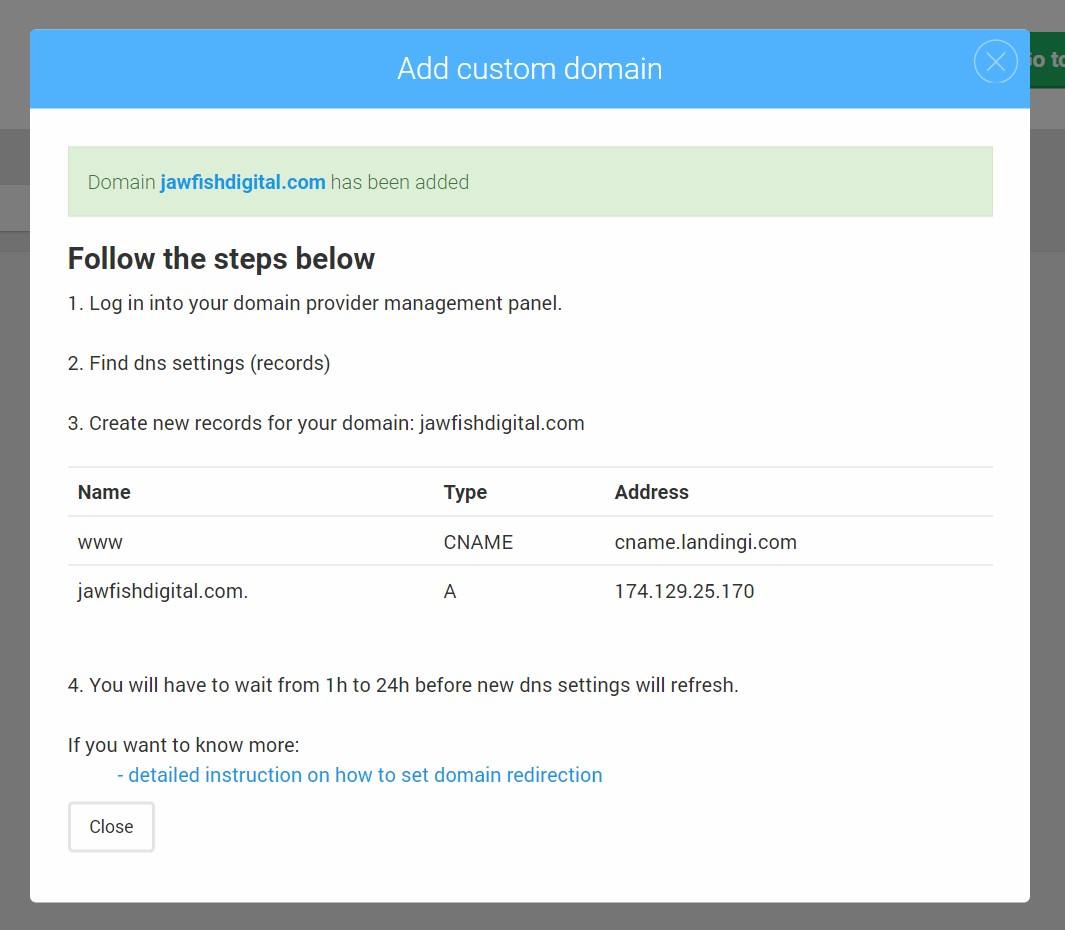
If you don’t know how to do this, consult with your web designer, hosting provider, or domain name provider.
Step 9: Add the landing page to your WordPress website

There are a number of ways you can add your landing page to your WordPress website. As we mentioned above, you can simply link to it where appropriate. For example, you may add a link from a blog post, call-to-action, or from a link in your navigation menu. It all depends on how you plan to present your offer.
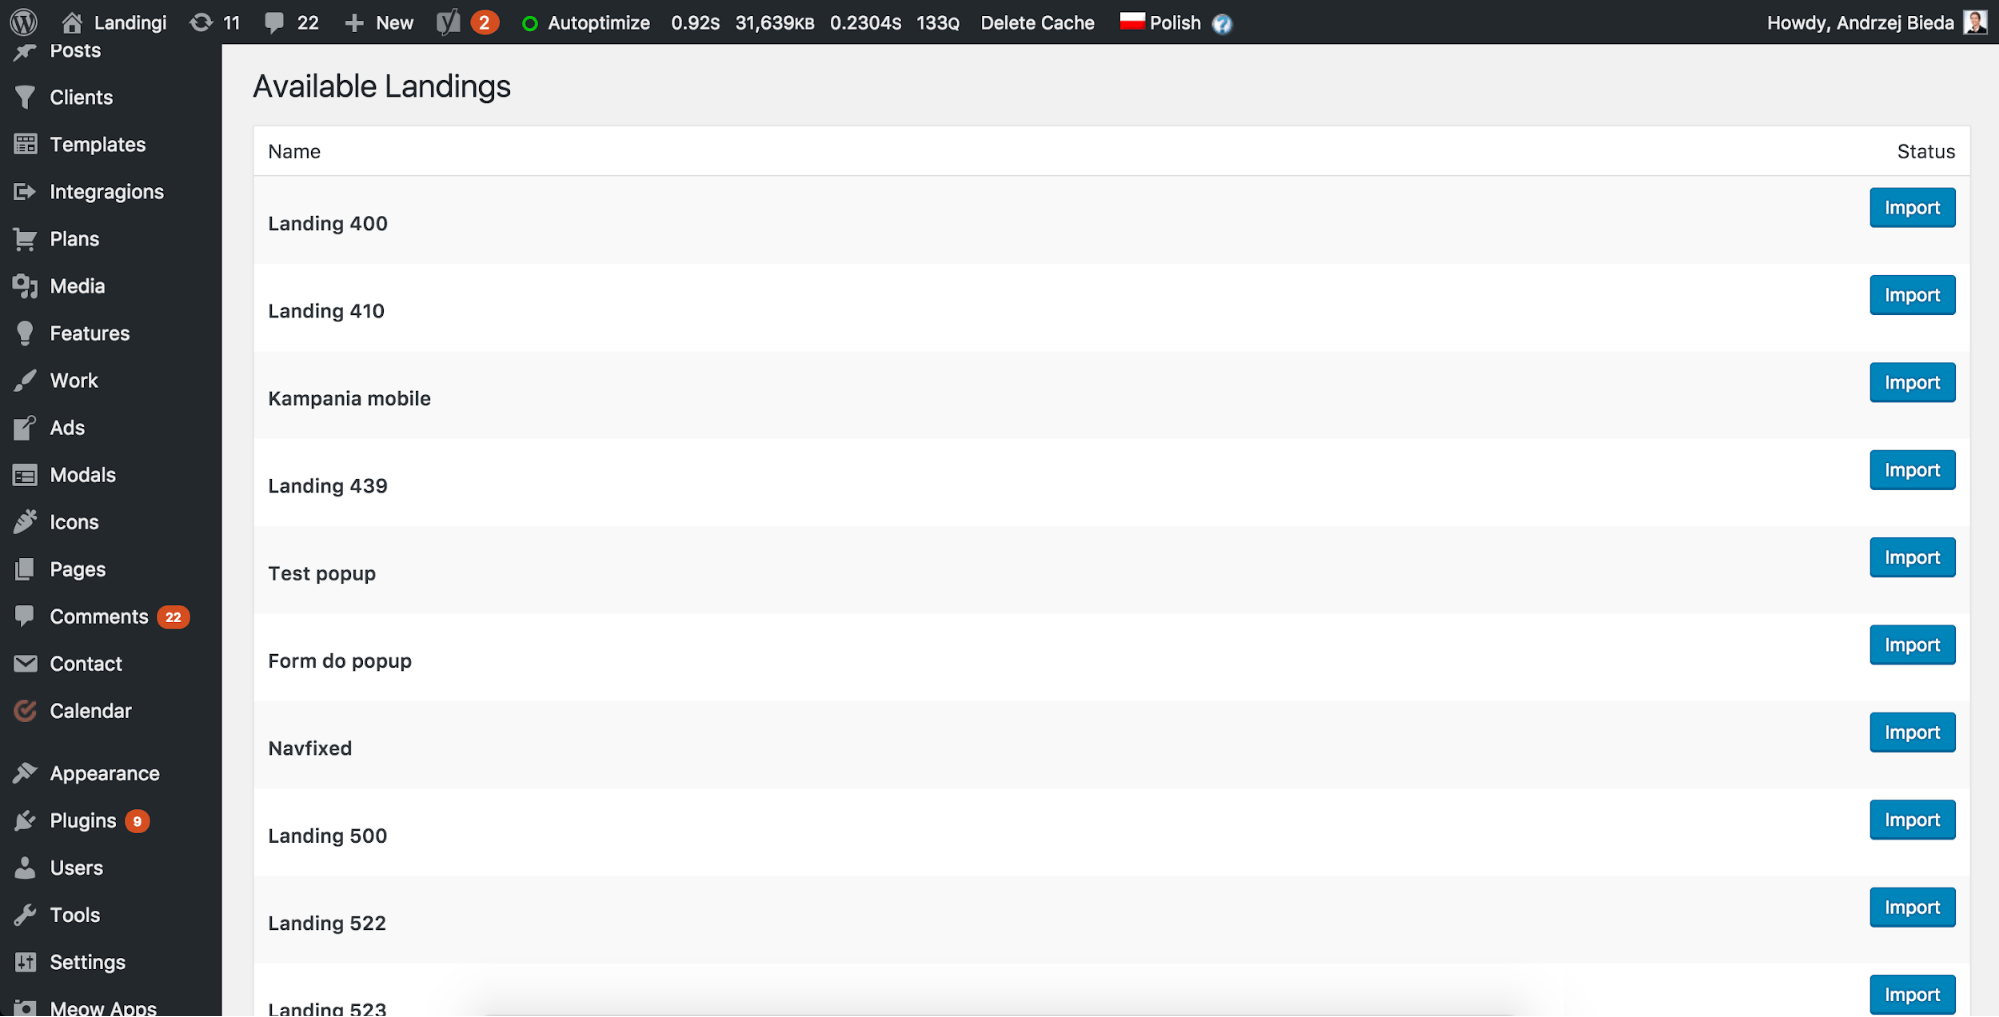
However, you can also import landing pages from Landingi to your WordPress website using the free Landingi WordPress plugin.
Once the plugin is installed and setup, you can import any of the landing pages that you have created:
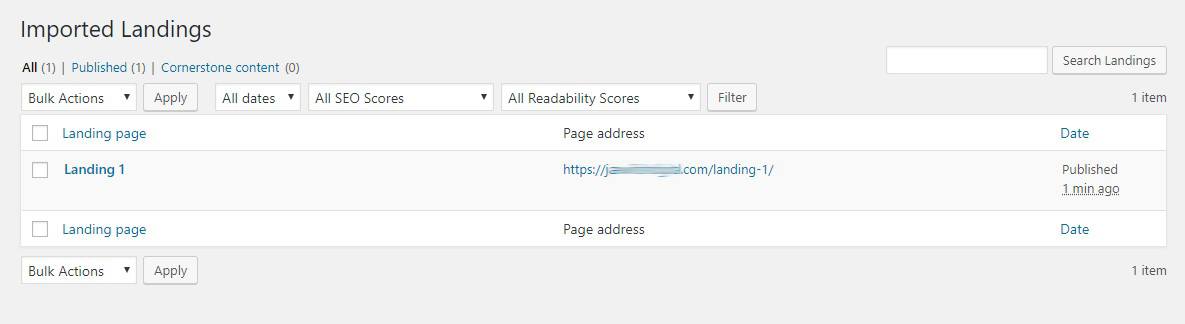
The page will then be available in your list of imported landing pages:
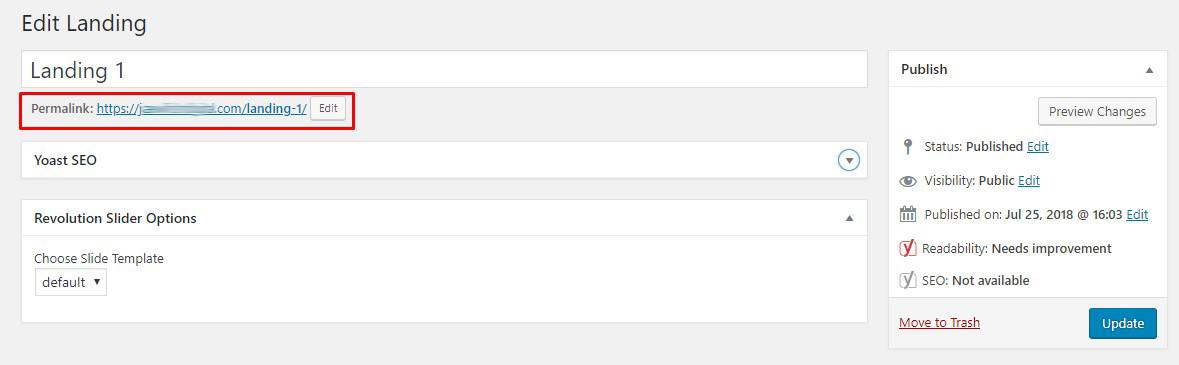
The page will be available on your own website and you can copy the page URL and link to it wherever you’d like:
Step 10: A/B test your landing page
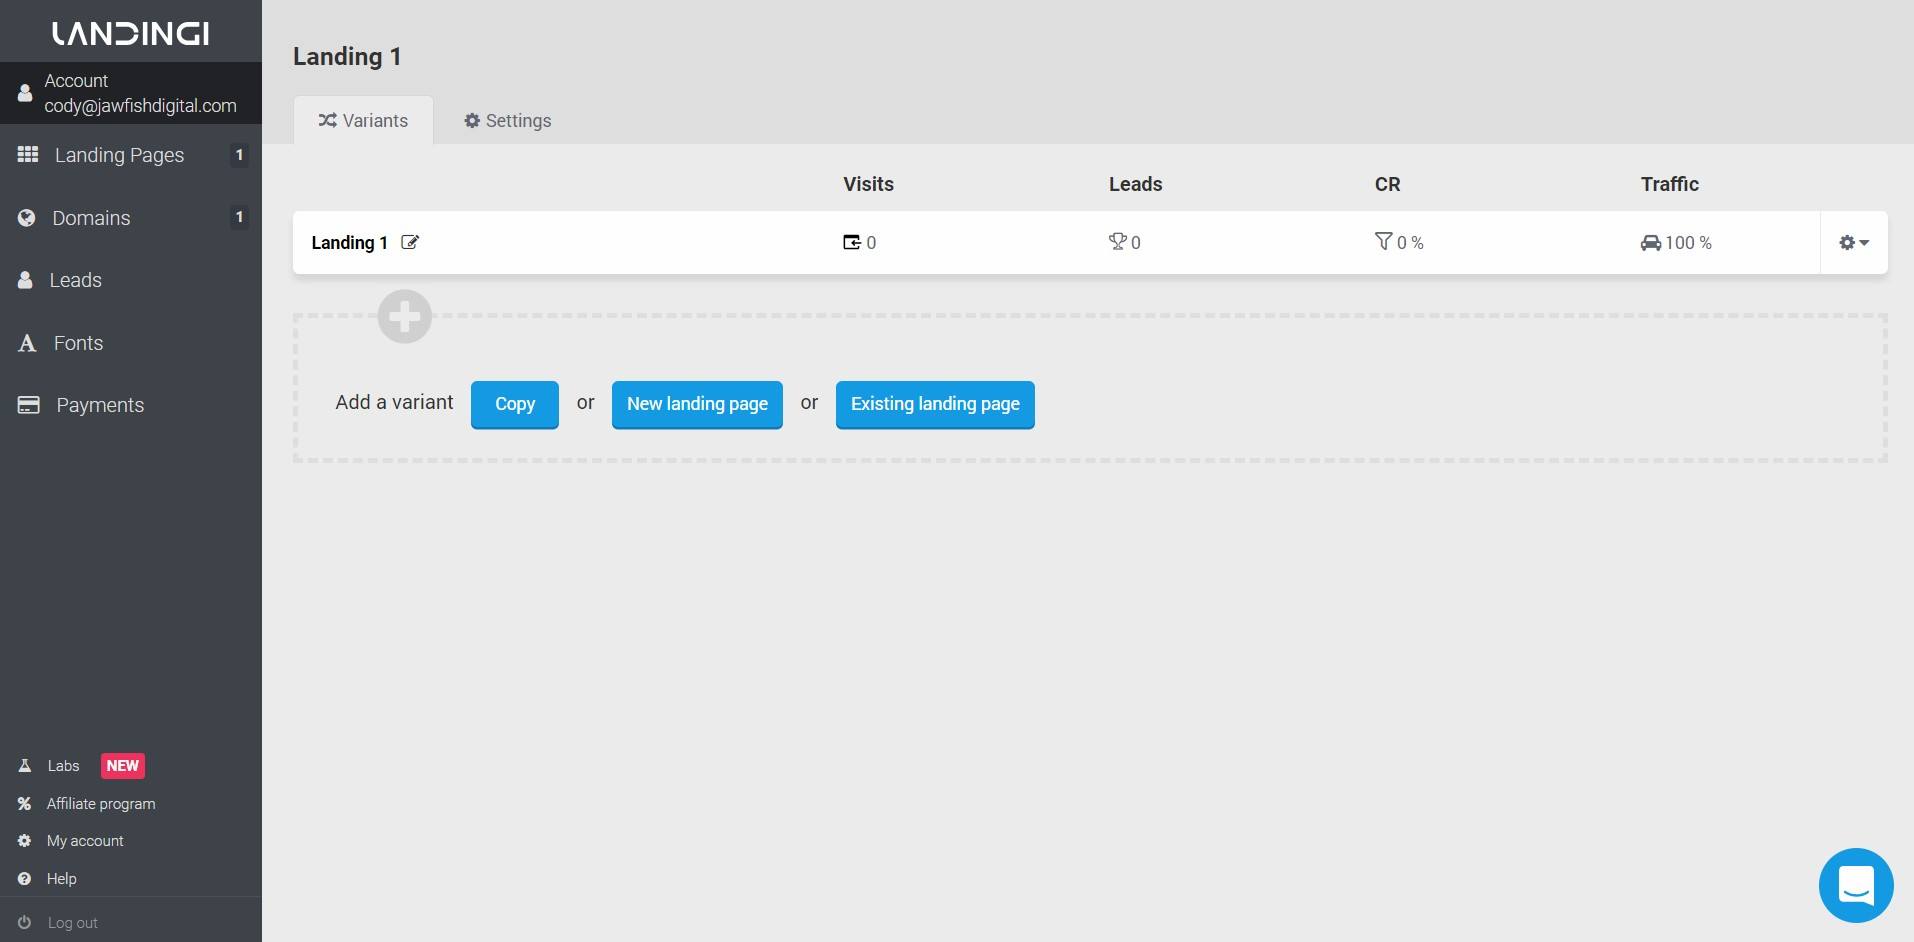
Lastly, this step is optional. But to get the most out of our landing page, we suggest A/B testing each one. You can A/B test each of your landing pages in Landingi by creating different variants. For example, you may decide to test the headline on the landing page.
If you create two different variants, each variant will be shown to 50% of the page’s visitors automatically. Then, you can compare the conversion rates of the two pages to see which headline was most effective.
Build your own WordPress landing page with Landingi!
We hope this guide was helpful to you! But, if you need any help building a custom landing page with Landingi, don’t hesitate to reach out to our support team. We’re available via phone, email, and live chat. We also have a fantastic knowledge base that you can consult.
Remember, you can sign up for a free 14-day trial to try all of Landingi’s features.