In this guide, you will learn how to create and use the form options in the Landingi editor.

Add form
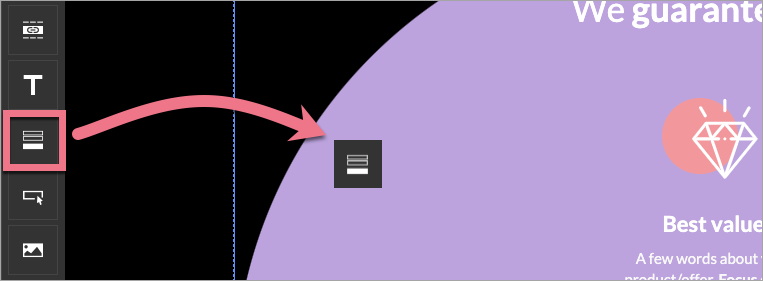
On the left side of the editor, find the Form widget, then drag and drop it into the active area of your landing page.
See here if you want to create a sticky form.
Edit form
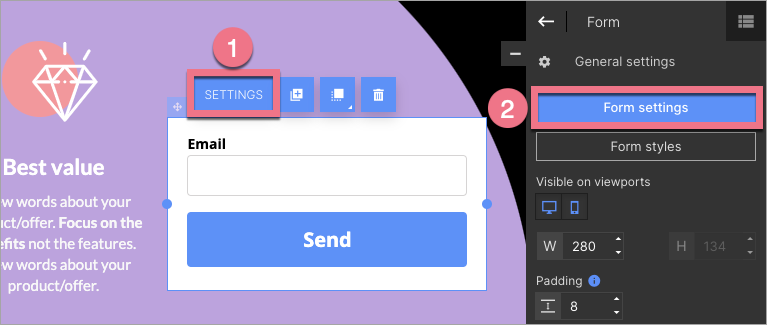
Click on the form to start editing. You will see its context menu (1) and toolbar on the right side of the editor (2).
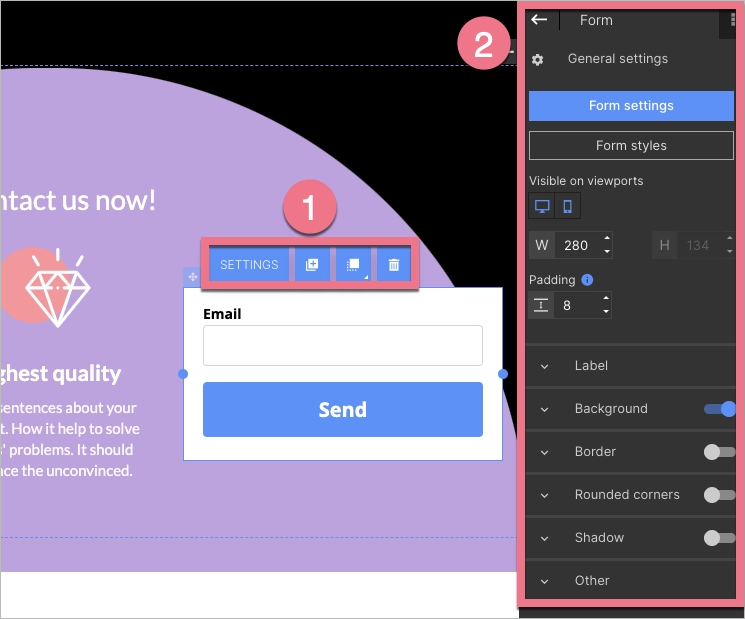
In the context menu, you can change the width of the form by clicking on the dots on the frame. The remaining icons let you change its position, enter the form settings, duplicate it, move it to the top/bottom, and delete the form.
In the widget toolbar, you can go to the settings or select the style of the form, turn on/off mobile or desktop view (by default, the form is visible in both views), change the form width, edit the padding, and adjust displaying labels. Underneath, you will find tabs with some additional options. You can turn them on or off using the slider located in the right-hand corner of each tab (except the Other tab).
Design of the form
You can use one of the ready-made form styles and form section templates. You can freely manage the design of your form using the tools in the right-side toolbar.
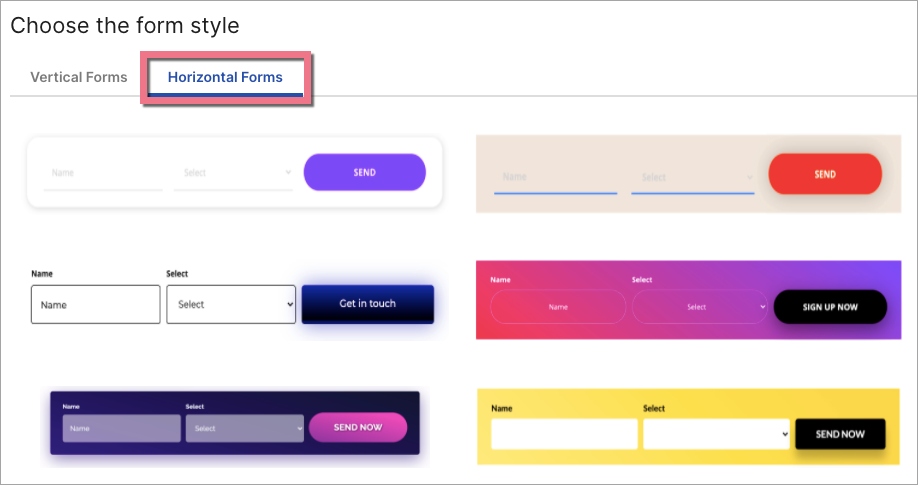
Form styles
Click on Form styles in the toolbar to choose a ready-made form design. Double-click on it or select and click Save & close. You can choose vertical or horizontal form.
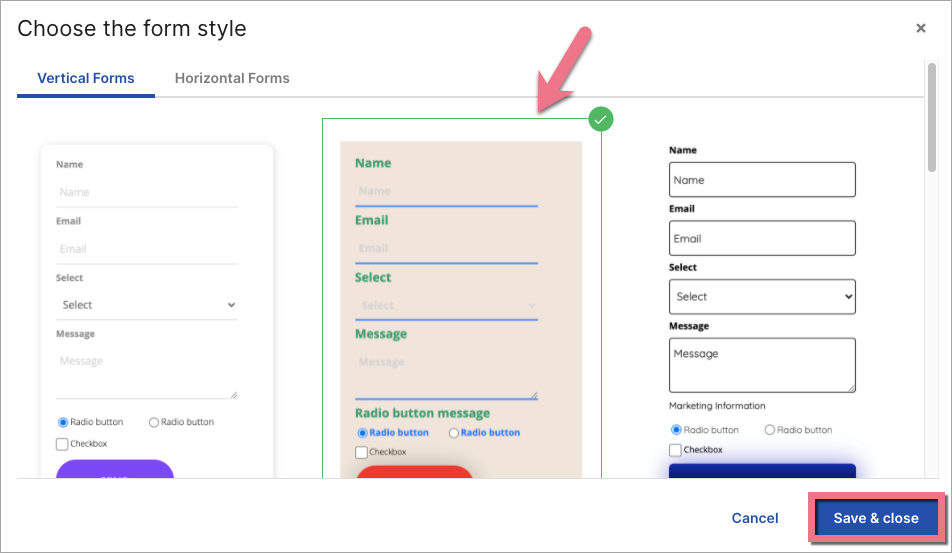
Remember that horizontal forms can have up to two fields (plus the send button, the checkbox, hidden, marketing info, and ReCaptcha fields).
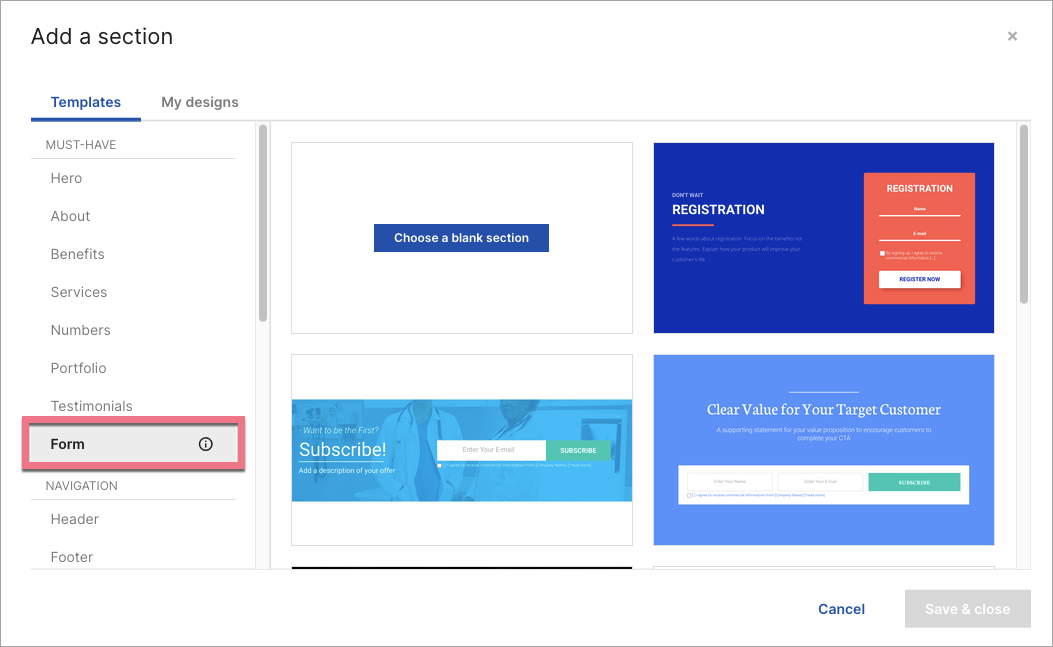
Form section templates
You can also add a new section and choose one of the ready-made form section templates. They are unique, high-quality, and vibrant! Learn more about section templates here.
To learn how to create the best lead capture form, read our article Lead Capture Forms: Guide, Best Practices And Examples.
Form settings
You can enter the form settings from the context menu (1) or the toolbar (2).
There are six tabs (read more below):
- Form fields
- Email integration
- Integrations
- Next action
- Autoresponder
- Additional settings
After the changes, remember to save and close.
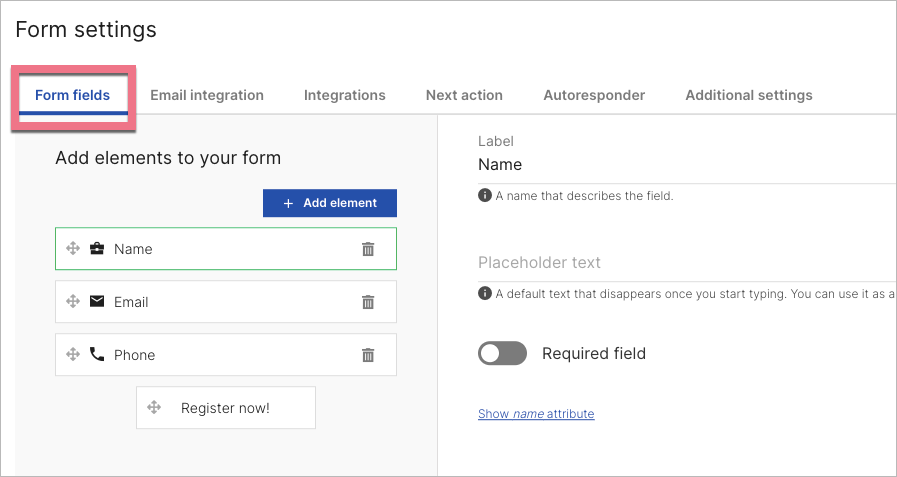
Form fields
You can add your own fields or predefined fields to the form by clicking on the + Add element button. By clicking on the selected field on the left, you will see its settings on the right. The range of settings changes depending on the selected element.
UTM
UTM parameters added to the URL address allow you to track the effectiveness of online campaigns and track visits. You can use UTM parameters in the link to your landing page.
If you use custom parameters that you want to pass to the lead, you will need hidden fields in the form and additional JavaScript code. See how to collect non-standard UTM parameters.
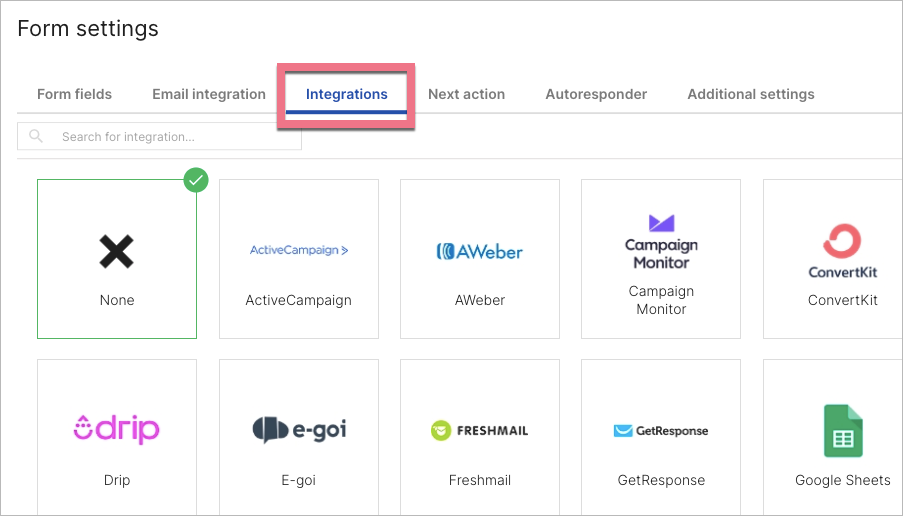
Integrations
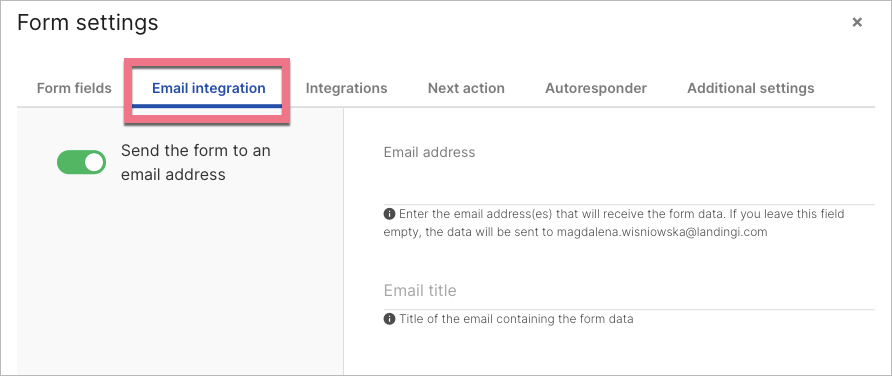
Email integration
If you want to send leads to your email address, use our separate Email integration.
Besides this option, you can also integrate your landing page form with one more tool from the Integrations tab.
Integrations
If you use external tools and would like to integrate them with the form on your landing page, navigate to the Integrations tab. Here, you will find our in-app integrations, however, Landingi connects with way more tools – to learn more about compatible and Zapier integrations, see our integration catalog.
If you want to learn more about integrating the form on a landing page created in our platform or are looking for guides about a specific system, check the integration category.
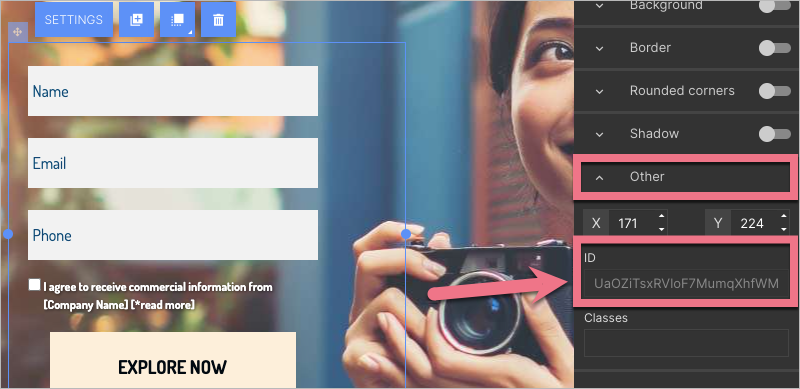
Some integrations require the form ID number. To find it, click on your form in the editor and navigate to the right-side toolbar. Unfold the Other tab and copy the ID number.
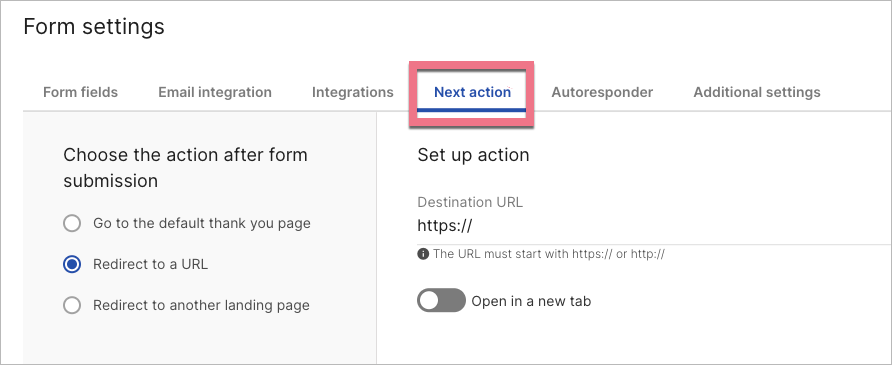
Next action
You can specify which action will occur after filling in the form: going to the default Thank You Page, redirecting to any URL, or another landing page. Learn more about Next Action.
Funnels
With the Next Action option, you can create simple funnels.
Connecting multiple landing pages into a funnel is the simplest way to attract users, convince them to become leads, and make them purchase your product because leaving data in such a journey seems much more unforced for them.
Custom Thank You Page
For all landing page templates with forms available in our platform, the thank you page’s design is already prepared. Such thank you page has a default dynamic URL address.
If you want to have a permanent (static) URL of the thank you page, we suggest creating a separate landing page as a customized thank you page to which the user will be redirected after the conversion (filling in the form).
Learn more about dynamic and static TYP URL addresses.
Autoresponder
You can set the autoresponder function to automate your communication.
Learn more about how to use autoresponders. Also, check how to send them from your own domain.

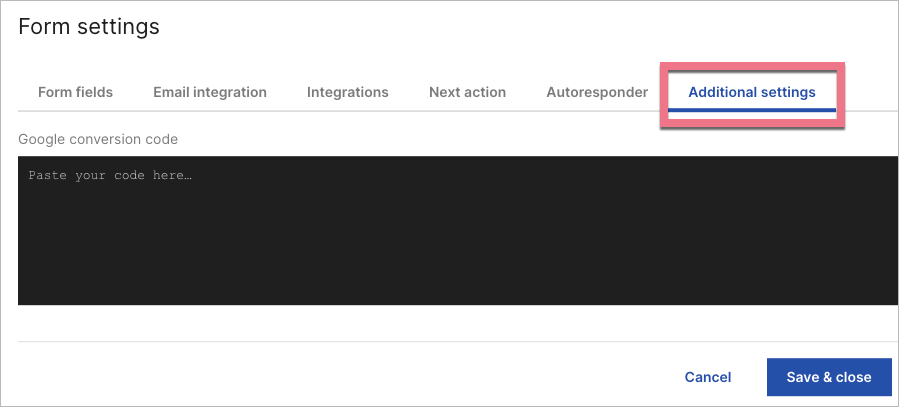
Additional settings
You can add an HTML code for Google conversion tracking.
Smart Sections and duplication
To smooth your work, you may want to use the same form multiple times. You can do this by using Smart Sections or duplicating the whole landing page.
Form Smart Sections
A Smart Section is a section that you can add to multiple landing pages, the sections are edited in the dedicated editor, and changes published in the editor are automatically updated to all landing pages with that section.
Form Smart Sections have the same ID number, fields, design, settings, and connected integrations. That means that leads collected on all landing pages with the form Smart Section are treated as having the same source (even if they come from different landing pages).
Duplicating landing pages
When you duplicate a landing page, you create its copy: with all its elements, including a form. Such form will have the same ID number, fields, design, settings, and connected integrations. That means that leads collected on all landing page copies are treated as having the same source (even if they come from different landing pages).