If you want to have more than one slider (image carousel) on your landing page, use the following instructions to implement it. With this method, you will be able to add a single slider to your landing page too.
Add slider sections
1. Log in to your Landingi account and go to the editor of your landing page.
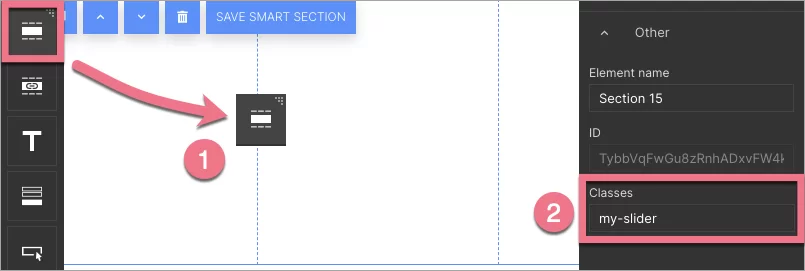
2. Create a new section for your slider – on the left side of the editor, find the Section widget (1), then drag and drop it into the active area of your landing page.
Add a class to your new section. In the widget toolbar on the right, go to the Other section at the very bottom and type my-slider in Classes (2).
3. Drag new Image widgets and add images. Place one image above the other.
Remember that the images in the slider:
- should be the same size;
- their size should reflect the size of the slider;
- they will display in the slider in the order they were added to the editor;
- you can add as many photos as you want.
4. Below the previously created section (slider section), drop another section widget to create a navigation section.
5. Drag two Icon widgets there: one for switching slides left and the other for switching slides right. Drop them in a chosen place, click on them, select Change, and choose your icons (preferably arrows).
6. In the widget toolbar on the right, give them previous and next classes respectively.
7. Publish your landing page.
You can add as many slider sections and navigation sections as you want.
Add JavaScript code
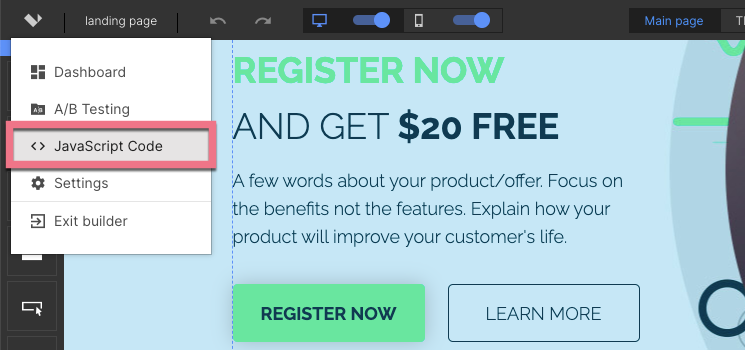
1. Go to the JavaScript Code tab of your landing page. You can enter the tab right from the editor.
2. Create a new script. Name it and paste the code indicated below in the Content field. Choose the Body bottom position on the Main page.
<script>
$('.my-slider').each(function(){
var $currentSlider = $(this);
$(this).find('img').not(':first').hide();
var current = $currentSlider.find('img').first();
var $sectionUnderSlider = $currentSlider.next();
var time = 16000;
var buttonClicked = 0;
$sectionUnderSlider.find('.next').click(function(){
buttonClicked = 1;
setTimeout(function(){
buttonClicked = 0;
}, time)
current.fadeOut()
if (current.next().length) {
current = current.next()
} else {
current = $currentSlider.find('img').first();
}
current.fadeIn(300);
});
$sectionUnderSlider.find('.previous').click(function(){
buttonClicked = 1;
setTimeout(function(){
buttonClicked = 0;
}, time)
current.fadeOut()
if (current.prev().length) {
current = current.prev()
} else {
current = $currentSlider.find('img').last();
}
current.fadeIn(300);
})
setInterval(function(){
if (!buttonClicked) { current.fadeOut()
if (current.next().length) {
current = current.next()       }
else {
current = $currentSlider.find('img').first();
}
current.fadeIn(300);
} }, time)  });
</script>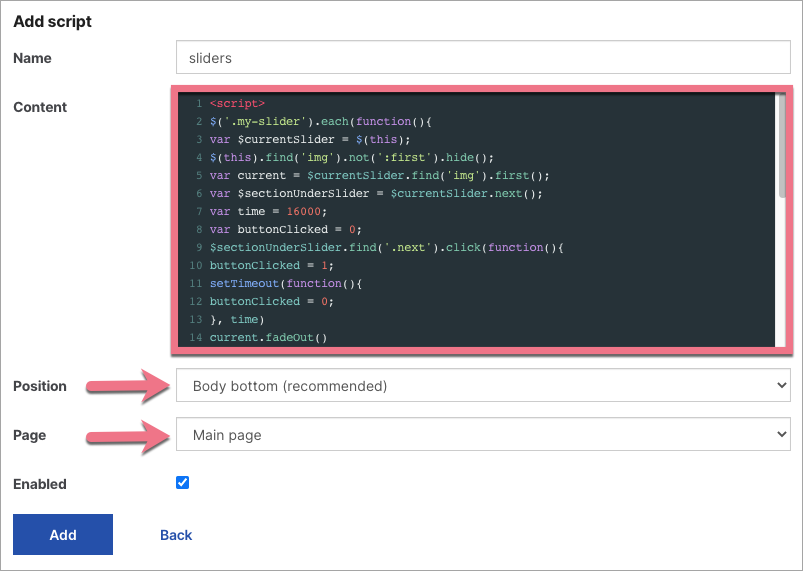
3. Click Add to save the code.
4. Go to your published landing page and check if the sliders display correctly.
You can also check the alternative method of creating a slider (one slider per landing page).