If you do not want to use the hosting option provided by Landingi, you can embed the landing page on your server.
- Before you start, read the tips listed at the end of this guide.
How to embed a landing page on your server?
1. Log into the platform and go to the Landingi tab.
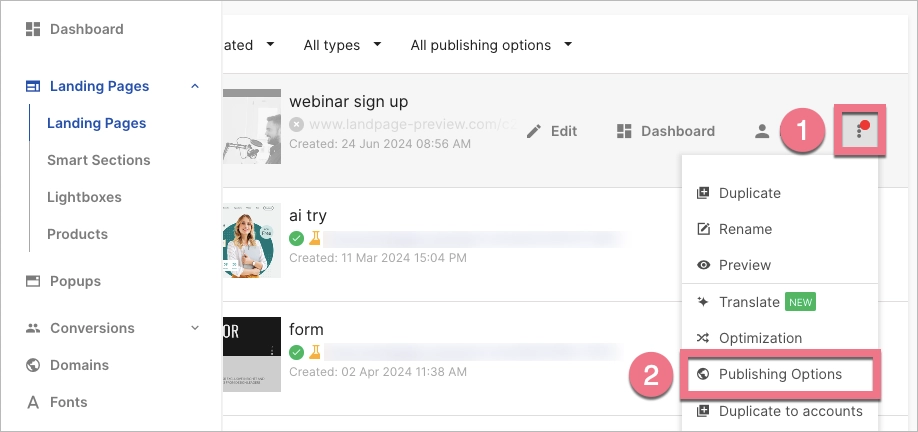
2. In the list of all the landing pages, find the one you want to add to your server and click on More (1) (three dots icon). From the drop-down menu, choose Publishing Options (2).

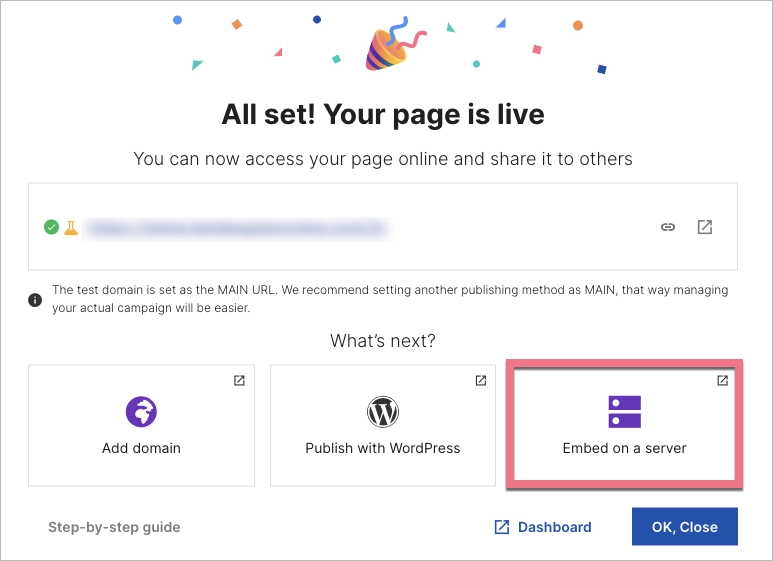
3. In the new window, click on the option Embed on a server.

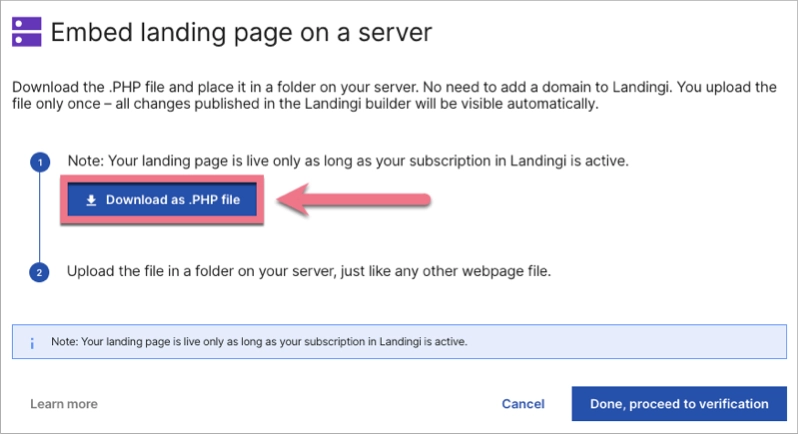
4. In the next window, click on Download as .PHP file.

5. After downloading, add the .PHP file on your server (via FTP client) in the chosen folder, depending on the path where the landing page should be displayed.
Tips
Remember:
- Generating a .PHP file does not mean that the entire site and its contents (HTML, CSS, JavaScript, etc.) are placed in this file – it will contain only references to the appropriate resources, which will allow it to be available under your domain.
- For the generated file to work properly, your PHP version must be min. 7.4.
- You still need to use our editor to edit your landing page, and if your Landing account expires, the landing page on your server will no longer be available for users.
- Editing your landing page in the editor is done exactly as before the .PHP file was generated. You have to click on Publish each time you want to save changes in the editor, but there is no need to generate the PHP file again and place it on your server. Changes on the landing page will be visible online up to several minutes after publication.
- Using this method means that there is no need to redirect your domain by adding the appropriate DNS records, but the installation of an SSL certificate is on your side.
