You have spent many hours working on your marketing campaign from scratch. You’ve analyzed every single component to make it the most effective. From a clear landing page template and captivating copy, through an enticing newsletter, eye-catching social media posts to paid ads. It seems the time has come and the campaign may go live at last. But, have you considered how to track the results and get the information what worked well and what, in fact, did not?
- URL tags – what are they for?
- What parameters can you add to your URLs?
- URL Builder – how it works?
- Dos and don’ts
URL tags – what are they for?
URL tags are tracking parameters for Google Analytics. Using URL tags will simplify your campaign analysis. By adding them to your link, you can define which channel generated the most traffic to your landing page. You are given precise information whether it is a newsletter, banner or maybe it’s an influencer who shared your social media post.
- utm_campaign – an individual campaign name, (e.g „summer” for a summer newsletter)
- utm_source – it defines the place where you want to leave the link, (e.g newsletter to define the traffic coming from one)
- utm_medium – it describes the marketing medium which brought a user to your landing page. It can be a banner, Facebook interaction, etc.
- utm_term – by using this parameter you can identify specific keywords, (e.g product names, categories)
- utm_content – it allows you to differentiate similar content in two ad variants displayed in the same medium
So much for the theory. Sounds a little bit complicated? There’s nothing to be afraid of. Let’s take a look at how it works in practice.
URL Builder – how it works?
First of all, you don’t have to create all these tags manually. Use the URL Builder to have it done quickly instead.
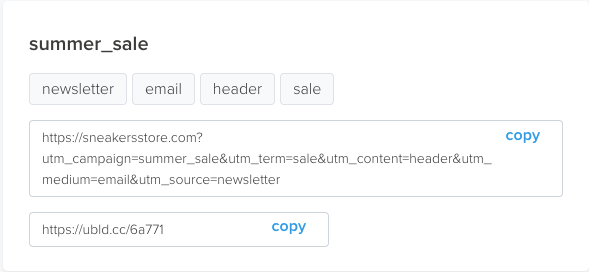
Let’s go with an example: imagine you’ve planned a summer sale in your sneakers store. Follow these steps:
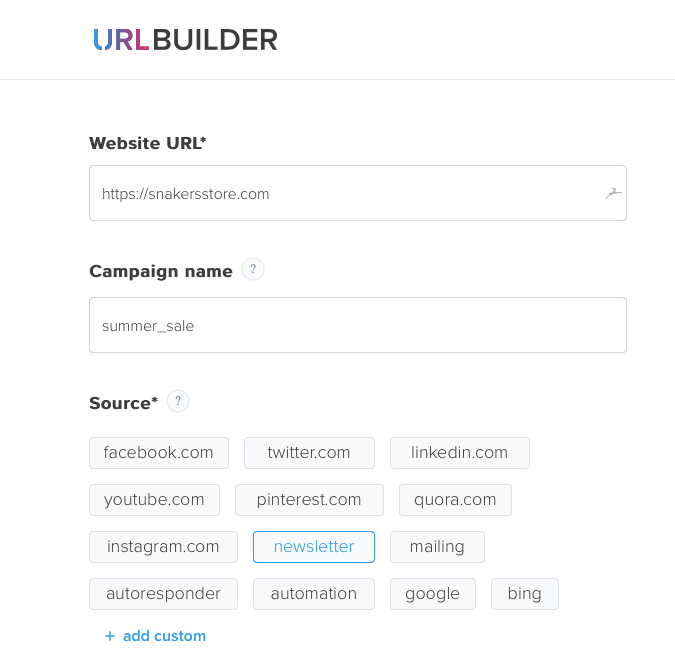
Enter your website URL, campaign name and specify the referrer (or add your own) where you publish your link.
Specify the type of marketing medium of the source. You can also add advanced settings such as defining term and content for your URL tags. It is not obligatory, but it may give additional insight to your campaign analysis.
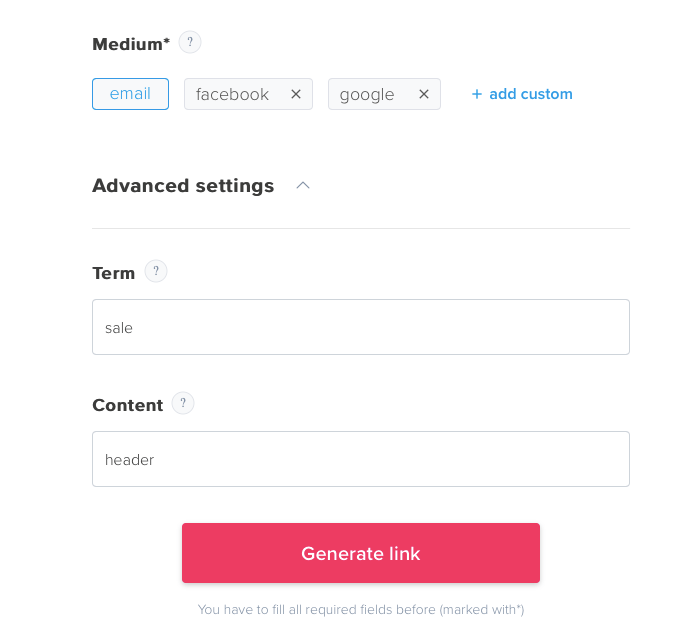
One more click and a custom URL link is generated and ready to copy. And that’s it! Take a look at final result below:
Dos and don’ts
Now you know building URL tags is a piece of cake. But, there are a few things good to remember while generating tags to your campaign:
- Be specific – sharing something on Facebook with a source tag “social media” will be pointless. Unspecified tag will track whole social media area, not only your efforts focused on Facebook:

- Lowercase only – use lowercase in your tags and avoid spacing.
- Shorten your link – if the length of your link bothers you – shorten it. URL Builder will do it for you instantly.
- Never use the same parameter more than once.
- Do not tag your SEO campaigns. Google Analytics gather some information when visitor comes to your page from an organic search. Adding URL tags may cause overwriting analyzed data from your campaign.
The use of URL tags will always depend on the type and specification of your campaign – you need to determine what exactly do you want to measure and analyze, but it’s worth the trouble.
The more you know about campaign, the better. URL Builder will help you to optimize, learn and analyze what brought you to the success.

