Kit is an email service provider specifically marketed toward creators, bloggers, podcasters, and others who are building audiences. This guide will walk you through integrating your landing page with Kit (formerly ConvertKit) to send leads to this platform.
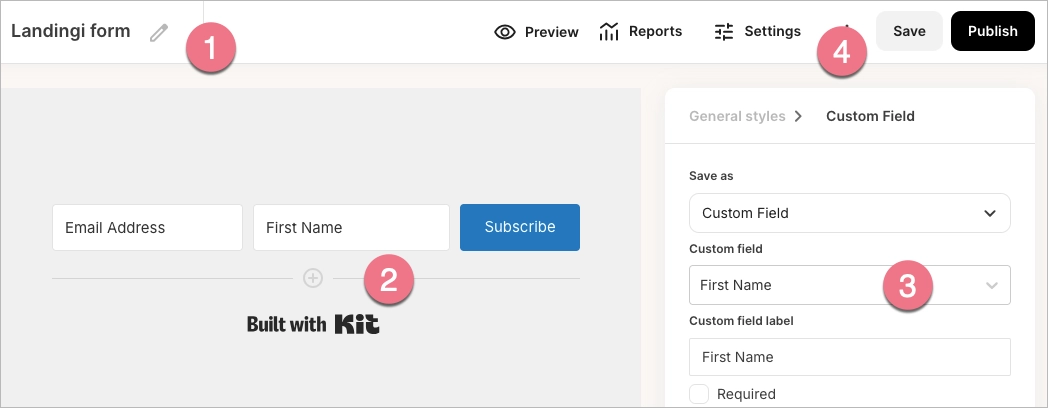
This integration supports custom form fields.
- You can also connect your landing page with Kit via Zapier to send leads and manage subscribers, purchases, or tags.
Get your API key from Kit and create a form
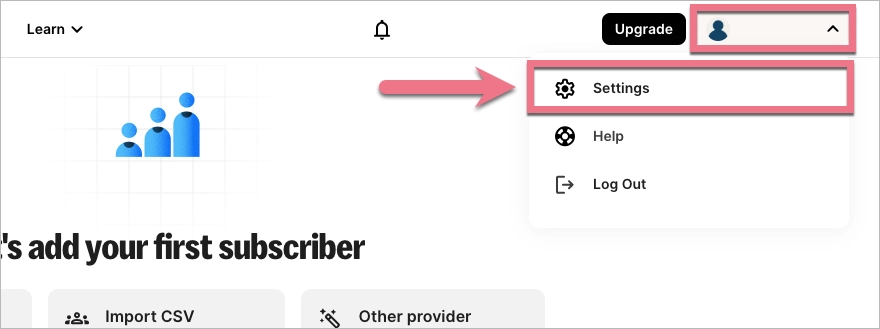
1. Log in to your Kit account.
2. Click on your profile icon and select Settings.
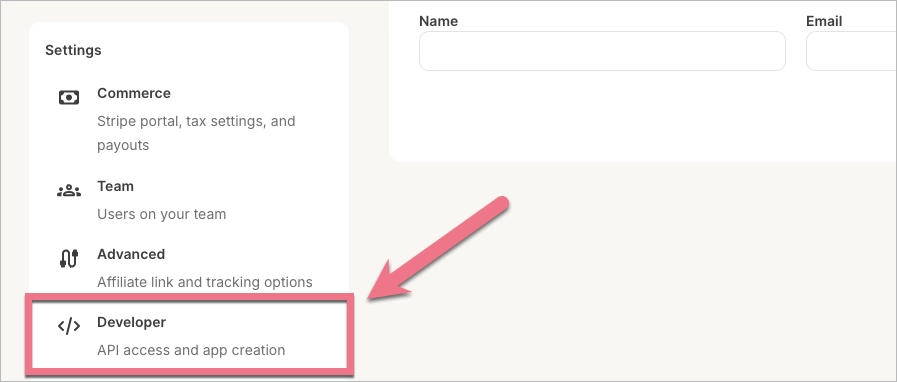
3. From the left-side menu, choose Developer.
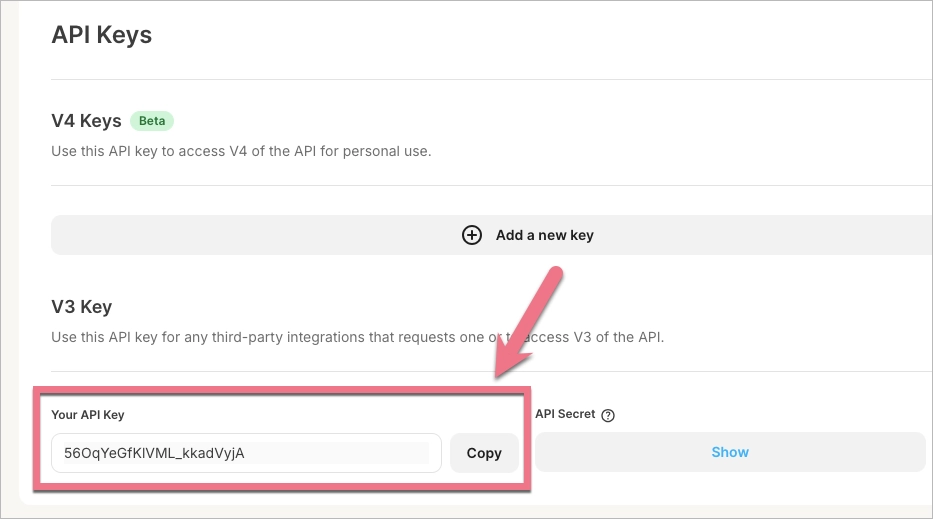
4. Find the V3 Key section and copy your API key.
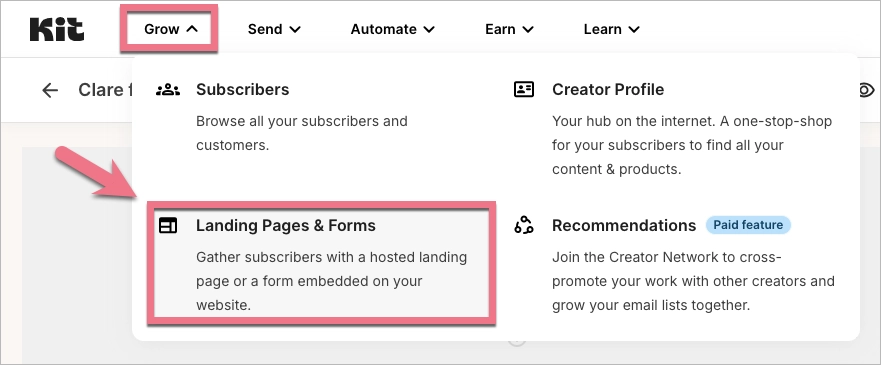
5. To ensure leads are sent to Kit, you need to create a form in the platform – it won’t be visible anywhere. Click on the Grow tab and select Landing Pages & Forms.
6. Create a new form – choose any style. Then:
- customize its name,
- add fields that match the fields in your landing page form created in Landingi,
- set a Custom field value for each field – you’ll use the same values later in the integration settings in Landingi,
- click Save.
Install the API key in Landingi
1. Log in to your Landing account and go to the editor.
2. Click the form and navigate to its Settings.

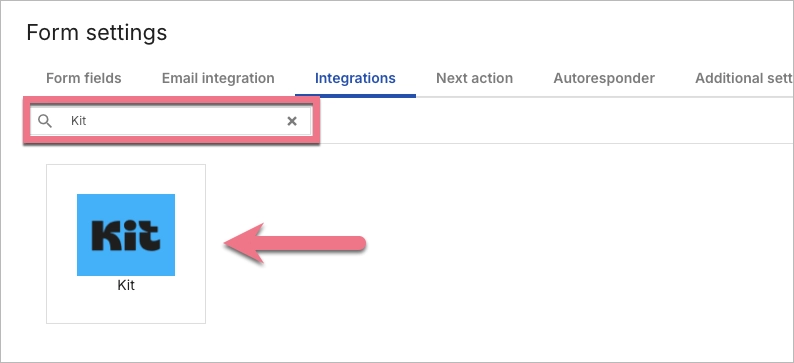
3. In the Integrations tab, choose Kit. You can use the search bar to look for the integration. Type the name and press Enter.
4. Paste your key in the API Key field (1). The Form (2) tab will update automatically with forms previously defined in the Kit platform (leads will be sent to the selected form).

5. Next, connect the form fields with the appropriate values defined in Kit.
IMPORTANT: Remember that field types must be identical in Landingi and Kit platforms.

6. Save and close. Publish your landing page.
Fill out the form and check if the data is sent correctly to your Kit account.
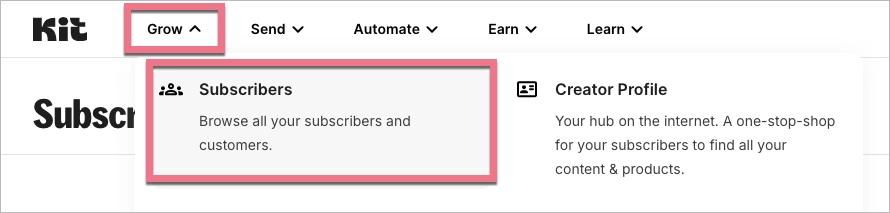
To see your leads in the Kit platform, click on the Grow tab and select Subscribers.
Browse all integrations in our Integrations Catalog to see tools you can connect Landingi with.

