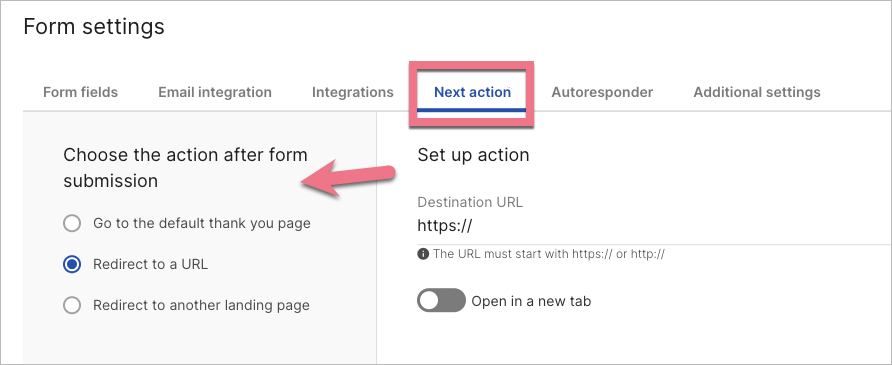
In Landingi, you can decide what happens after users fill out the form on your landing page. In form settings, choose one of three redirections:
- Go to the default thank you page
- Redirect to a URL
- Redirect to another landing page
Set up the action after form submission
1. Log in to your Landingi account and go to the editor of your landing page.
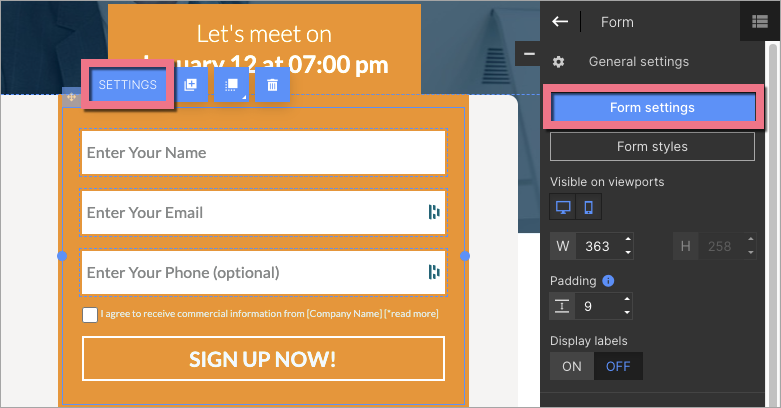
2. Select the form and go to its Settings.

3. In the Next action tab, from the drop-down menu, choose what should happen when the user submits the form on your landing page.

Go to the default thank you page
This is a default option for every form. Learn more about the thank you page here.

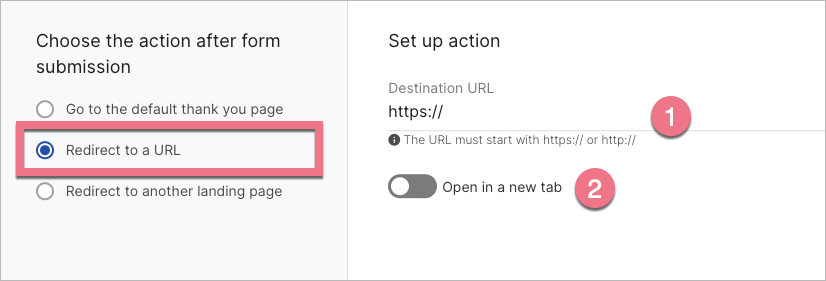
Redirect to a URL
(1) Enter the URL address where the user will be redirected.
(2) If you want to open the target URL address in the new browser’s tab, check Open in a new tab.

Redirect to another landing page
(1) Select the Target landing page where the user will be redirected.
(2) If you want to send all lead data from the first landing page to the target landing page, check the Transfer lead data box.
E.g., if the form on your current landing page contains two fields, like Name and Email, and the next landing page (to where the user is redirected in the next step) contains only the Phone field in the form, both Name and Email will be sent to the lead on the target landing page, and in result, the lead on the target page will contain all data from both landing pages: Name, Email, and Phone.
(3) If you want to open the target landing page in the new browser’s tab, check Open in a new tab.

Finally, click Save and close and publish your landing page.
Fill out the form on your landing page and check if everything works correctly.
Create funnels
With Next action functionality, you can connect more than two landing pages and create a funnel this way.
We recommend marking the box Transfer lead data as checked for all landing pages in your funnel to send all details from every step to the last, final landing page.