ActiveCampaign is one of the leading sales platforms for small and medium businesses. This guide will show you how to integrate ActiveCampaign with your form.
This integration supports custom form fields.
- You can also connect your landing page with ActiveCampaign via Zapier to automate workflow and manage your leads quickly and easily.
Integrate your landing page with ActiveCampaign
1. Log in to the Landingi platform. Then go to the editor.
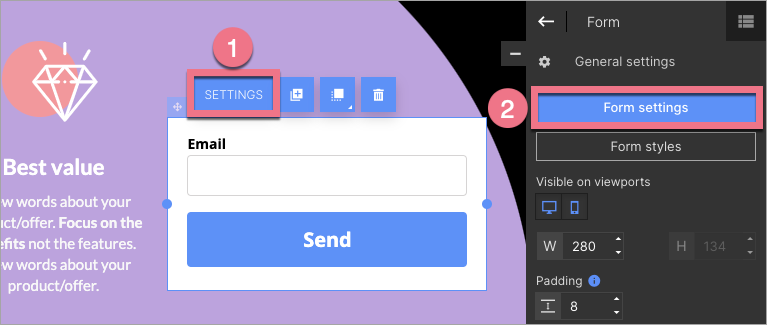
2. Click on the form to start editing. Go to Settings from the context menu (1) or toolbar (2).
3. Go to the Integrations tab and select Active Campaign. You can use the search bar to look for the integration. Type the name and press enter.

4. Log in to your account in the ActiveCampaign platform. In the side menu on the left, go to Settings (1) > Developer (2) and copy the URL and key (3).

5. Return to the editor. In the ActiveCampaign integration, paste the URL and API key.
Status, Mailing list, and Tags, if predefined in the ActiveCampaign platform, will load automatically after successful login. You can change them at any time depending on your needs.
IMPORTANT: Currently, the ActiveCampaign platform does not automatically support the double opt-in function. You can configure it manually from the ActiveCampaign page by following the directions included in this video (from 7:00 min).

6. Now, you can connect the form fields with the fields in ActiveCampaign. When you are ready, click Save. Then publish your landing page.

NOTE: Remember that when you select a field type, it must be identical both in Landingi and ActiveCampaign.
7. Complete the form on your landing page and check if the leads are loaded in the ActiveCampaign platform correctly.
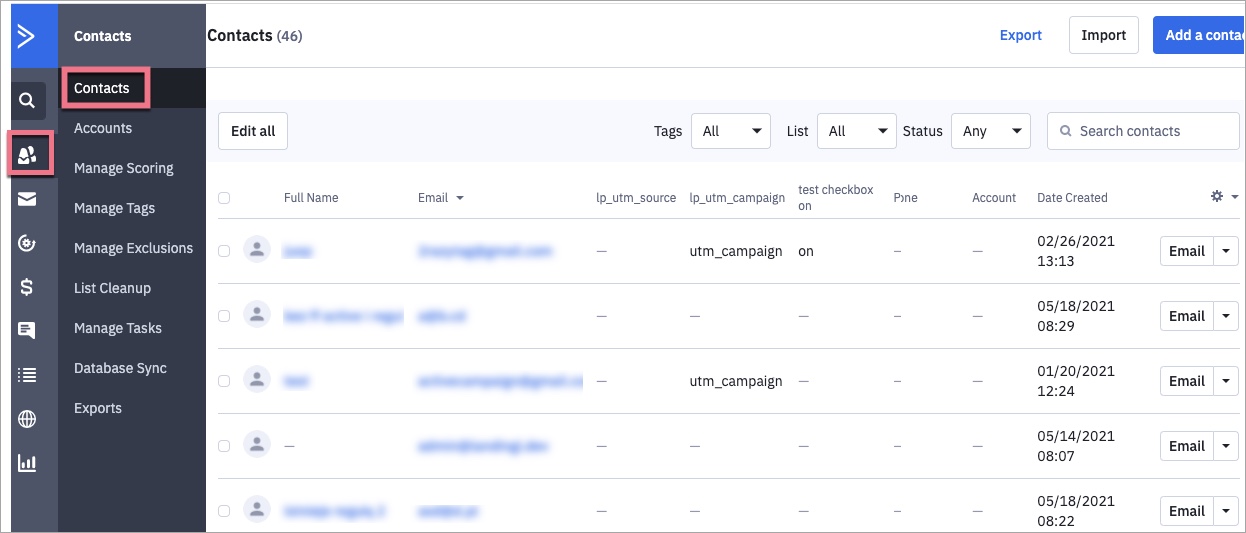
8. Go back to ActiveCampaign. Click on Contacts on the left menu. You will see the list of your contacts (leads). Select a contact and click on it to see the details. You can also filter leads by tags if you have created them before.
Browse all integrations in our Integrations Catalog to see tools you can connect Landingi with.

