Osano is a data privacy software platform. It allows you to keep your website compliant with CCPA, GDPR, and monitor all privacy practices.
This guide will walk you through installing the Osano cookie banner on your landing page via GTM. Before you start, you will need to install and configure the Google Tag Manager and container for your landing page. Read more about adding Google Tag Manager in Landingi.
There are few more tools you can integrate Landingi with that can help you manage your cookies and privacy policy:
Configure consent in Osano
1. Before setting up a tag in GTM, create an account in Osano.
2. In the Consent Management tab, click + to add a new consent configuration.

3. Go to Advanced Settings.

4. Add a name and scroll down.
Select Google Consent Mode. Paste your domain – you can enter either a root domain or a subdomain; Osano automatically works with subdomains of your website with no additional configuration. Paste the URL with your landing page’s policy.

5. You can adjust the design of the banner in the Customization section.

6. When you’re ready, select Get Code.

7. Copy and take note of two parts of your code (1 & 2). You need them to configure a tag in GTM.

8. Now, you can click Create Configuration and Publish.

Set up tag and trigger in GTM
1. In your Google Tag Manager, go to Tags and click New.

2. Name the tag and go to its configuration.

3. Select the option to discover more tag types.

4. Search for Osano and select Osano Consent Manager.

5. You will see what permissions this template requires to work correctly. Review them and click Add to workspace.

6. In Customer ID (1) and Customer Configuration ID (2) fields, paste values copied from your Osano code.

7. Scroll down and unfold Advanced Settings. Click Consent Settings.

8. Set up additional consent that is needed for the tag to fire. Click Add required consent to add new. Go to Google Help to learn more about consent settings.

9. Scroll down and click Triggering. Choose Consent Initialization – All Pages. Then save the changes.

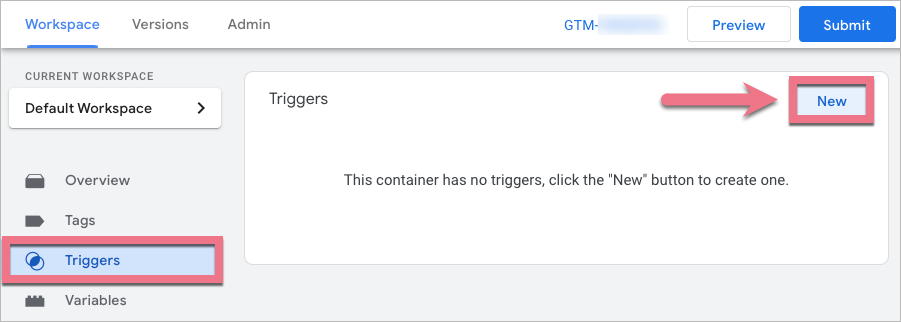
10. Go to Triggers and click New.
11. Name the trigger. In its configuration, choose Custom Event as a trigger type.

12. Name the event: osano__cm–load-.+ and check the Use regex matching option. Let the trigger fire on All Custom Events. Save the changes.

13. Go to Admin and click Container Settings.

14. Check the Enable consent overview option.

15. When you’re ready, do not forget to click Submit.

From now, the Osano cookie banner should display on your landing page.

Browse all integrations in our Integrations Catalog to see tools you can connect Landingi with.

