Creating and editing pop-ups is easy and quick. You can publish them on landing pages created in Landingi or on external websites to get more leads wherever you want.
NOTE:
Create a new pop-up
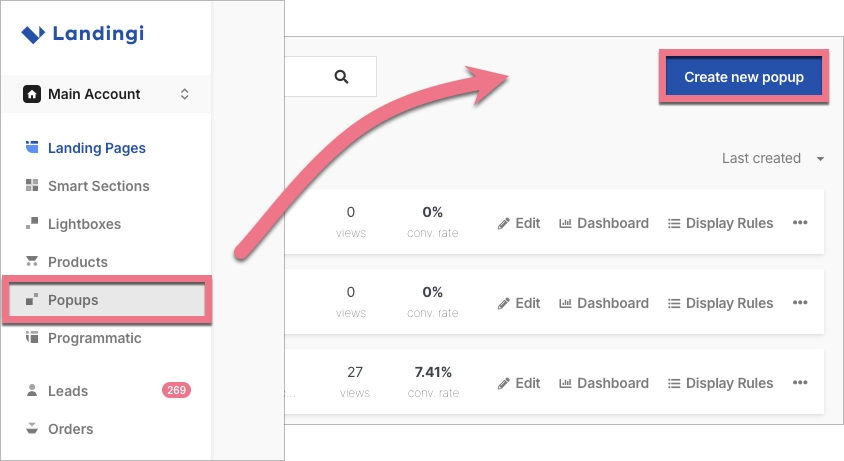
1. Go to the Pop-ups tab and click on Create new pop-up.
2. To create a completely new pop-up click on Choose template (1). If you want to upload a previously prepared pop-up from your computer click Upload .popup file (2).

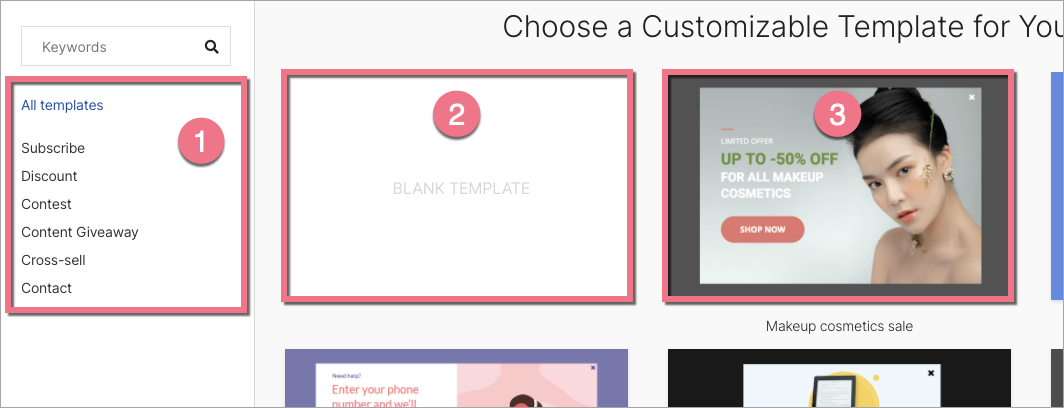
3. When you decide to choose a template, you can search for a suitable one using the list of categories (1), select an empty template (2), or one of our customizable templates (3).
See our pop-up template gallery.
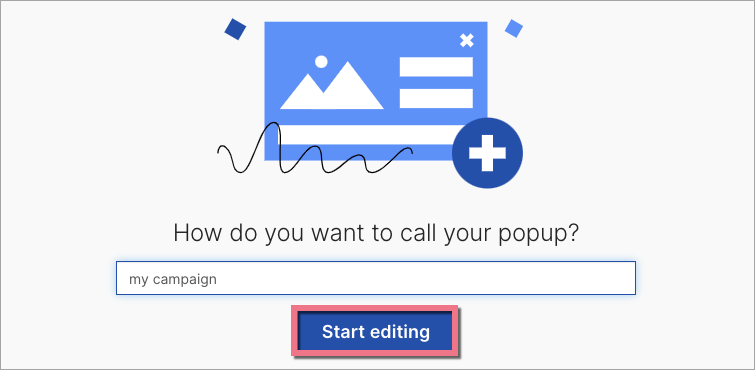
5. Give your pop-up a name and click on Start editing.
6. You can always find the Edit button in the list of all pop-ups:

You can enter the editor also from the Dashboard of the pop-up:

Edit your popup
Pop-ups are edited in the same way as landing pages. Learn how to use the different elements of the editor here.
Check out how to edit a popup using the Popup Style!
1. You can choose from 9 widgets that you can put on your pop-up. The landing page editor has a section widget that is not available in the pop-up editor.

It is not possible to add your own JavaScript codes to the pop-up.
2. Use the arrows (1) if you want to undo or redo the editing. Like the landing page, the pop-up has a desktop (2) and mobile view (3). The mobile view is automatically created based on the desktop view, but this does not work in the other way. We recommend starting with the desktop view and then adjusting the mobile view.
Customize the Main page and the Thank you page (4) – a target page to which the user will be redirected after filling in the form. Remember to do it for both the desktop and mobile view.

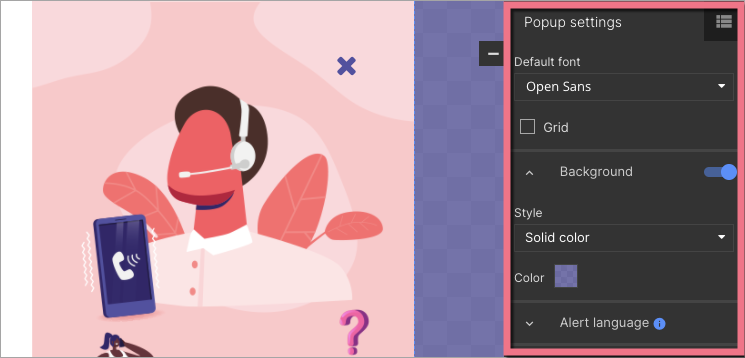
3. On the right, you will find a side panel with Pop-up settings.
When editing, you can go back to Pop-up settings by clicking on the arrow:

4. Pop-up has only one section, but you can adjust its height using blue arrows at the bottom edge.

5. The close button is a fixed element of the pop-up – you can change its position, size, color, and icon. Click on the button, you will see its toolbar (1) and editing options. If you want to change the icon, click on Settings (2).

6. Once you finish editing, you can check the Preview of the new pop-up. Click on the Next button (if this is the first time you edit the pop-up) in the editor’s upper left corner to set the display rules and publish the pop-up. If you are reediting the pop-up, you will see Publish button here.
Click Save if you want to just save your changes and exit the editor.

To learn more about the functionality of pop-ups, check the guides for display rules, statistics, and leads.

