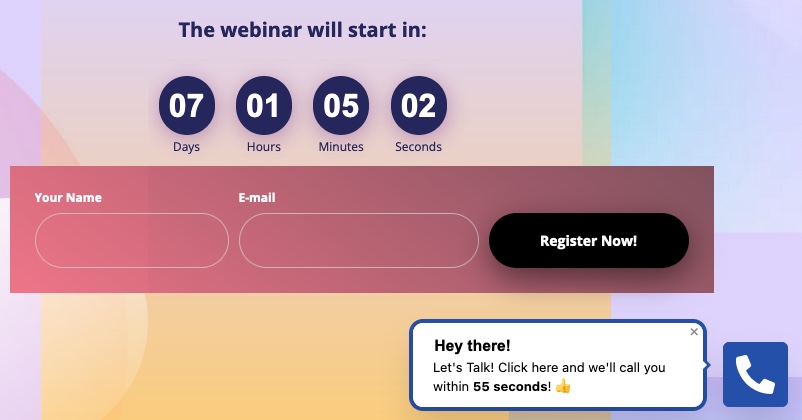
Convolo is an AI-powered lead response management tool. It helps you increase sales and improve customer service by reaching out to visitors within 55 seconds after they’ve dropped their phone number. You can integrate your landing pages, pop-ups and lightboxes in two ways:
- by implementing Convolo phone button using a JavaScript snippet (landing pages only),
- by integrating a Landingi form with Convolo (this includes landing pages, lightboxes and pop-ups).
Integrate Landingi with Convolo
Select the integration method:
Adding a phone button
To add a phone widget to your landing page, copy a snippet from Convolo and install it in Landingi.
Get the JavaScript code from Convolo
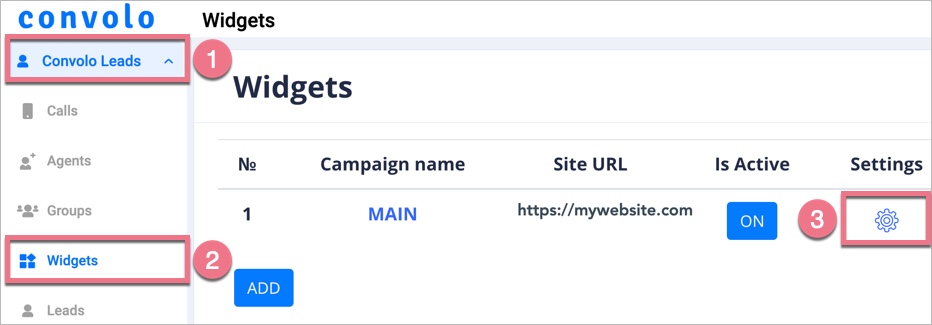
1. Log in to your Convolo profile. Go to the Convolo Leads tab (1), select Widgets (2), and head to settings (3).
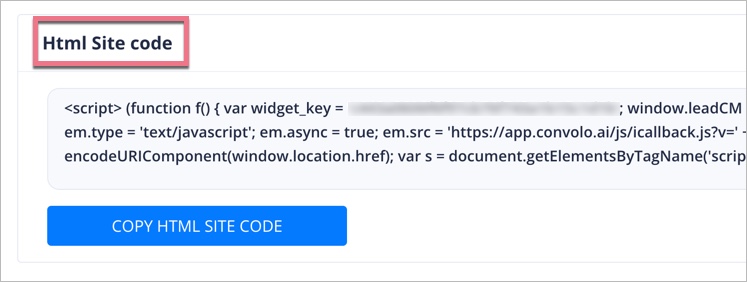
2. Scroll down the Main section and copy the HTML code.
Install the code in Landingi
1. Log in to your Landingi account and navigate to the Dashboard of your landing page.
2. Go to the JavaScript Code tab. Click Add script.
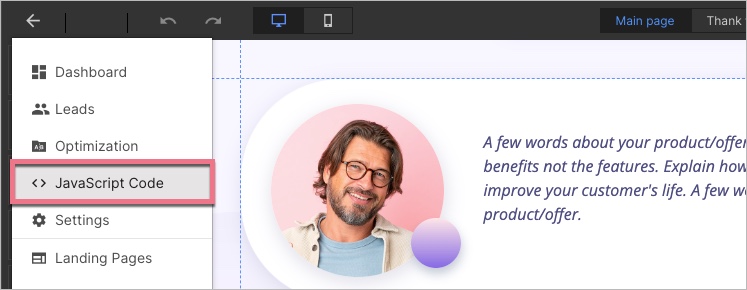
You can access the JavaScript Code section also directly from the editor:
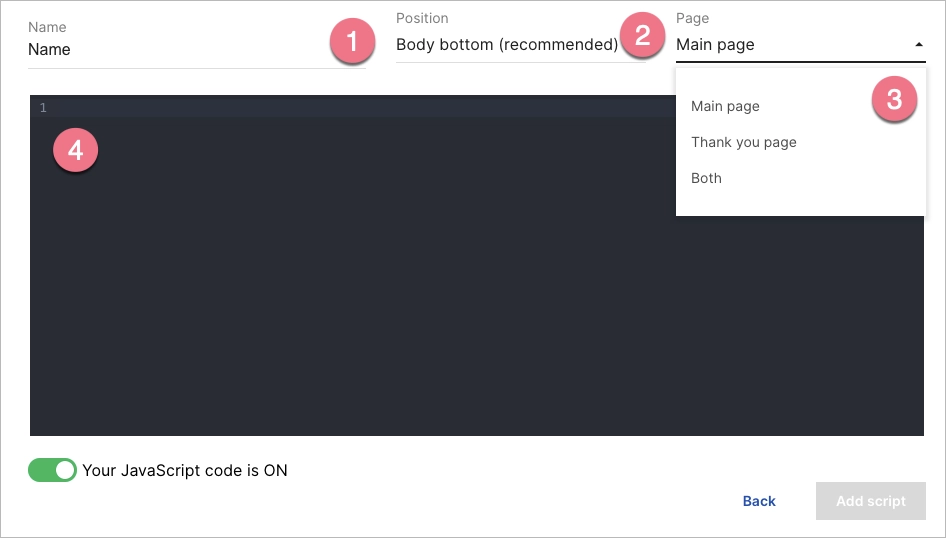
3. Name (1) the script, choose the Body bottom (2) position, and select the page where you want to show the widget (3). Paste the code (4). Click Add to save the code.
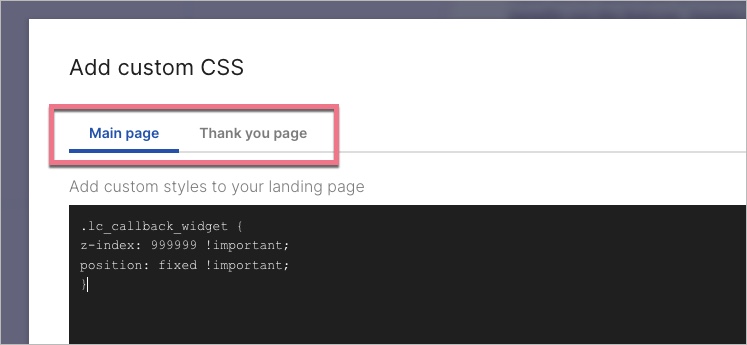
4. You need to add a CSS code snippet so that the phone widget stays on top of other elements. Go to the editor, navigate to Page Settings, and click Add custom CSS.

When editing, you can go back to Page Settings by clicking the arrow:

5. Copy and paste the following code:
.lc_callback_widget {
z-index: 999999 !important;
position: fixed !important;
}
Paste it into a section depending on where you’ve installed the JavaScript snippet.
6. Click Save & close.
Publish your landing page and check if the Convolo phone widget works correctly.
Integrating a form
You can integrate a Landingi form with Convolo using the webhook integration (available in the Landingi form settings). To do that, you’ll need to set a Landingi form and copy two keys from your Convolo account.
Set up form integration
1. In Landingi, add a form widget. Click on the form and go to its Settings.

2. Your form must contain the phone field.
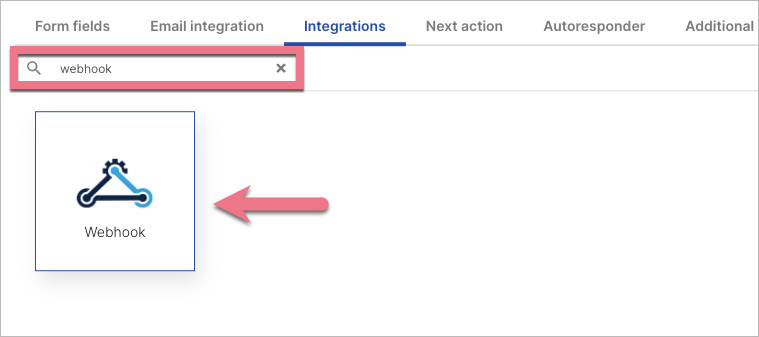
3. In the Integrations tab, select Webhook.
4. Configure the connection:
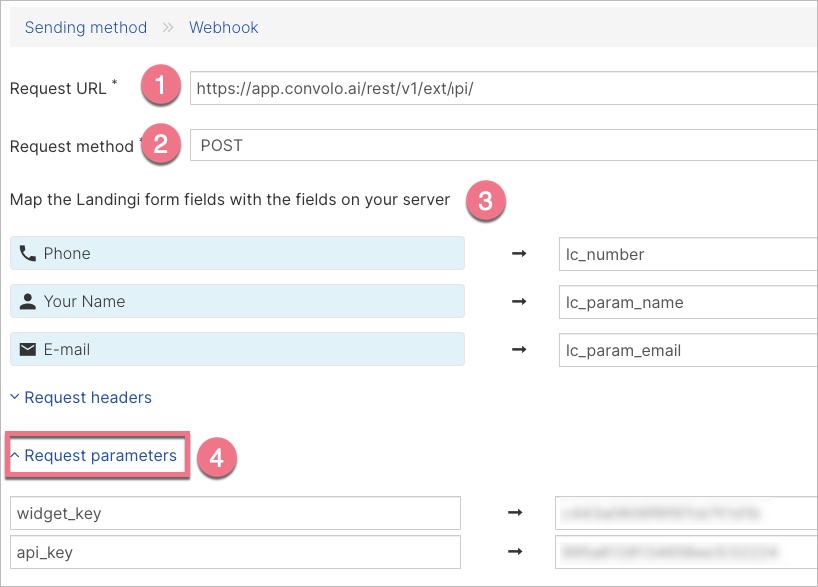
- (1) paste the following URL as the Request URL: https://app.convolo.ai/rest/v1/ext/add_call_api/
- (2) select POST as the Request method
- (3) connect the fields as presented in the table below; there are 3 default fields in Convolo: phone, name and email. Learn how to add custom form fields in Convolo.
| Phone | lc_number |
| Name | lc_param_name |
| lc_param_email |
5. To get the widget_key and api_key (4), log in to your Convolo profile, go to the Convolo Leads tab (1), select Widgets (2), and head to settings (3).

Copy the Widget key from the Main tab, and the Api key from the Integrations tab.
If the Api field is empty, click the Generate API KEY button (or fill it in with the API key you want). Click SAVE to apply changes.

6. If your Landingi webhook integration has been set up, click Save and close in the top right corner.
7. Click Publish. Your form is now integrated with Convolo.
Managing leads
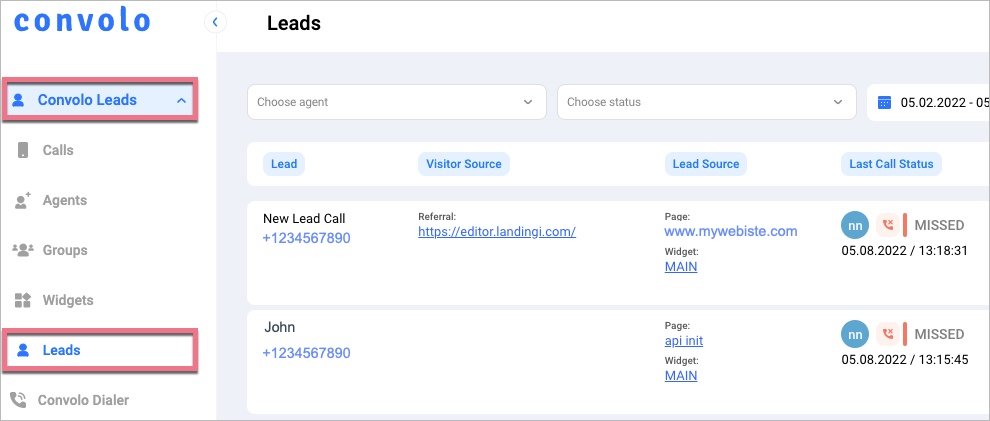
You can manage leads generated by the phone button and the form integration in the Convolo Leads tab.
Browse all integrations in our Integrations Catalog to see tools you can connect Landingi with.
