Hotjar is the tool that reveals your users’ online behavior. This guide will walk you through integrating your landing page with Hotjar via additional JavaScript code.
Get your code from Hotjar
1. Log in to your Hotjar account, go to Settings and enter the Sites & Organizations tab.

2. Choose your site or add New Site (1). Then click Install tracking code (2).

3. Choose to install code manually and click Add code manually.

4. Copy your code.

Do not close this site.
Install the code in Landingi
1. In a new browser tab, log in to your Landingi account and navigate to the Dashboard of the landing page.
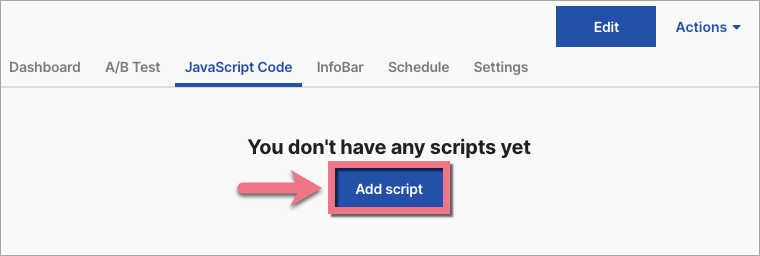
2. Go to the JavaScript Code tab and click Add script.
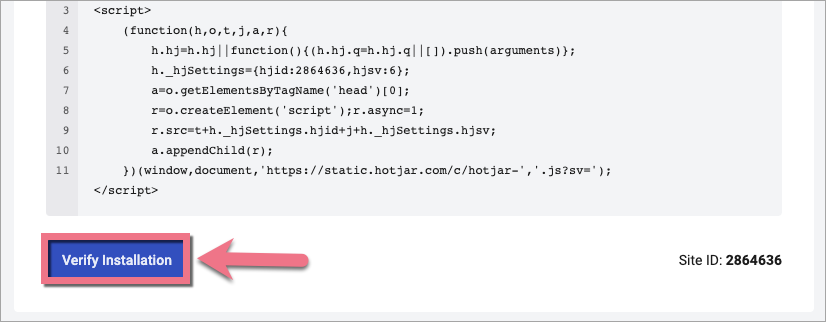
3. Name (1) your script and paste the code in the Content (2) field. Choose the Head (3) position on the Main page (4). Then click Add.

4. Go back to your Hotjar account. Click Verify Installation.
After successful verification, you will see the installation confirmation.
From now on, Hotjar will collect information about user behavior on your landing page, generate heatmaps, and provide recordings from sessions.
IMPORTANT: While using Hotjar, you may come across some unexpected special characters on your landing page. This is not an error — it’s only due to a suppressing data feature that is enabled on your Hotjar account (find out more here). It is designed to protect data privacy. Your landing pages, however, keep displaying correctly to visitors.
Browse all integrations in our Integrations Catalog to see tools you can connect Landingi with.

