Product

Create, publish and optimize pages with a drag&drop, pixel perfect and mobile-friendly builder

Speed up the creation process with 400+ customizable templates for landing pages, pop-ups and sections

Track microconversions in your Dashboard and analyze events and clicks with visual map

Integrate your pages with your favorite mar-tech apps and solutions to get the flow of your campaign going

Drive sales and conversions with irresistible product displays and seamless shopping experiences

Use a reliable and secure platform that smoothly handles millions of visits

Solutions

How to generate more traffic and get more leads.

How to reach global audience with language versions of landing pages.

How to take care of your digital footprint.

How to publish non-generic, handcrafted pages.

How to manage larger volumes of pages and clients.

How to deliver personalized content to potential customers.

Resources

Master digital marketing with the help from savvy professionals and increase your website’s conversions

Guides for beginners, set-up instructions and creation tips to get started and optimize your pages

A free online course for landing page creators! Learn the secrets of high-converting pages and become an expert

Get the answers you’re looking for – contact us

Schedule a one-on-one meeting with us and learn more about the benefits of our platform

Hire a Design Expert or order an import of your existing page from other platforms to Landingi

Home Help Center InfoBar at the bottom of your page

InfoBar at the bottom of your page

TABLE OF CONTENT

InfoBar is a thin bar that appears at the bottom of the landing page every time the user visits it the first time (and as long as they won’t close it). The bar must be defined for each landing page separately. You can use it to display information such as your privacy policy, new deals, or to promote your other services.

Privacy policy

If you want to redirect the user to your privacy policy, you need to create another landing page with the policy and link it to InfoBar’s button. You can publish the page to a URL with a path, for example, www.mypage.company/privacypolicy.

Setting up the InfoBar

When the user clicks on the close button, a cookie file called infobar-close (Necessary type) is saved in the browser and is valid for one month. This way, the users won’t see the bar for the next month, even if you re-enable the bar or edit it.
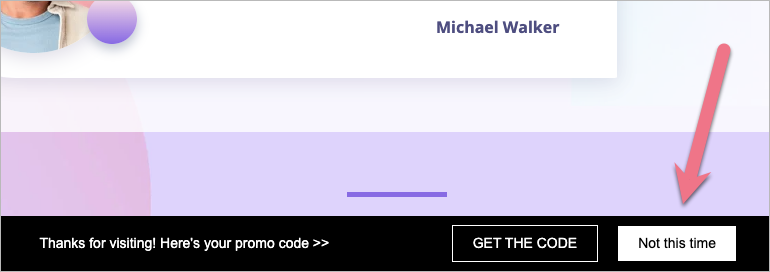
1. Navigate to the Dashboard of your landing page and go to the InfoBar tab.

2. Fill out the fields: Bar text (1) and Agree / close button (2). You can use the additional button (3) to redirect users to a different page (URL address).
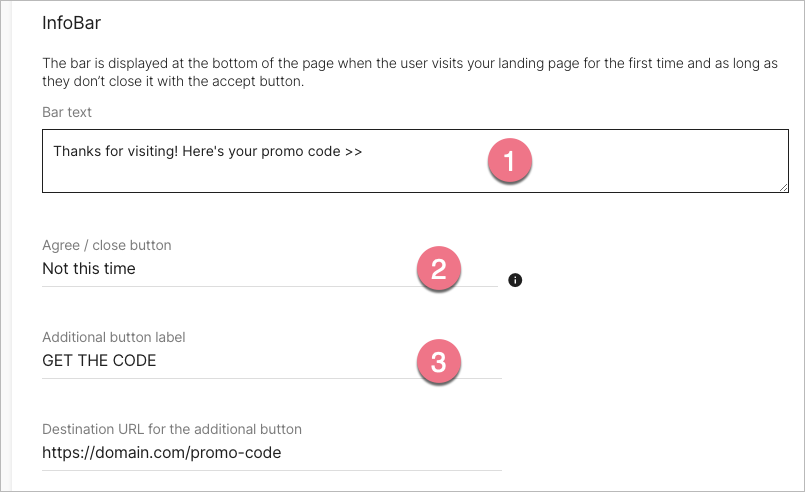
3. Choose your theme: dark or light. Then Save changes.

The InfoBar will be displayed on your landing page right away. There’s no need to publish your landing page again. From now on, when users click on the close button, cookies will be saved in their browser.

Related articles

Read Landingi reviews on G2