OneSignal is the market leader in customer engagement, powering mobile push, web push, email, and in-app messages for marketers and developers. In this guide, you will learn how to integrate it with your landing page in Landingi to send push notifications to your visitors.
Enable custom code in OneSignal
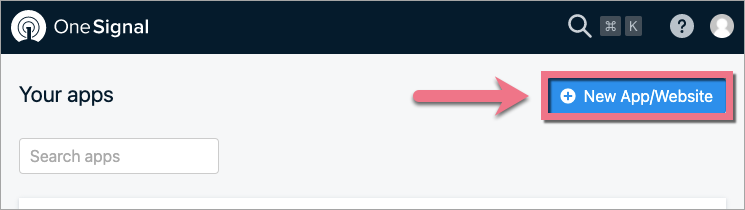
1. Log in to your OneSignal account.
2. Click New App/Website.
3. In the Name of your app or website field, enter your landing page domain (1). Choose Web (2) as the platform. Then click Next: Configure Your Platform.

4. Select Custom code as the type of integration.

5. Enter the name of your landing page in the Site Name field (1) and its URL address in the Site URL field (2). Then click Save.

6. Copy the appID.

Install the code in Landingi
1. Navigate to the Dashboard of your landing page.
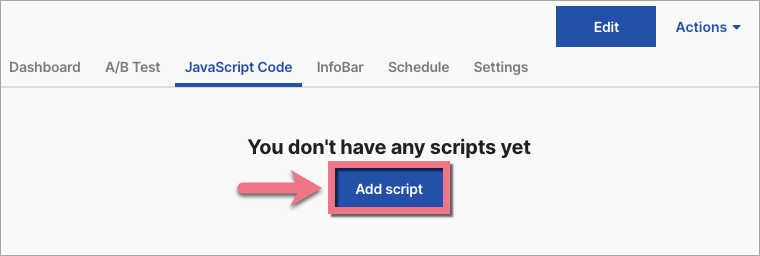
2. Enter the JavaScript Code tab and click Add script.
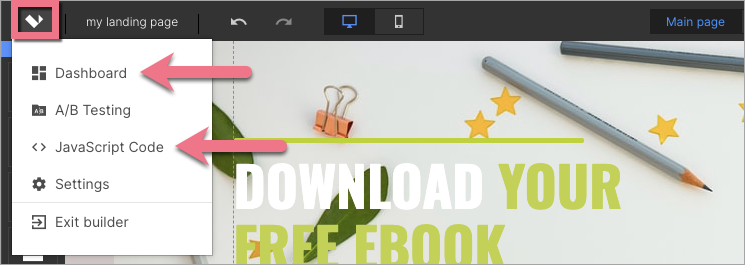
You can enter the Dashboard and JavaScript Code tab also from the editor:
3. Below, you will find the code that you need to copy and paste.
REMEMBER: Customize the code for your landing page. Change the values of the following parameters:
- (1) appID;
- (2) subdomainName (label for your landing page);
- (3) actionMessage (notification);
- (4) acceptButtonText;
- (5) cancelButtonText.

Customize and copy the following code:
<script src="https://cdn.onesignal.com/sdks/OneSignalSDK.js" async=""></script>

<script>

var OneSignal = window.OneSignal || [];

OneSignal.push(function() {

OneSignal.init({

appId: "??????????????????",

subdomainName: "your_label", /* The label for your site that you added in Site Setup mylabel.os.tc */

promptOptions: {

 /* actionMessage limited to 90 characters */

actionMessage: "We'd like to show you notifications for the latest news and updates.",

/* acceptButtonText limited to 15 characters */

acceptButtonText: "ALLOW",

/* cancelButtonText limited to 15 characters */

cancelButtonText: "NO THANKS"

}

});

OneSignal.showSlidedownPrompt();

});

</script>
4. Name (1) your script and paste the customized code in the Content (2) field. Choose the Head (3) position on the Main page (4).
Save by clicking Add.

Now, you can create and send push notifications. Read OneSignal guide on how to send push messages.
Browse all integrations in our Integrations Catalog to see tools you can connect Landingi with.

