As the owner of an account, you can add users with limited access to some features of the platform.
What are user permissions
The table below specifies the user permissions for all plans excluding Agency. You can learn more about users for the Agency plan here.

How to add a user
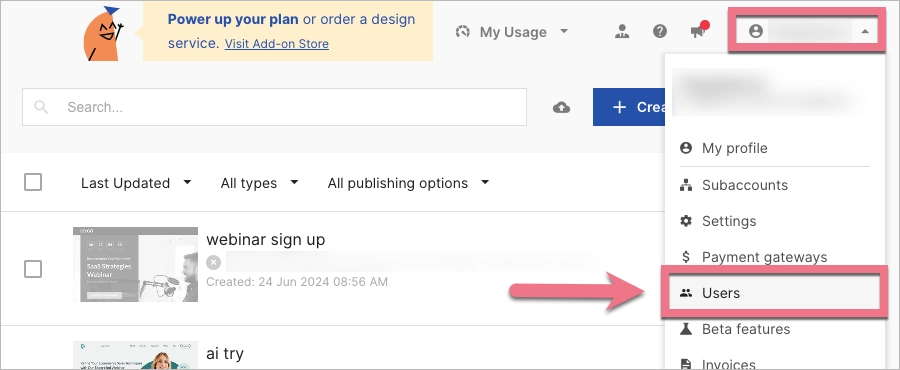
1. Log in to the Landingi account as the owner, click on your profile in the upper panel, and then go to the Users tab.
2. Click Create new.

3. Fill out the fields: enter the name and email address of the user. Choose the user type. Then create a password for the new user to log in. Confirm by clicking Create user.
A new user will receive an email containing their login credentials and can start using the platform immediately.

How to manage users
In the Users tab, you can manage your users: add new, edit (1), or delete (2) them.

When a user uses the Two-Factor Authentication, you will see the 2FA (3) label next to its name. The account owner and admin can disable the 2FA (4) for their users.


