Last month, we presented an article with the written information from our live webinar. Today we will follow up on that idea to tell you more about Landingi lightboxes and pop-ups.
For those of you who would prefer to watch the webinar but have yet to, here is a link to our presentation.
Let’s start with the basics.
What is a lightbox?
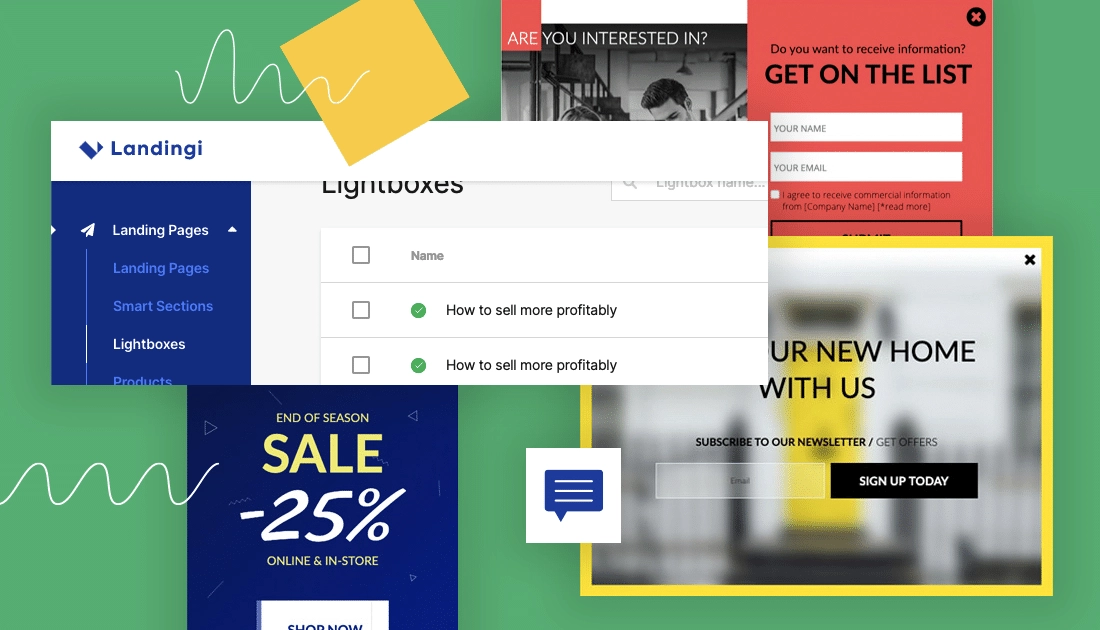
The terms “lightbox” and “pop-up” are often used interchangeably, and in many cases, they refer to similar concepts. And although they are pretty similar to each other, at least at Landingi, they are not the same thing.
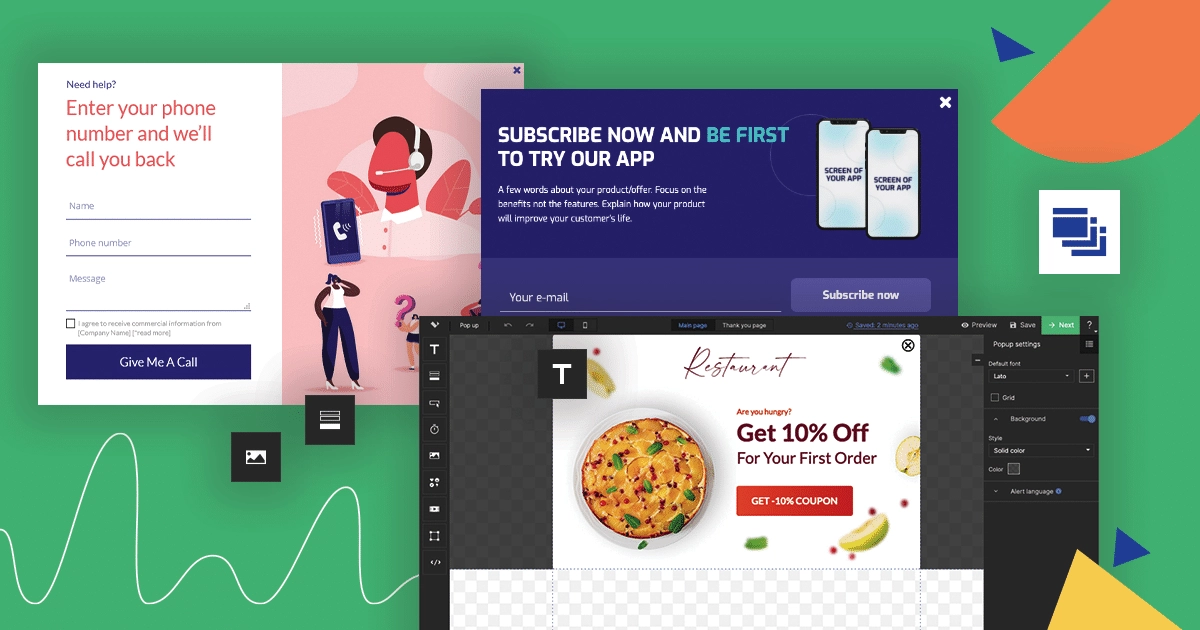
A lightbox is a graphical element that appears on a webpage, typically as a window or a box. It draws attention to specific content or prompts users to take action. When a lightbox is triggered, it usually darkens or blurs the background page, bringing the focus to the content within the lightbox.
Lightboxes can serve various purposes, such as displaying additional information, capturing email addresses for newsletter subscriptions, presenting special offers or promotions, providing login or registration forms, showing image galleries, or requesting user feedback.
They are commonly used in website design, e-commerce, marketing campaigns, and user interactions. The content inside a lightbox can include text, images, videos, forms, buttons, or any other interactive elements.
The user triggers the Landingi lightboxes, always. They never appear on their own without a specific user action. Many different elements can be used as a lightbox trigger.
- Button
- Image
- Icon
- Text
Of course, they must be informative enough for the user to know that some additional content/information is “hidden” underneath.
Make your sections smartable and let go of mundane manual tasks with Smart Sections! An easy way to manage bulk changes.
How to create a lightbox?
Step-by-step instructions on how to create a lightbox at Landingi can be found here, but in short:
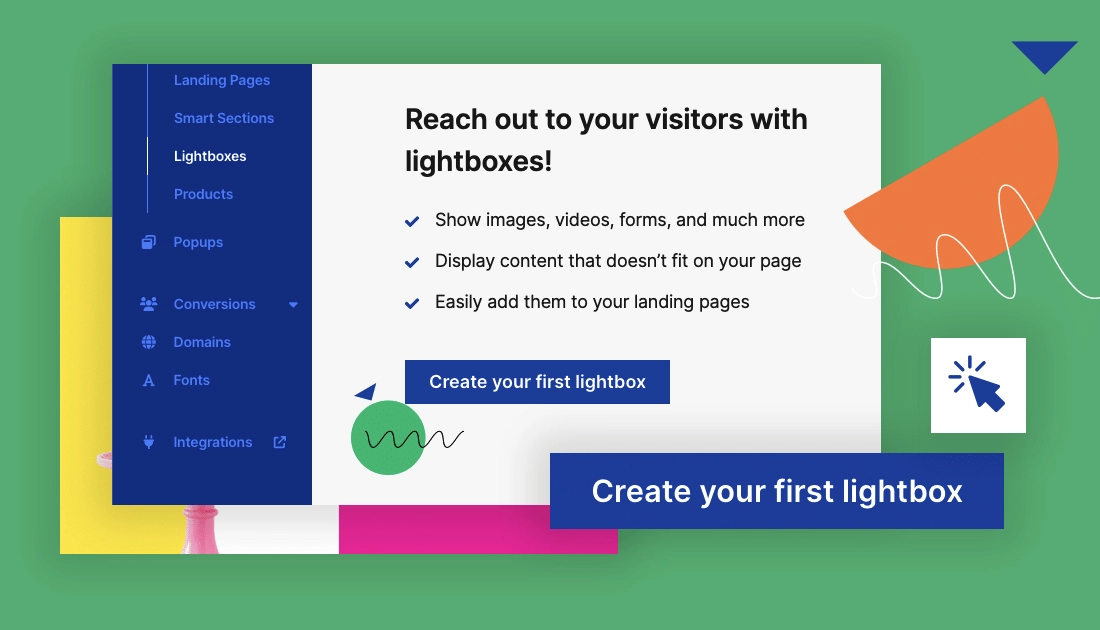
1. Go to the Lightbox tab in your Landingi dashboard and click “Create a lightbox”
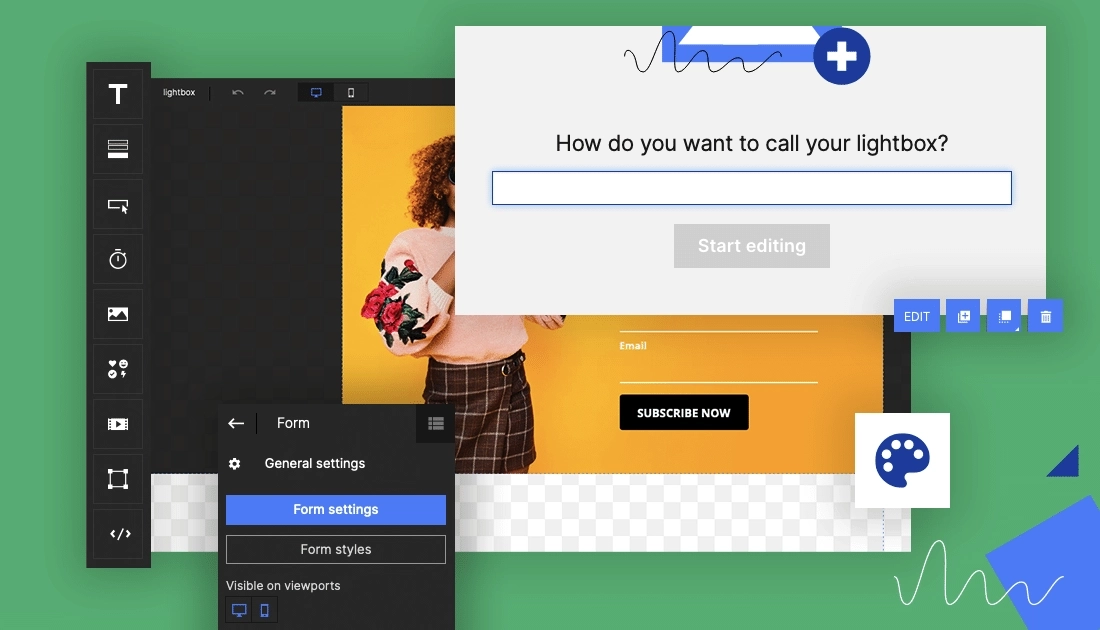
2. Name your Lightbox, and in the editor, use all the available widgets you want for your new project. Creating a lightbox is very similar to creating a landing page section.
As mentioned above, you can use different elements to trigger a lightbox. More details on that subject can be found here.
Regardless of the element of the landing page you will choose, each will have an additional option in the right-side menu called “Click action”.
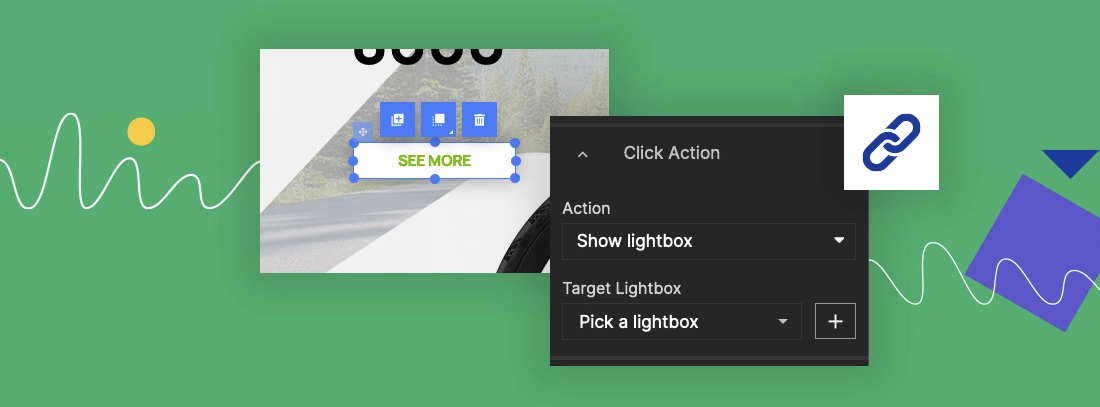
You can select a lightbox feature and a specific lightbox from the list if you have more than one.
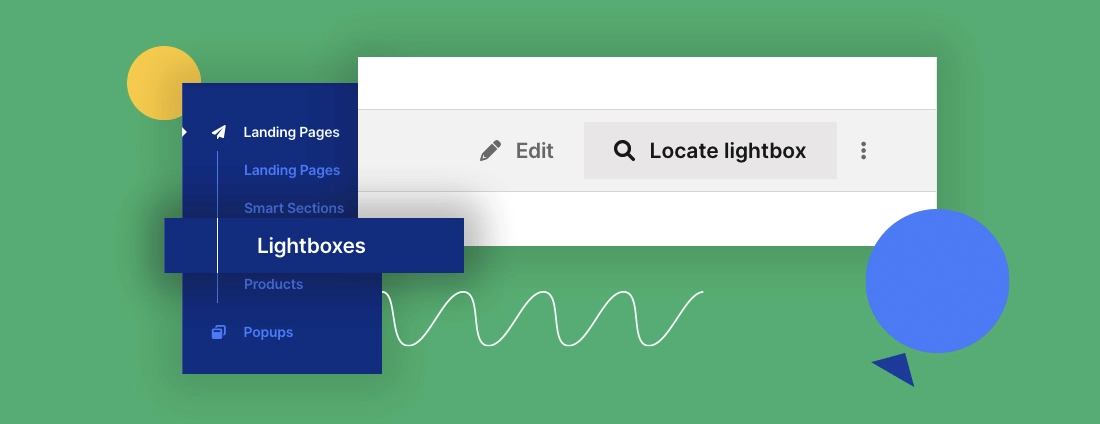
Once the lightbox is created and used on a specific page or pages, you can use it on more than one page. In the lightbox dashboard, you can easily find out where.
Although lightboxes can contain forms, I recommend against such use on your pages. This is because a lightbox (unlike a pop-up) is always triggered by user intention. That means there is a risk that the user will not act, they will not see your form, and they will not convert.
Important lightbox information:
If you use the form on the lightbox, please remember that (unlike the pop-up) it will use the landing page’s “Thank You page”. That means that if you use the same lightbox on different landing pages, the TYP your visitor will see will always be different, even though the same lightbox was used.
It also means that if the lightbox is used for micro-conversion (a different, less important conversion goal than the one on the landing page), the TYP presented might not make any sense if it is designed with the main conversion goal instead.
For example. The landing page invites you to sign up for a webinar, and the “thank you page” and its content reflects that fact. If your lightbox has a simple form inviting for a newsletter sign-up, the “thank you page” above might not make any sense for those who signed up.
Because the lightbox uses the same TYP as the page, all conversions are counted together, and the lightbox does not have its own conversion dashboard.
Using the lightboxes to enrich your page – offer, product description, etc. – with additional information is a much better option.
The most popular purposes of lightboxes are:
- Images display
- Video display
- More details about products
- Privacy Policy or GDPR information
- Forms and funnels
- More content that doesn’t fit on a page
Additional pictures or more specific details that may not be super important for most visitors or when the sheer amount of the information you wish to provide for your users could make the landing page clattered. You can publish them on the lightbox. This way, they are always available at a user’s request, but at the same time, they will not influence the “CTA flow” you created on your page. Additionally, the lightboxes on the page make it look a lot more interactive than just a simple, one-page creation.
Get 111 Landing Page Examples—The Ultimate Guide for FREE
What is a pop-up?
A pop-up, also known as a pop-up window or simply a pop-up, is a graphical user interface (GUI) element that appears on top of the current window or webpage. It typically emerges suddenly and displays additional content or information, often in a smaller and separate window. Pop-ups are commonly used in computer software and web browsers to provide supplementary information, notifications, or interactive features.
The important differences between the pop-ups and lightboxes at landingi are three:
- The pop-up trigger is automatic (unlike with the lightbox) and can be activated through the following “events” on the page:
- time spent on the website – set the time after which the pop-up will be displayed to the user,
- scroll down – the pop-up will be displayed when a user scrolls down a page by a percentage of the page you specified,
- exit intent – the pop-up will be displayed when the user changes the cursor position to leave the site,
- click on the element – the pop-up will be displayed when the user clicks on the item you specified.
- The pop-up has its own dashboard and statistics. Unlike the lightboxes, the pop-ups have their own. There, you can learn about the number of views, the number of leads collected, and the conversion rate (if you use a form).
- If you like the use of the Landingi editor and the flexibility it gives you to turn your ideas and projects into a digital reality, you will love the fact that you can use and publish Landingi popups on external websites, for example, those created in WordPress.
How to create a pop-up?
Step-by-step instructions on how to create a pop-up at Landingi can be found here, but in short:
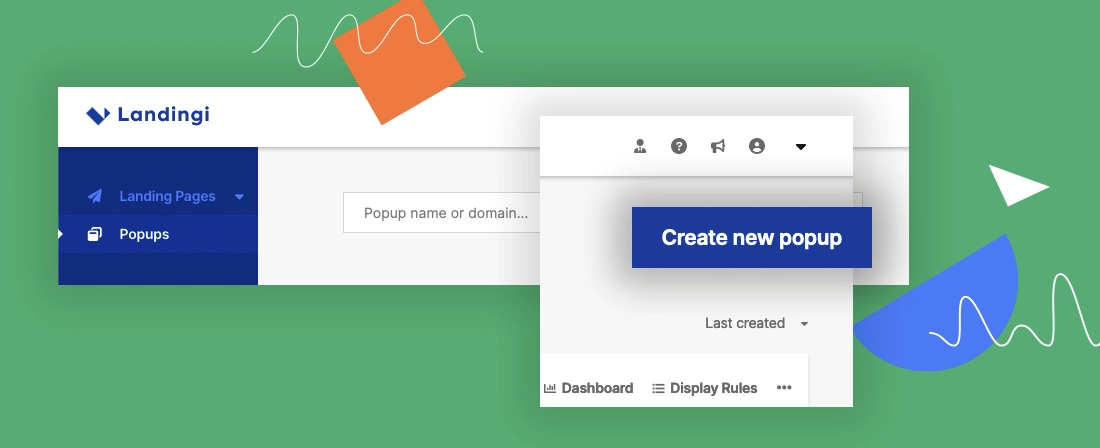
1. Go to the Popups tab in your Landingi dashboard and click “Create a popup”
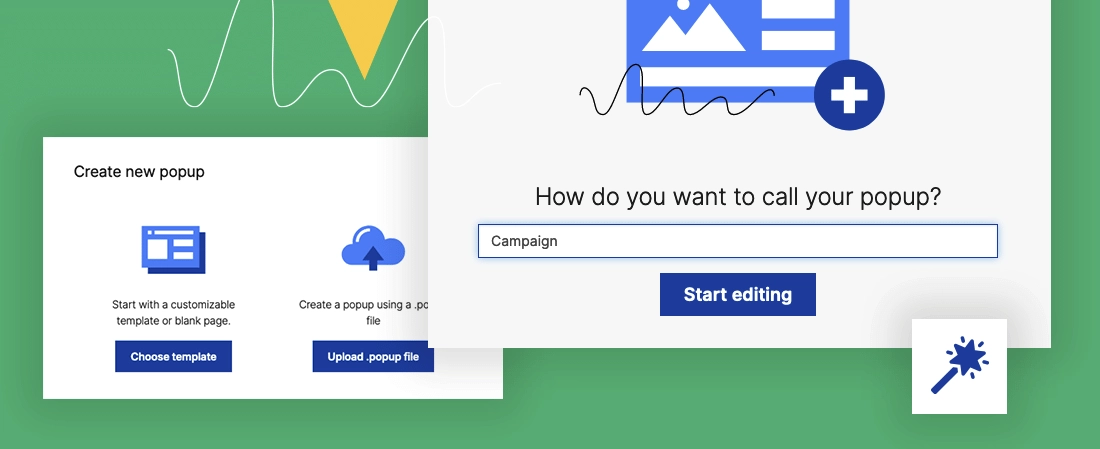
2. Choose a template or work from scratch.
3. Give your pop-up a name and click on Start editing.
Once the pop-up is created, choose where it should show and when. For more details, follow this instruction.
The use of lightboxes is fairly simple, and since they show up with a user’s consent, there is not much you can do wrong here.
Important pop-up information:
Unlike the lightbox (as I mentioned above), the pop-up has it’s own “thank you page”, independent from the landing page itself. That is why the pop-ups have separate dashboards. This will allow you to understand better what is happening on your page, how many visitors converted using the main goal, and how the micro-conversion worked. The fact that the visitor will convert using the pop-up will not stop them from staying on your page and proceeding with the main CTA. As I mentioned, that is not the case if you use the lightbox.
Pop-ups “dont’s”!
While popups can be helpful in certain contexts, there are situations where they should be avoided.
Here are some cases when it is generally recommended not to use popups:
- Mobile Devices: Popups can be particularly problematic on mobile devices due to their limited screen space. They can obscure content, be challenging to close on smaller screens, and disrupt the user experience. It is often better to use alternative methods, such as banners or inline messages, that don’t interfere with the main content.
- Critical Content: If the information or action within the popup is crucial for the user to proceed, it should be incorporated directly into the main interface rather than using a popup. Important content should be easily accessible and visible to users without relying on additional windows.
- Excessive or Intrusive Advertising: Popups that serve intrusive advertisements can be disruptive and negatively impact user experience. They can frustrate visitors and create a perception of a low-quality or spammy website.
- Overuse or Poor Timing: Using popups excessively or displaying them too frequently can annoy users. Bombarding visitors with multiple popups can make them feel overwhelmed and compelled to leave your website.
- Unnecessary Data Collection: Requesting excessive or unnecessary personal information through a popup can raise privacy concerns and discourage users from engaging. Respect user privacy and only request essential information when absolutely required.
- Disrupting User Workflow: Popups interrupting or disrupting user workflows can be frustrating. For example, displaying a popup immediately after a user starts performing an action or starts to read the information on the website can cause annoyance. Ensure that popups are presented appropriately and allow users to complete their intended tasks before appearing.
Remember, the user experience should be a top priority when deciding whether or not to use popups. Assess the potential impact on usability, accessibility, and engagement before implementing them on a website or application.
To summarize:
Landingi pop-ups and light boxes are similar to each other. The pop-ups give you more freedom regarding usage (where) and information (data collection, statistics, etc.). The lightboxes are fantastic for expanding on additional information for the visitors concerning products or a service offered.
