Product

Create, publish and optimize pages with a drag&drop, pixel perfect and mobile-friendly builder

Speed up the creation process with 400+ customizable templates for landing pages, pop-ups and sections

Track microconversions in your Dashboard and analyze events and clicks with visual map

Integrate your pages with your favorite mar-tech apps and solutions to get the flow of your campaign going

Drive sales and conversions with irresistible product displays and seamless shopping experiences

Use a reliable and secure platform that smoothly handles millions of visits

Resources

Master digital marketing with the help from savvy professionals and increase your website’s conversions

Guides for beginners, set-up instructions and creation tips to get started and optimize your pages

A free online course for landing page creators! Learn the secrets of high-converting pages and become an expert

Get the answers you’re looking for – contact us

Schedule a one-on-one meeting with us and learn more about the benefits of our platform

Home Help Center Calendly integration

Calendly integration

TABLE OF CONTENT

Calendly is an appointment scheduling software, which you can embed on your site via HTML code. This guide will walk you through integrating your landing page with Calendly to allow your users to schedule a meeting with you easily.

NOTE: This integration uses the HTML widget which is not available with the Core plan.

Get your code from Calendly

1. Log in to your Calendly account.

2. In the Event Types tab, click on the gear icon near your events and then click Add to Website.

3. Choose the embed type – in our example, we selected Inline Embed. Then click Continue.

4. Adjust your calendar look (1) and copy the code (2).

5. If you want to add more meeting options, click New Event Type and set up your event. Then go to the code settings.

Install the code in Landingi

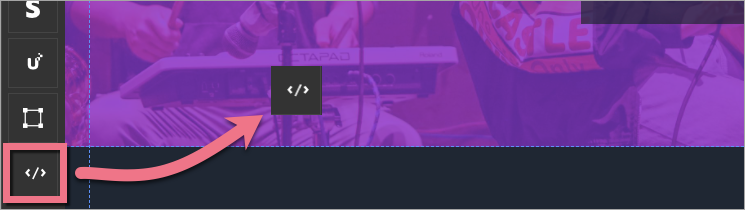
1. Log in to your Landingi account and navigate the editor of your landing page.

2. Find the HTML widget, then drag and drop it into the active area of the editor.

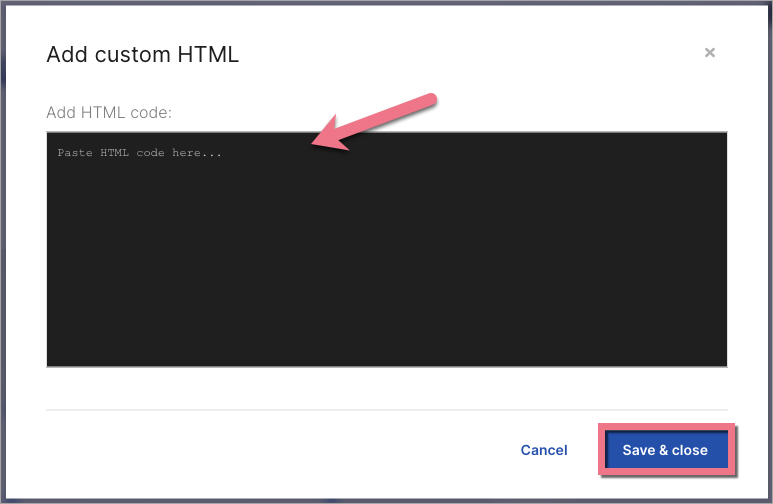
3. Double-click the HTML widget to edit it.

4. Paste the code from Calendly in the Add HTML code field. Then Save & close.

5. Publish your landing page.

See if your calendar displays correctly. If needed, go back to the editor and adjust the widget’s width and position.

NOTE: Keep in mind that Calendly is a third-party solution and is continually being developed. We do our best to keep this guide updated, but if you come across any changes in the set-up process, let us know.

Browse all integrations in our Integrations Catalog to see tools you can connect Landingi with.