One of the publishing options in Landingi is our hosting. Each landing page is automatically assigned to our test domain, but you can easily change it to your own custom domain. Before assigning a custom domain to a landing page, you need to add it to your account – read how to add a domain to your Landingi account.
Assign your domain
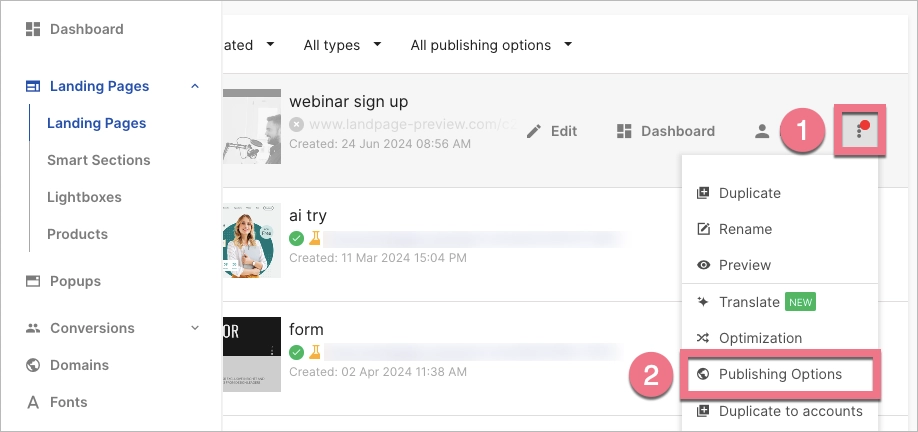
1. Navigate to the Landing pages tab and go to the Publishing Options of your landing page.

You can also access Publishing Options in the landing page Dashboard.

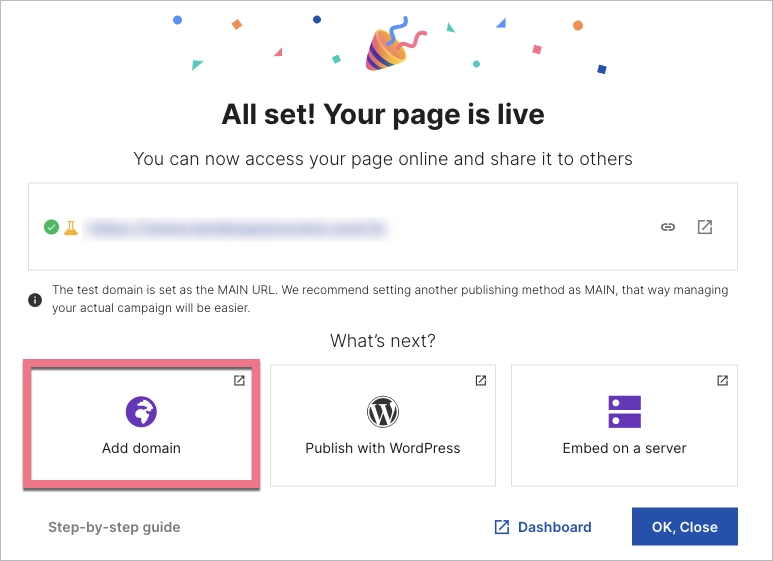
2. Select Add domain.

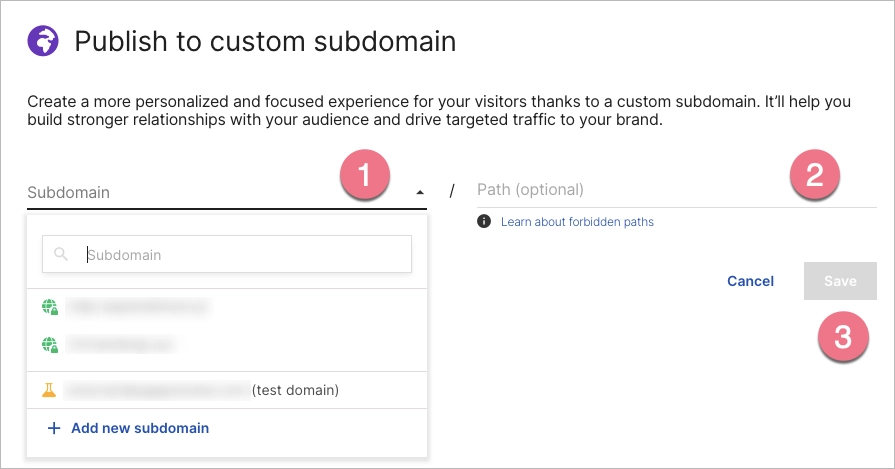
3. In the new window, select the domain you want to assign to the landing page (1) – optionally, you can add the path to the address (2) – and then Save (3). The landing page will be visible immediately under the new URL.

For one subdomain, you can add any number of paths – you can publish several landing pages under one subdomain, but in different subfolders.
404 error page
If you see the 404 page after entering your domain’s URL in the browser, it means that your domain has been redirected to Landingi servers correctly, but no landing page has yet been assigned to this URL.
