LiveWebinar is a webinar platform that offers full customization, webinars in various formats, live streaming, paid webinars, and much more. You can set up a webinar that holds up to 1000 participants. In this guide, you will learn how to integrate your form with LiveWebinar so that the registrants will be automatically added to your LiveWebinar account.
Set up a form and a webinar in LiveWebinar
If you’re setting up LiveWebinar for the first time, you need to create a form and assign it to a scheduled webinar.
1. Log in to LiveWebinar, go to Registration > Forms (1), and select Create Form (2).

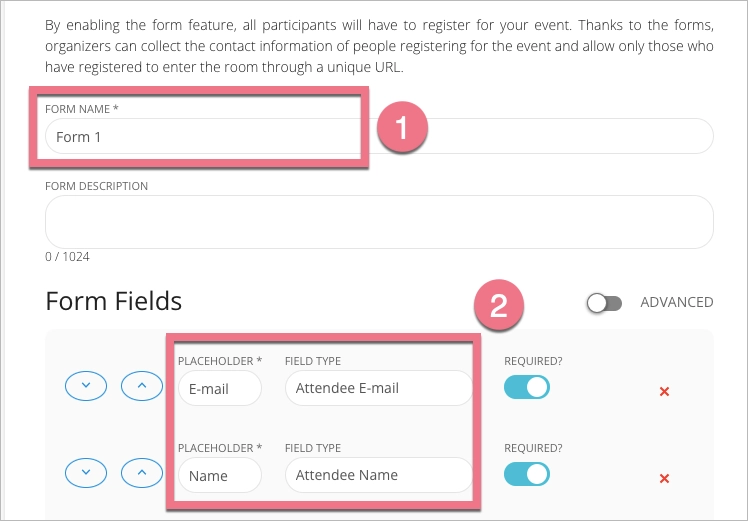
2. Name the form (1) and add the fields (2) that you’ll later connect with the form on your landing page. The placeholder is the label of the field that you’ll see in Landingi. It is required to add the Attendee E-mail field.
When you’re ready, click Create (or Update) at the bottom of the page.

3. Now, connect the form with a webinar. To create a webinar, go to the Rooms/Events (1) tab and click Schedule Webinar (2).

4. Configure the webinar and click Schedule at the bottom. The webinar name will later appear in the form settings in Landingi.
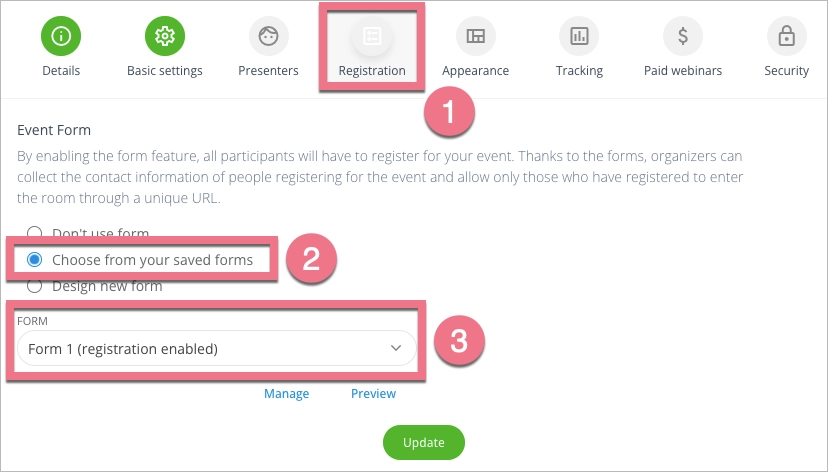
Navigate to the Registration (1) section, select Choose from your saved forms (2), and select a form (3). Click Update to save the settings.

You can always access the settings using the gear icon.

Now, log in to Landingi to set up the integration.
Integrate your form with LiveWebinar
1. Log in to Landingi and navigate to the editor.
2. Click on the form and go to its Settings.

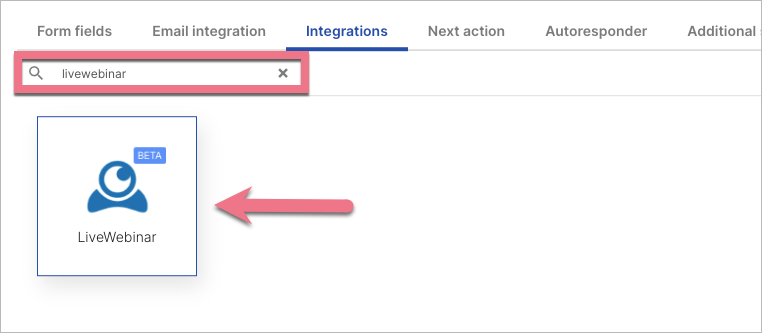
3. In the Integrations tab, select LiveWebinar. You can use the search bar to look for the integration. Type the name and press enter.

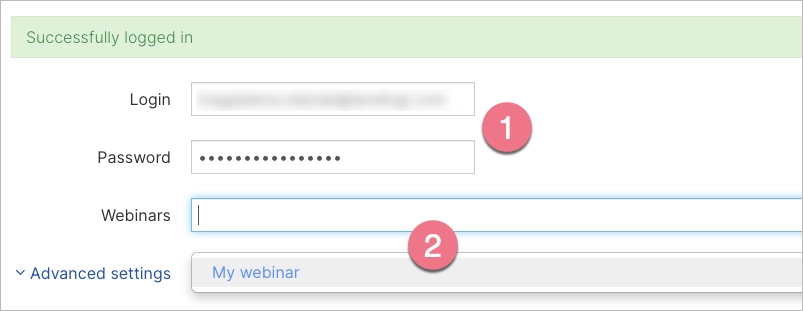
4. Log in with your LiveWebinar credentials (1). After a successful connection, select your webinar (2).

5. Connect fields with placeholder labels from LiveWebinar. If your form has more fields than you’ve added to LiveWebinar, map the remaining fields as None (the values won’t be sent to LiveWebinar, you’ll see them only in the lead details in Landingi).

6. When you’re done, click Save & close, and publish your landing page.
Fill in the form to check if the integration works correctly.
Managing registrants
To manage the submissions, access the Attendees tab. You can view the list generated by a given form in the By forms tab. Click Registrants to see the list.

Browse all integrations in our Integrations Catalog to see tools you can connect Landingi with.
