Klaviyo is a marketing automation system created for e-commerce in order to manage email communication with customers and maximize revenues from this channel. In this guide, you will learn how to integrate your landing page with it.
You can integrate your landing page with Klaviyo in two ways:
- to implement Klaviyo pop-ups and sign-up forms on your landing page using a JavaScript code, or
- to send lead data from your landing page to Klaviyo subscription lists using Zapier.
Use a JavaScript code to implement pop-ups
Get your code from Klaviyo
1. Log in to your Klaviyo account.
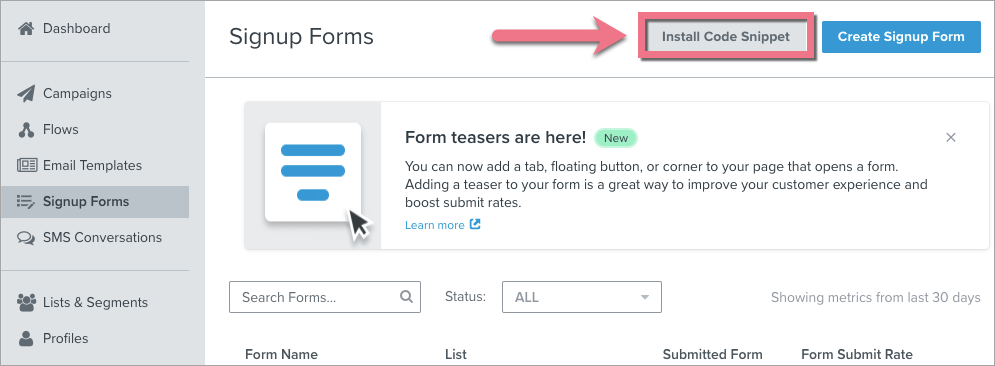
2. Navigate to the Signup Forms tab.

3. Click Install Code Snippet.
4. Copy the code (1).
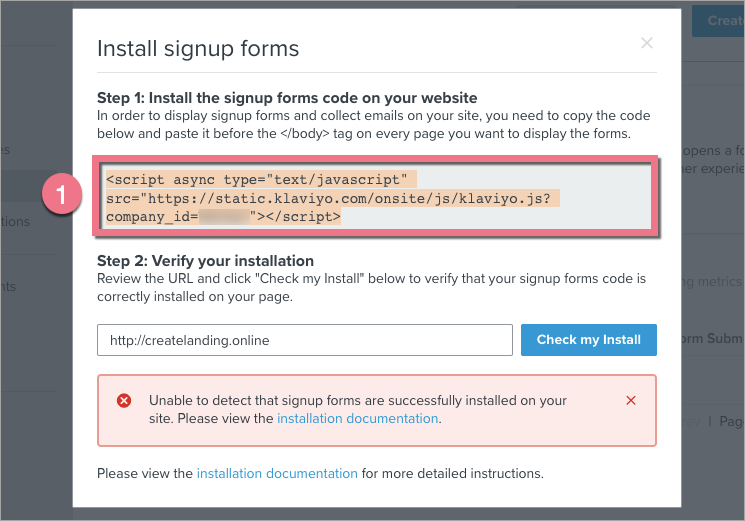
5. Do not close this window.
Install the code in Landingi
1. Log in to your Landingi account and navigate to the Dashboard of your landing page.
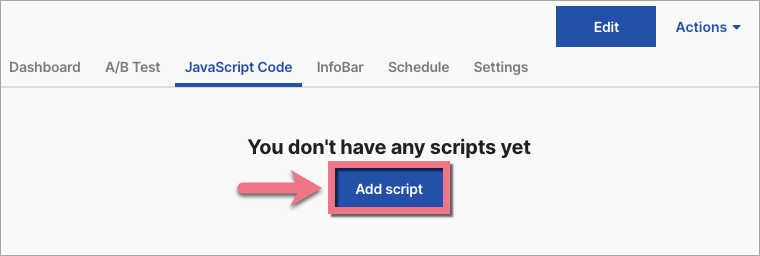
2. Enter the JavaScript Code tab and click Add script.
You can enter the Dashboard and JavaScript code tab also from the editor:

3. Name (1) your script and paste the code in the Content (2) field. Choose the Body bottom (3) position on the Main page (4). Click Add.

4. Go to the editor of your landing page and click Add custom CSS in Page Settings.

When editing, you can go back to Page Settings by clicking on the arrow:
5. Copy the following code:
.needsclick {
z-index: 999999 !important
}
6. Paste the code in the Add custom CSS window. Then click Save & close.

7. Go back to Klaviyo. Type your landing page URL address and click Check my Install (2). Once the integration has been installed correctly, a confirmation will appear.

8. Now, you can create pop-ups and signup forms that will be automatically implemented on your landing page after publishing them. Click Create Signup Forms.

9. Publish your landing page and check if everything displays correctly.

Use Zapier to send leads to Klaviyo
You can connect your landing page with the Klaviyo platform using Zapier to send leads from a landing page to your subscription lists in Klaviyo. Go to Zapier to connect Landingi and Klaviyo.
If your Landingi account is not connected to Zapier, check our guide on Zapier integration to learn how to do this.
When connecting Klaviyo and Landingi, you will need Klaviyo API Keys. To find them, click on your profile name and choose the Account tab.

Then click Settings and choose API Keys. Copy your keys.

Browse all integrations in our Integrations Catalog to see tools you can connect Landingi with.

