Adding pop-ups created in Landingi to your WordPress site can be done in a few simple steps.
Firstly, on the publishing stage, choose where to display your pop-up.
Define where exactly the pop-up will display
You can define sites, where your pop-up will be displayed, both for pages published via the WordPress plugin and for other pages powered by WordPress.
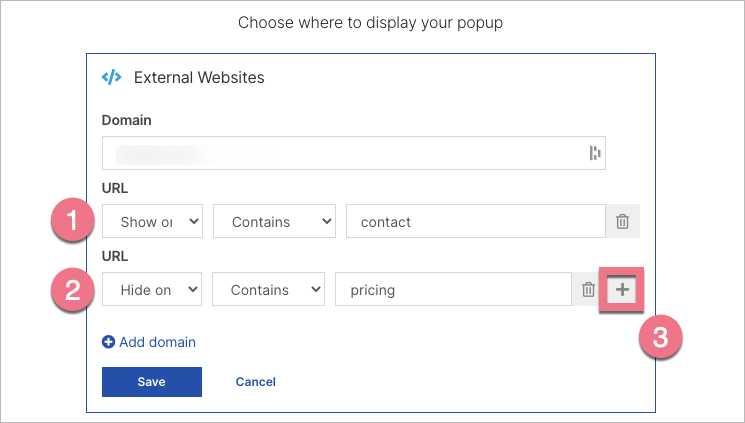
1. To display pop-ups on selected subpages, choose Contains and Show on. Type the subpage path.
2. To not display pop-ups on selected subpages, choose Contains and Hide on. Type the subpage path.
3. You can add more display rules by clicking the plus icon.
Add a pop-up to a landing page published via the WP plugin
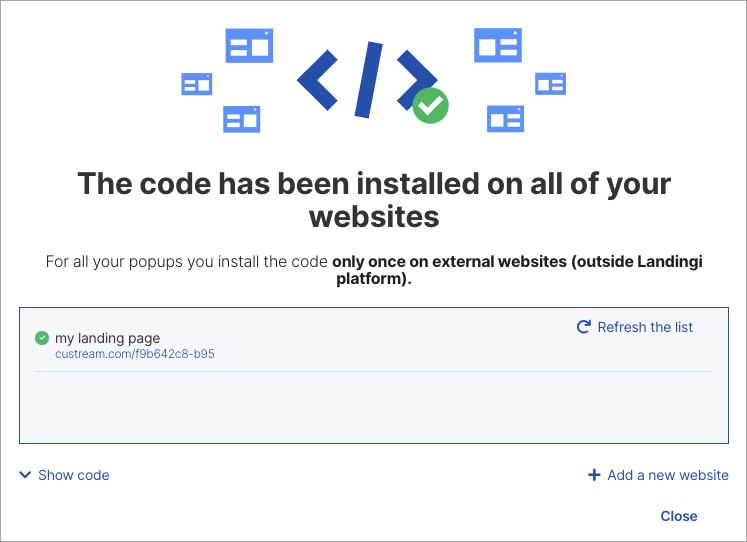
If you use our plugin (Landingi Landing Pages) and you have your landing page imported thanks to it, you do not have to do anything else – the code enabling the display of the pop-up will be added automatically in the final stage of creating the pop-up:
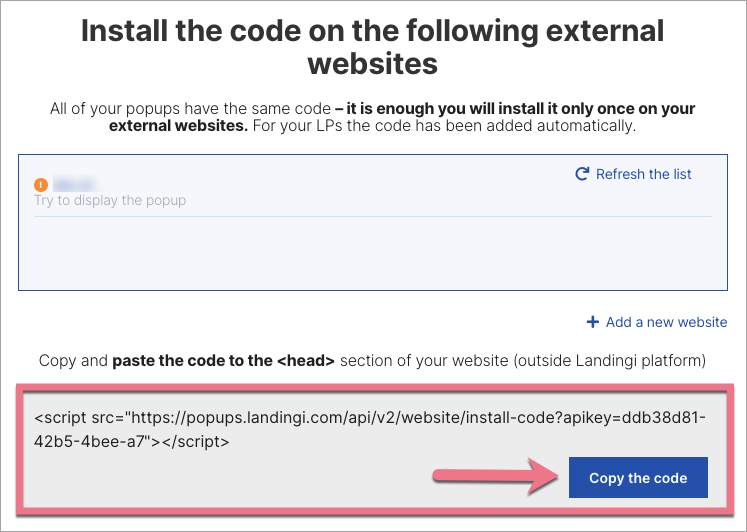
Add a pop-up to a WordPress site (specific page or all/any)
If you want your pop-up to be added to your own site (outside Landingi) powered by WordPress, take the steps indicated below.
1. On the final stage of creating the pop-up in Landingi, copy the automatically generated HTML code.
2. You need to paste the code into your WordPress theme code. Depending on the theme you use, you have access to different code editors.
Choose your theme (editor):
Classic editor (Twenty Twenty-One and older)
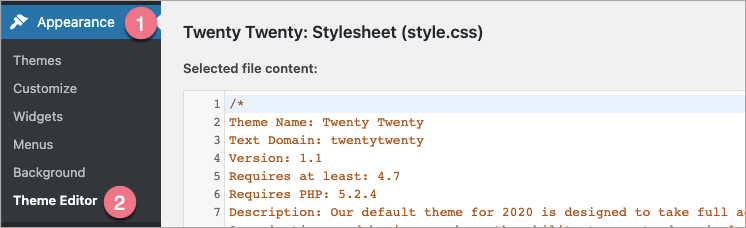
3a. Go to your WordPress dashboard. In the menu on the left, navigate to the Appearance (1) tab and click Theme Editor (2).
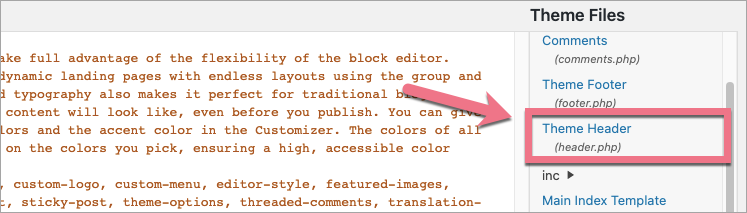
3b. You will see the window with the option to edit the theme in a source code. On the right side, click on Theme Header file (header.php).
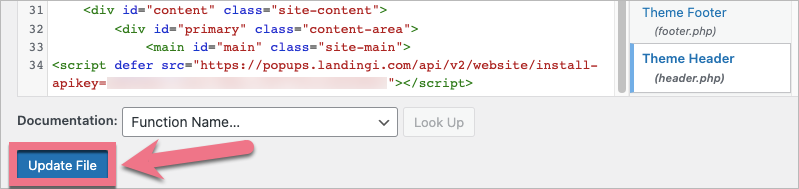
3c. After that, you will see the window with the <!doctype html> code. Paste the code generated in Landingi at the end of this section. Remember to do so before the closing tag.
3d. Click Update File.
If you want to make changes to the pop-up or its display rules, you only have to do it in the Landingi editor – it will update on WordPress automatically.
Block editor (Twenty Twenty-Two and later)
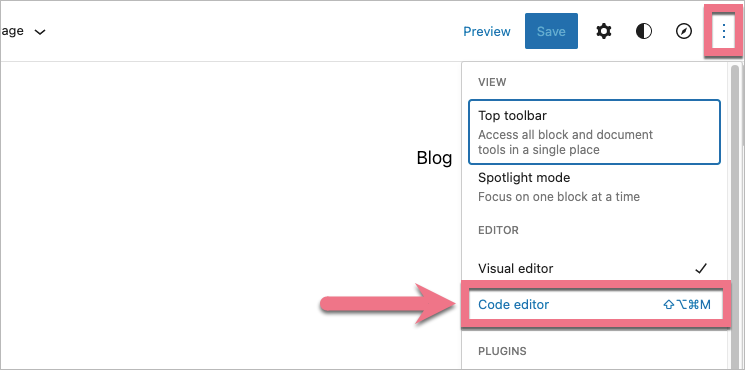
4a. Go to your WordPress dashboard. In the menu on the left, navigate to the Appearance tab and click Editor.

4b. Click Settings (three dots icon) and select Code editor.
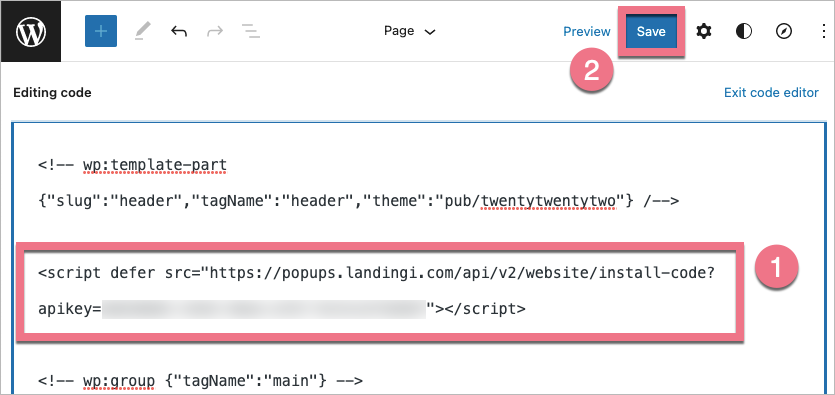
4c. Paste the code (1) under the ‘header’ section. Then click Save (2).
If you want to make changes to the pop-up or its display rules, you only have to do it in the Landingi editor – it will update on WordPress automatically.