
Creating a landing page in WordPress is crucial to building a successful online presence. In today’s digital landscape, it’s remarkable to note that, according to a notable source, “WordPress is used by 62.7% of all the websites whose content management system we know. This is 43.4% of all websites”, according to W3Techs. This statistic underscores the platform’s widespread adoption and its significance for individuals and businesses looking to establish or enhance their online footprint.
Whether you aim to gather leads, promote products, or simply direct traffic to a specific section of your website, a well-crafted landing page can make a significant difference. In this guide, we’ll walk you through the process of creating an effective landing page in WordPress in just five simple steps. We’ll cover everything from choosing and installing a theme to publishing your page. Additionally, we’ll explore how to create landing pages using popular tools like Elementor and Landingi and provide tips for building free landing pages.
Here are the five steps we will cover:
- Choosing and Installing a Theme
- Adding Pages
- Customizing
- Setting the Homepage
- Publishing Your Landing Page
So, are you looking to create a WordPress landing page but unsure where to start? Let’s go through each step to get your landing page up and running.

Lunar is almost here!

Step 1: Choosing and Installing a Theme
Choosing the right theme is the first crucial step in creating a WordPress landing page. Your theme dictates the overall look and feel of your site. WordPress offers a vast array of free and premium themes specifically designed for landing pages. To install a theme:
- Log in to your WordPress dashboard. Add a new site, if applicable.
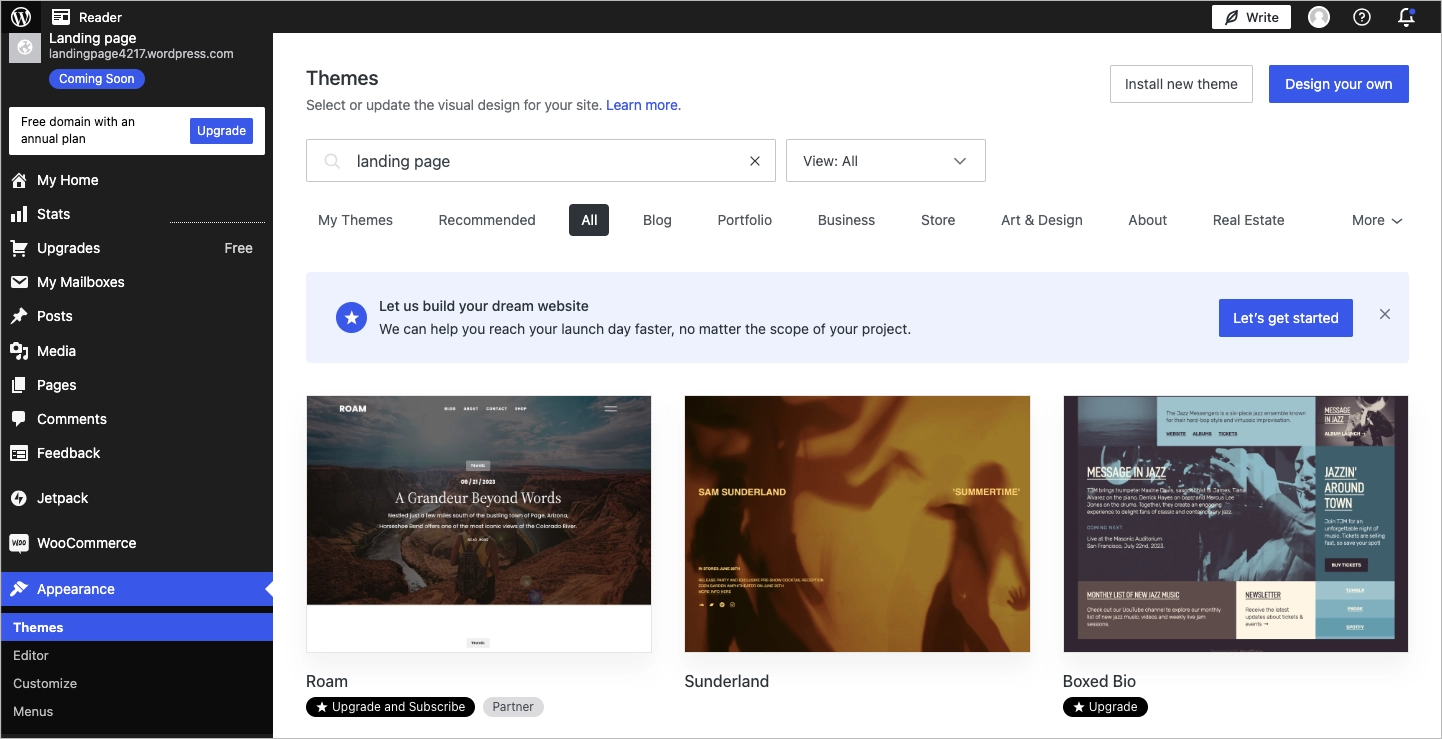
- Navigate to Appearance > Themes. If you are creating a new site, you will be promptly directed to theme selection.
- Browse through the themes or use the search bar to find one that fits your style and needs. Popular options include Twenty Twenty-Four or Attar.
- Click on the theme and then “Activate this design” to apply the theme to your site.
- Customize the theme. Give your site a name and edit the page design. You can skip this step for now or launch your website immediately.
Choosing a responsive, fast-loading, and easy-to-customize theme will set a solid foundation for your landing page.
You can create your WordPress landing page from scratch using pre-made section patterns. Simply click “Design your own” and assemble your page using patterns.
Step 2: Adding Pages
Adding pages is optional, as a good landing page should be focused on one goal and fit on a single page. However, you might want to consider creating a thank you page. To do this, follow these instructions after installing your theme:
- Go to Pages > Add New in your WordPress dashboard.
- Title your page and add any essential content, keeping the design and goal of your landing page in mind.
- Select a suitable template from the Template menu on the sidebar.
Step 3: Customizing
Customization is key to making your landing page stand out. Here’s what you can do:
- Navigate to Appearance > Customize to open the WordPress Customizer.
- Adjust site identity settings like your site title and tagline.
- Click on elements such as the layout, header, buttons, colors, and background to customize them to match your brand’s identity. Note that customization options are limited in the free WordPress plan.
- Add widgets, menus, buttons, and other elements to enhance your landing page’s functionality and user experience.
Step 4: Setting the Homepage
Set your landing page as your homepage to ensure it is the first thing visitors see. This step ensures that all traffic directed to your homepage will see the landing page you’ve crafted.
- Go to Settings > Reading.
- Choose your newly created landing page from the “Your homepage displays” dropdown menu.
- Save the changes.
Step 5: Publishing Your Landing Page
Finally, it’s time to make your landing page live. If you haven’t already launched your website, double-check all the elements to ensure everything is in place and publish your landing page:
- Review your page to ensure all elements are correctly placed and functional.
- Test your page on different devices and browsers to ensure responsiveness and compatibility.
- Click the Publish button to make your landing page live.
- Regularly monitor performance to track visitor behavior and conversion rates.
Your landing page is now live and ready to attract and convert visitors!
How to Build a Free Landing Page on WordPress?
To build a free landing page on WordPress, create a free WordPress account and explore the diversity of free themes available through your WordPress dashboard. Navigate to Appearance > Themes and utilize search terms related to your brand to find the perfect fit for your needs. Select your theme and customize it to your liking.
Incorporate essential elements such as text, images, buttons, and forms, ensuring each component aligns with your brand identity. Key aspects of an effective landing page to include are a compelling headline, supportive subheadings, visually appealing content, clear call-to-action (CTA) buttons, data collection forms, and social proof elements like testimonials.
After finalizing your page and ensuring it’s fully optimized, publish it. You can then designate it as your homepage by adjusting your Settings > Reading preferences to your new landing page. The final step involves promoting your landing page across various channels, such as social media, email marketing, and online advertisements, to attract and engage your target audience.
Tips for Creating an Effective Free Landing Page
- Keep it simple: Focus on a clear and concise message. Avoid cluttering landing pages with too much information.
- Make it visually appealing: Use high-quality images and maintain a consistent color scheme and typography.
- Highlight the benefits: Clearly explain the benefits of your offer to persuade visitors.
- Test and iterate: Use A/B testing to experiment with different headlines, images, and CTAs to see what works best for your custom landing page.
How do I Make a Landing Page in WordPress For Free?
To make a landing page in WordPress for free, follow these five instructions:
- Choose a Free Theme. To create landing page for free, start by selecting a free theme that suits your landing page design. Go to your WordPress dashboard, navigate to Appearance > Themes, and search for themes optimized for landing pages. Once you find a theme you like, install and activate it.
- Use the Gutenberg Editor or a Free Plugin. Next, decide whether to use the Gutenberg editor or a free page builder plugin. Gutenberg is the default WordPress editor that uses blocks to build pages and is suitable for creating basic landing pages. Builder plugins such as Elementor or Landingi offer advanced design capabilities. To install them, you can go to Plugins > Add New, search for the plugin, install it, and then activate it. However, although these plugins are free, it’s important to note that you need to upgrade to a higher WordPress plan to install them.
- Create and Customize Your Landing Page. Create a new page by going to Pages > Add New and give it a title like “Landing Page”. If your theme supports it, select a full-width layout to give you more design flexibility. Use the Gutenberg editor to add various blocks such as headings, paragraphs, images, and buttons to build your page. In a builder plugin, drag and drop elements like headings, images, text blocks, buttons, and forms to design your page, and customize each element using the settings on the left panel.
- Add Essential Elements. Add essential elements to your landing page, such as call-to-actions (CTAs) like buttons or links that guide users to take a specific action (e.g., Sign Up, Learn More, Download Now). Include forms using contact form plugins such as Contact Form 7 or WPForms Lite to create and embed forms. You can also create a new “Contact” page with the default WordPress contact form. Use high-quality images that resonate with your audience, and consider adding social proof elements like testimonials, reviews, or client logos to build trust.
- Publish and Monitor Your Landing Page. Once you’re satisfied with your design, click the Publish button to make your custom landing page live. If you want this landing page to be your site’s homepage, go to Settings > Reading, and choose your new landing page from the dropdown menu. Regularly monitor the performance of your landing page using tools like Google Analytics or EventTracker and make necessary adjustments to improve user engagement and conversion rates.
How to Create a Landing Page in WordPress Using Elementor?
To create a landing page in WordPress using Elementor, first install and activate the Elementor plugin, then create a new page and choose to edit with Elementor, where you can select a pre-designed template or start from scratch, drag and drop elements to customize your page, and finally, publish the page.
Follow these 6 steps to create a landing page using Elementor:
- Install the Elementor Plugin. Log in to your WordPress dashboard and navigate to Plugins > Add New, then search for “Elementor” in the search bar, click Install Now, and then Activate.
- Create a New Page and Edit With Elementor. To begin creating your new page, navigate to Pages > Add New in your dashboard and give your page a title that encapsulates its purpose, like “Welcome” or “Get Started.”
- Design Your Landing Page. Start by familiarizing yourself with its interface, where the left panel offers various elements for use, and the right side shows a live preview of your work. You can add new sections, choose their structure, and easily drag and drop widgets like Headings, Images, and Forms to customize your page. Additionally, make use of Elementor’s pre-designed templates to quickly create a landing page that fits your needs, further customizing it to align with your branding.
- Add Essential Elements. Use a Heading widget for your main headline and supplement it with a Subheading or Text Editor widget for extra context. To enhance your message, insert high-quality images with the Image widget and embed videos with the Video widget. Don’t forget to include Button widgets for CTAs, use the Form widget for lead capture, and add social proof through Testimonials, Reviews, or client Logos to build trust and engagement.
- Optimize for Mobile. Activate the responsive mode in the Elementor panel and fine-tune settings for Desktop, Tablet, and Mobile views, ensuring your landing page is effortlessly navigable across all devices.
- Preview and Publish. Click the eye icon and check for any layout issues or missing elements. Once you’re satisfied, publish your page by clicking the green Publish button, and it will be live to attract visitors. Optionally, set it as your homepage by going to Settings > Reading in your WordPress dashboard, selecting “A static page,” choosing your landing page from the dropdown menu, and saving the changes.
How to Create a Landing Page in WordPress For Lead Generation?
To create a landing page in WordPress for lead generation, focus on compelling headlines, simple and effective forms, engaging visuals, trust signals, user experience optimization, A/B testing, integration with email marketing, and performance tracking. That way, you can create a WordPress landing page that effectively generates leads and supports your business growth.
Firstly, define a clear and compelling headline. This headline should immediately communicate the primary benefit or solution your offer provides. It needs to grab attention and encourage visitors to stay on the page. A strong subheadline can follow, offering additional details or supporting information.
The lead capture form is central to your landing page. Position it prominently, ideally above the fold, so it’s one of the first things visitors see. The form should be simple and ask only for essential information, typically a name and email address. More fields can be added if necessary, but remember that simpler forms usually have higher conversion rates. Use a strong call-to-action (CTA) on your form button. This CTA should be action-oriented and benefit-driven, such as “Get Your Free Guide” or “Start Your Free Trial.”
Visual elements like images or videos can significantly enhance engagement. Use high-quality visuals that are relevant to your offer and can help illustrate its value. A short, engaging video can be particularly effective in explaining the benefits of your offer and encouraging conversions.
Trust signals are another essential component. Include testimonials from satisfied customers, client logos, security badges, or any form of social proof that can build credibility and trust. Showing that others have benefited from your offer can reassure visitors and increase their willingness to provide their information.
Optimizing your landing page for user experience is crucial. Ensure that the page loads quickly, is mobile-responsive, and has an intuitive layout. Use plenty of white space to avoid overwhelming visitors and guide their attention to the form.
Use A/B testing to refine your landing page. Create multiple versions of your page with slight variations in headlines, images, CTAs, and form fields. Test these versions to see which performs best. This ongoing optimization can significantly improve your conversion rates over time.
Consider integrating your landing page with an email marketing platform. This will allow you to automate follow-up emails and nurture leads over time, moving them through your sales funnel.
Track your landing page performance using analytics tools. Monitor key metrics such as the number of visitors, conversion rate, bounce rate, and time on page. This data will help you understand how well your landing page is performing and identify areas for improvement.
How to Create a Landing Page in WordPress Using Landingi?
To create a landing page in WordPress using Landingi, begin by creating an account in Landingi and designing your landing page using a drag-and-drop editor specifically made for creating landing pages. The platform also provides an AI Assistant that assists in automating content generation, simplifying the process of creating impactful landing pages. In Landingi landing page builder, you can select from 11 customizable widgets (such as sections, shapes, forms, payment gateways, buttons, and counters), numerous options, page settings, additional JavaScript, HTML, and CSS codes, as well as over 170 integrations with MarTech apps. Once your landing page is ready, you can simply import it to WordPress using a dedicated landing page plugin.
Follow the step-by-step guide below to learn how to build your first landing page with Landingi and how to integrate it with WordPress.
Step 1: Log in to your Landingi account
From your dashboard, click “Create new landing page”.
If you don’t have a Landingi account, sign up for a free 14-day trial here.

If you have a .landingpage file, you can upload it. Otherwise, we will assume you are creating a new landing page.

Step 2: Choose the template you’d like to use
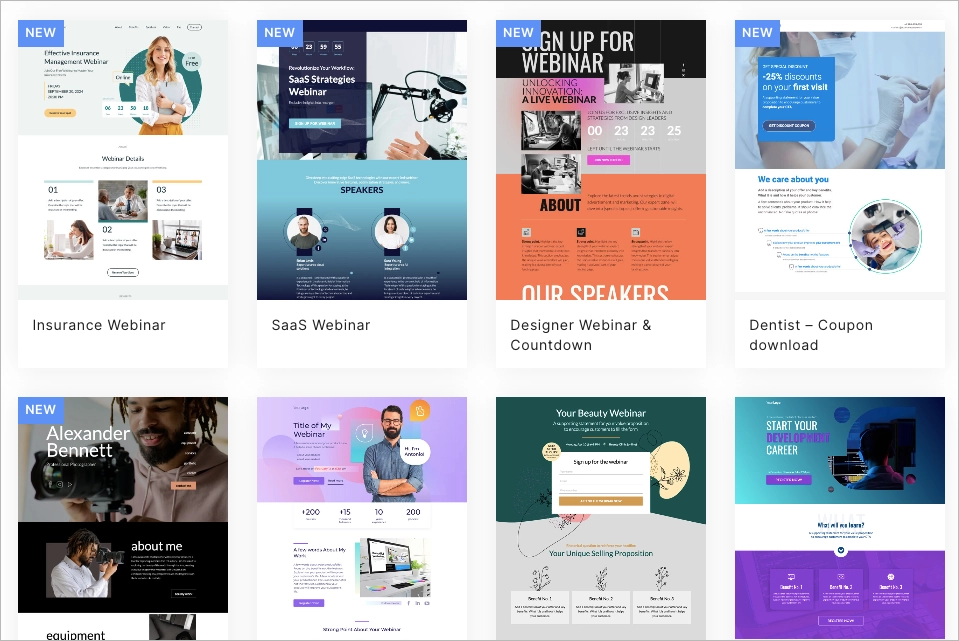
You can pick from over 400+ templates designed by professionals to capture leads effectively. Templates can be filtered through goals, funnel steps, or industries. Choose the design that you like the most, hover over it, and click “Use template”.
You can customize any of these designs as much as you’d like using the drag-and-drop landing page builder.
Also, feel free to begin with a blank page and create something from scratch.

Step 3: Customize your landing page
Name your landing page and proceed to the landing page builder.
To edit landing page content, click on the text to reveal an edit window. If you need to replace an image, click on the image, then click the edit icon. You’ll be able to choose from a gallery of images, the Unsplash stock library, or upload your own. For any other element such as images, shapes, icons, or forms, click on it and go to its settings to make changes.
In the panel on the right-hand side, you can adjust the element’s settings, including its position, color, shadow, border, and more. To access the Page Settings (such as the CSS code editor, meta tags, reCAPTCHA, or alert language), click on the arrow.
You can add new elements to the page by dragging them from the left-hand sidebar menu.

Step 4: Customize your Thank you page
Once you’re happy with your landing page, you’ll also want to make sure to edit the conversion page. This is the page that the visitor will be directed to after filling out your form. You can edit this page by click the tab labeled “Thank you page” at the top of the editor.

Step 5: Preview Your Landing Page
Before you publish the page, you can preview the landing page by clicking the Preview button at the top of the editor.

Step 6: Publish your landing page
Once you’re happy with how everything looks, exit the preview window and click “Publish.” A pop-up window will appear with some tips to enhance your landing page’s performance for better search engine visibility – follow them to maximize your results.

Once you’ve done it (or if you click “Publish anyway”), your page will be published. In a new window, you will see a link to your live landing page. You can copy this link and paste it as the destination URL for your ad or anywhere on your website where you want to direct visitors. For instance, if your landing page promotes a free ebook offer, you might want to link to it from some of your latest blog posts.
Here, you can click “Publish with WordPress” to access the guidelines for this publishing option. Or continue reading the next steps in this article.
In Landingi, you can also publish landing pages on a custom domain or by embedding a PHP file.

Step 7: Add the landing page to your WordPress website
To add your landing page to your WordPress website, use the free Landingi plugin to import landing pages from Landingi.
In the WordPress’ plugins marketplace, search for “Landingi Landing Pages”. Install the plugin.

Step 8: Get your API token
Go to your Landingi account, click on your profile name, select Settings, and access the “API Tokens” tab. Generate a new API token and copy it.

Step 9: Import your landing pages
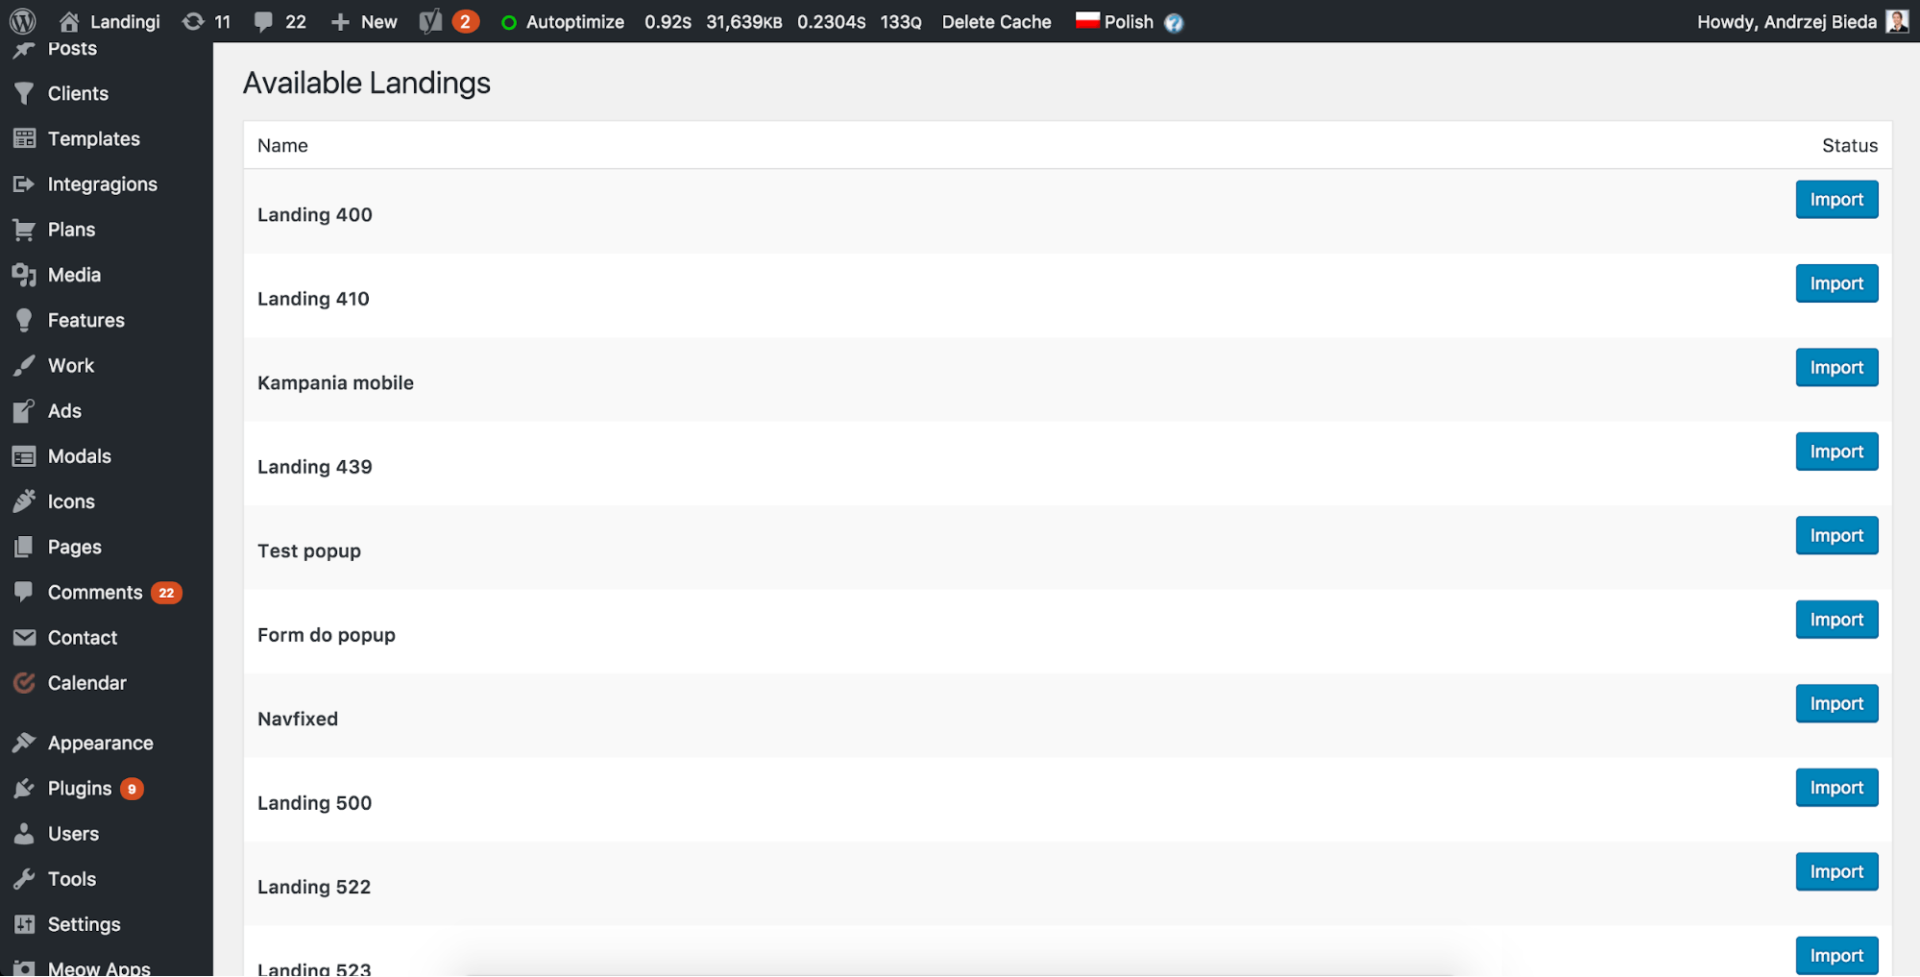
Go back to WordPress. Click Landingi in the sidebar and select Settings. In the Setup connection window, paste the previously generated API token and click Save API Token.
Go to the Available Landings tab. On the right side, you will see the list with your landing pages created in Landingi. Select a landing page and click Import. Every imported page is automatically published.
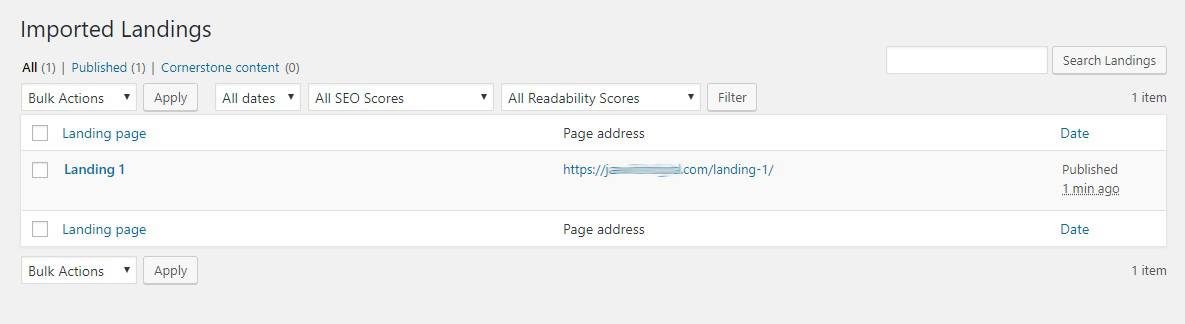
The page will then be available in your list of imported landing pages:
Step 10: A/B test your landing page (optional)
Lastly, to get the most out of our landing page, we suggest A/B testing each one. You can A/B test each of your landing pages in Landingi by creating different variants. For example, you may decide to test the headline on the landing page.
If you create two different variants, each variant will be displayed to 50% of the page’s visitors automatically. You are free to change this percentage. After that, you can compare the conversion rates of the two pages to determine which headline was most effective.
To run tests on your landing pages, initiate a test in the Optimization tab on your landing page’s Dashboard in Landingi.

How to Create a Landing Page with WordPress Plugin?
To create a landing page with WordPress plugin, search for a suitable plugin in a WordPress’ plugin marketplace (such as Beaver Builder, Landingi, Divi, or Thrive Architect), and activate it. Then, create a new page and design it using using the tools provided by the plugin. Once the page is ready, publish it and integrate it with any other marketing tools as needed.
Where Can I Find WordPress Landing Page Templates?
WordPress landing page templates can be found in the WordPress theme repository, various theme marketplaces, and within page builder plugins like Elementor and Landingi. The WordPress theme repository offers a wide selection of free and premium themes, each providing multiple template options that you can customize to fit your specific needs. This repository is a great starting point for finding basic and functional designs without additional cost.
For more advanced and unique designs, theme marketplaces such as ThemeForest and TemplateMonster are excellent resources. These marketplaces feature high-quality, professionally developed templates that often include enhanced features and greater customization capabilities. By purchasing a premium landing page template from these platforms, you ensure a polished and distinctive look tailored to your business objectives.
Page builder plugins like Elementor and Beaver Builder also come equipped with extensive template libraries. These libraries offer pre-designed landing pages that you can easily customize using intuitive drag-and-drop interfaces. Elementor, for instance, provides both free and premium templates suitable for various design complexities and functionalities. Similarly, Landingi offers a robust collection of landing page templates focused on conversion and lead generation. By utilizing Landingi’s WordPress plugin, you can seamlessly integrate and personalize these templates within your WordPress site.
Browse the Landingi’s template gallery and choose from over 400 designs!
How to Add a Landing Page to WordPress?
To add a landing page to WordPress, create a new page in your WordPress dashboard, design it with your chosen method (Gutenberg, Elementor, or Landingi), and then set it as your homepage if desired.
In WordPress, navigate to the ‘Pages’ section, click ‘Add New,’ and give your page an appropriate title. Using Gutenberg, you can build your layout with blocks for text, images, and buttons. For more advanced design options, Elementor offers a drag-and-drop interface to customize elements extensively. Alternatively, with the Landingi plugin, you can select a template from its library and tailor it to fit your brand.
Once your landing page is designed, setting it as your homepage enhances visibility. Go to ‘Settings’ in your WordPress dashboard, then ‘Reading,’ and choose ‘A static page,’ selecting your landing page from the dropdown menu. Review your page to ensure all elements function correctly, test forms and interactive features, and click ‘Publish’ to make it live. Regular updates and optimization based on performance data will help maintain your landing page’s effectiveness. Ensure your landing page is optimized for your specific objectives.
Create Landing Page in WordPress with Landingi
Creating a landing page in WordPress is not just a skill – it’s an essential strategy for effective digital marketing. Fortunately, WordPress provides a myriad of flexible solutions to meet an array of needs, whether through the use of themes, plugins, or external tools like Landingi. Landingi streamlines the landing page creation process within the WordPress environment, thanks to its intuitive design interface and seamless integration with over 170 third party tools. This makes it possible for users to design high-converting landing pages without the need for programming knowledge.
By starting today with Landingi’s free trial, you’ll experience how its features can dramatically improve your business’s online presence. The platform offers an array of capabilities such as EventTracker, for monitoring interactions on your page; Smart Sections, which allow you to reuse sections of your pages effectively; a comprehensive form builder for collecting visitor information seamlessly; and an AI Assistant that supports text generation, SEO content generation, and even background removal to equip you with all you need to create visually appealing pages tailored to your audience’s interests.
Through Landingi, optimizing your landing pages for better conversions becomes effortless. This approach will not only attract more traffic but also play an important role in achieving your marketing goals, enhancing your business’s appeal to potential customers. Embrace the flexibility and power of designing landing pages in WordPress with Landingi to unlock the full potential of your digital marketing strategy.
Ready to create your landing page? Get started with Landingi for free!