Google Analytics 4 is packed with plenty of event-tracking options. The most important ones (i.e., page view, scroll, form submission) are available by enabling Enhanced measurement. Other events can be tracked after configuring tags and triggers in GTM (for example, tracking button clicks that lead somewhere else on your domain).
This guide will walk you through creating a custom event that allows you to track page element visibility in GTM and GA4. Any other event (also called micro conversion) can be created in a similar way. Read more about custom events in Google Help.
This guide starts with creating a GA4 configuration tag in GTM – if you have already done that, you can jump right into configuring tags and triggers.
Create GA4 configuration tag in GTM
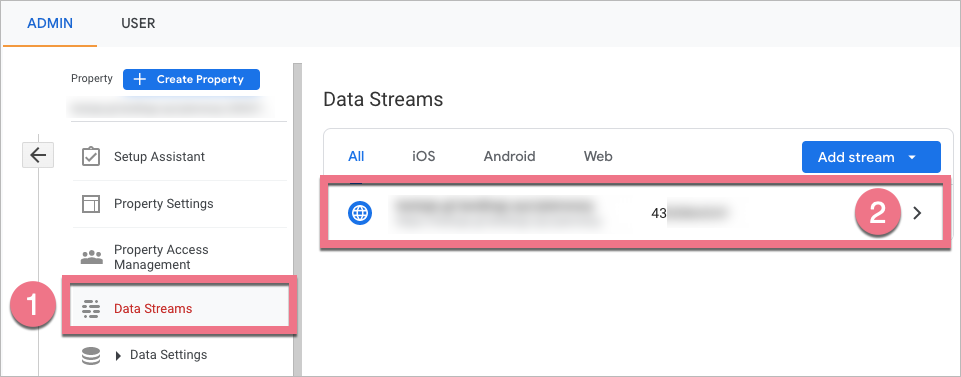
1. Go to your GA4 panel and navigate to the property dedicated to your landing page. Click Data Streams (1) and choose your stream (2).
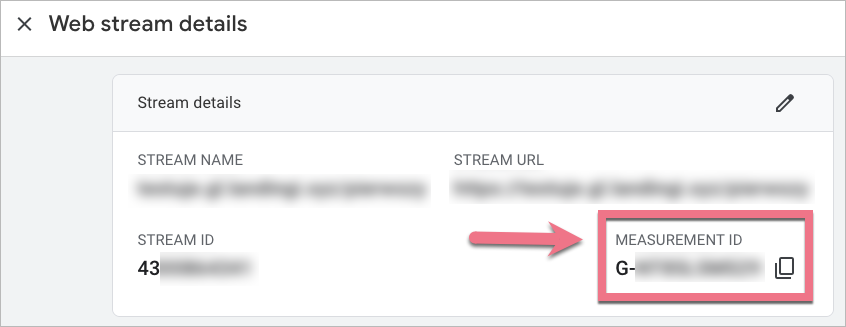
2. From Stream details, copy the Measurement ID.
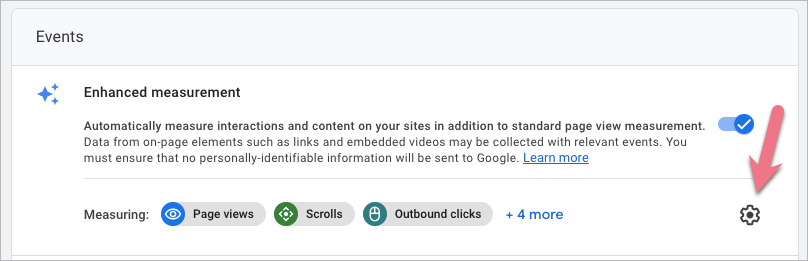
If you haven’t done it yet, scroll down and in Enhanced measurements settings (the gear icon), enable all options.
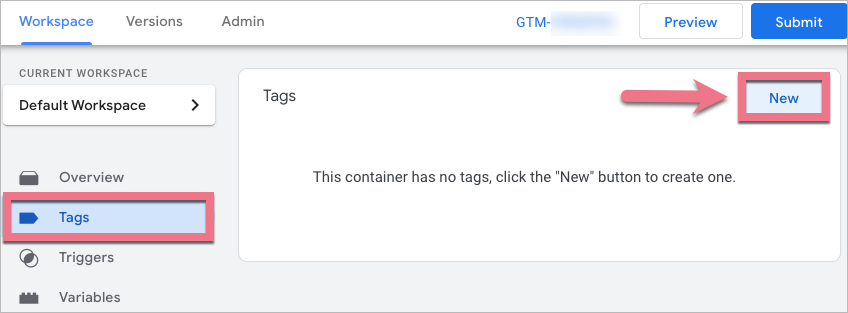
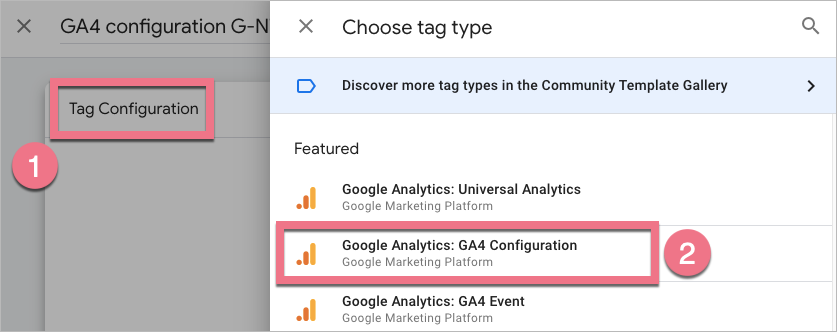
3. In a new browser tab, open your GTM. Go to Tags and click New.
4. Click Tag Configuration (1) and select Google Analytics: GA4 Configuration (2).
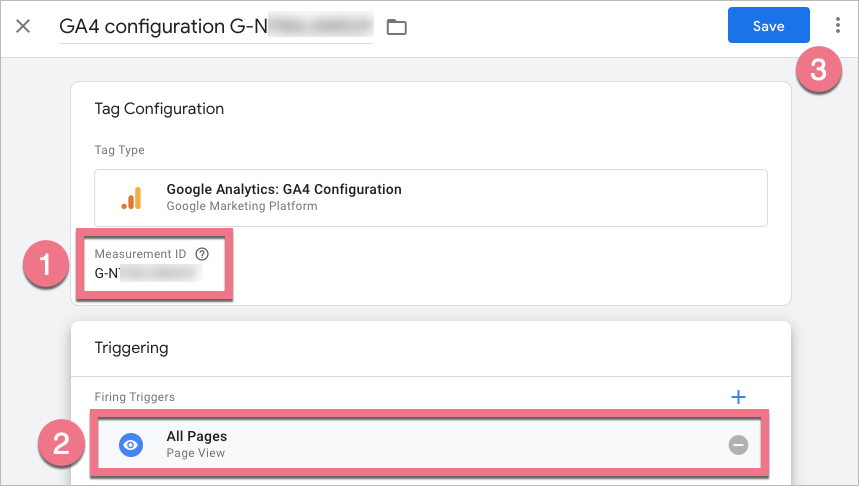
5. Paste the copied ID in the Measurement ID (1) field. Then choose All Pages (2) as the trigger. Name the trigger and click Save (3).
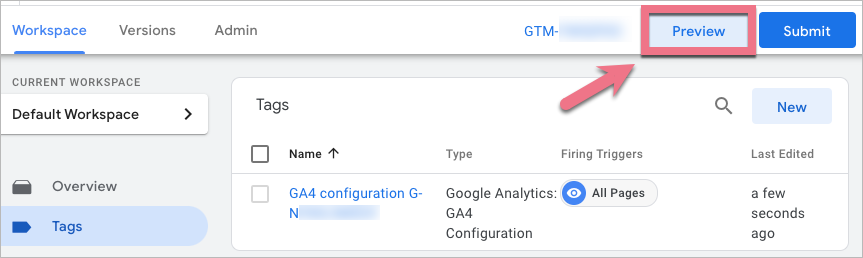
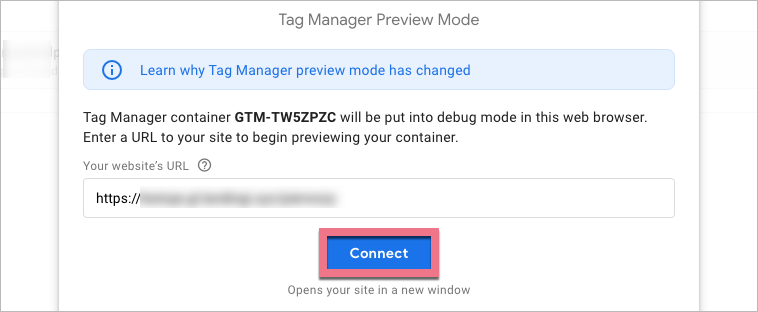
6. When the tag is saved, click Preview. In a Tag Assistant pop-up window, paste your website’s URL and click Connect. Then click Continue.
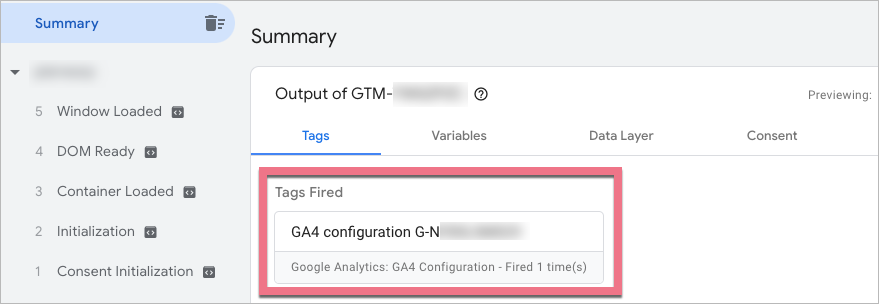
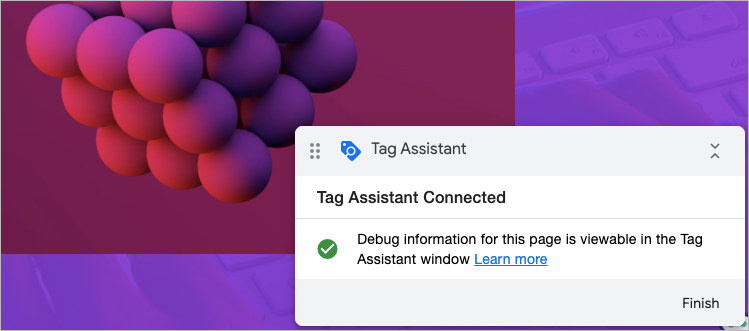
7. Tag Assistant will open a new window with your website. Do not close it and go back to Tag Assistant. You should see the fired tag.
Get the element ID from landing page
1. Go to the editor of your landing page and click the element which visibility you want to track. In our case, it is an image.
2. In the right-side menu, unfold the Other tab. Copy the number from the ID field.

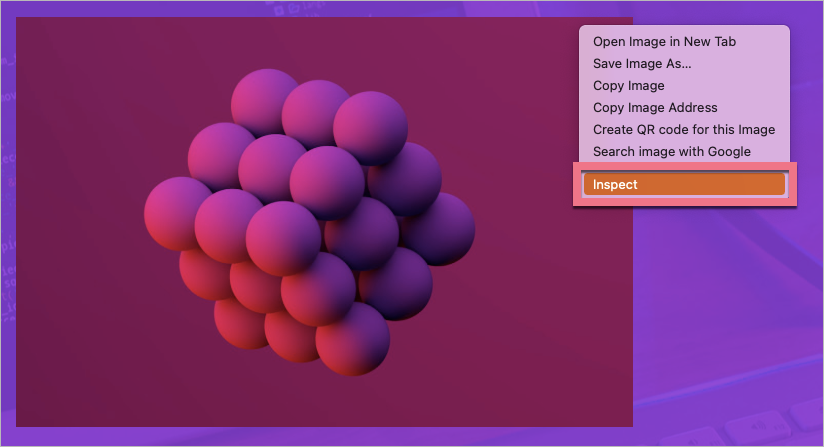
3a. You can also get the element ID from a published landing page. Open the page, right-click on your element and select Inspect.
3b. Developer tools will open. You can find the element ID after the id= parameter.
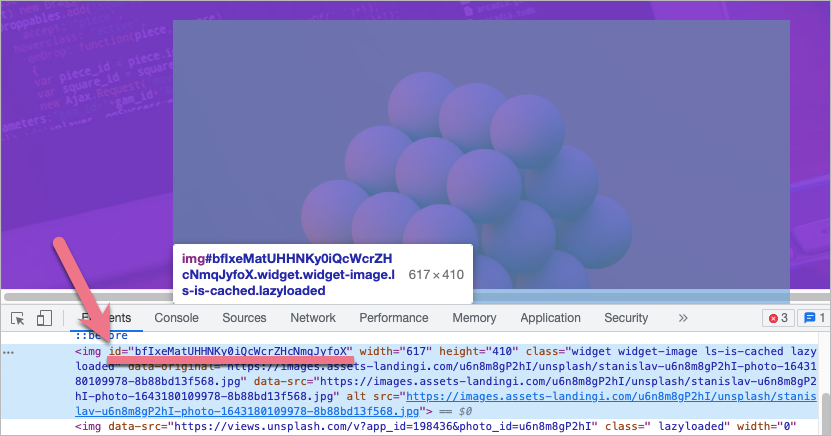
4. Take note of the number – you will need it in a tag configuration in GTM.
Configure tag and trigger in GTM and pass them to GA4
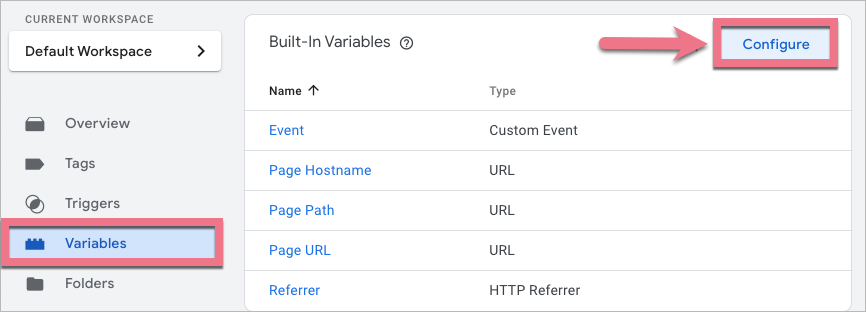
1. In your GTM panel, go to Variables and click Configure.
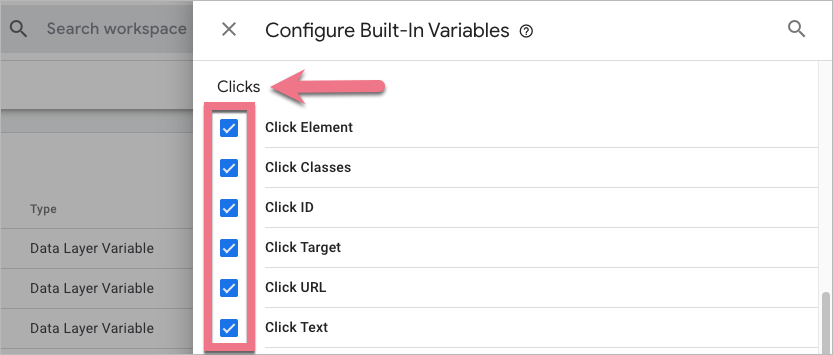
2. Find Clicks. Enable variables – in this case, the most important is the Click ID variable.
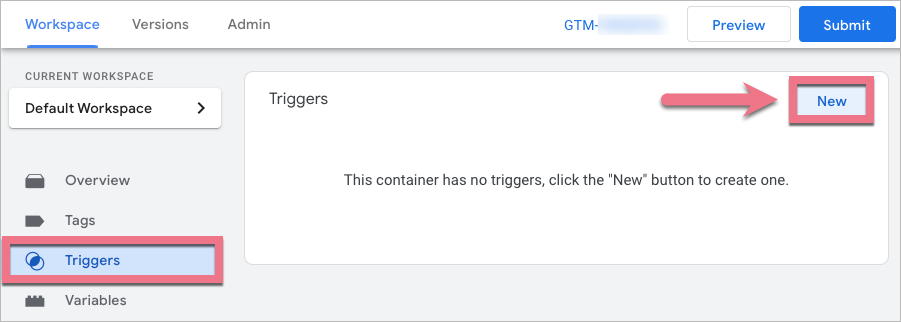
3. Go to the Triggers tab and click New.
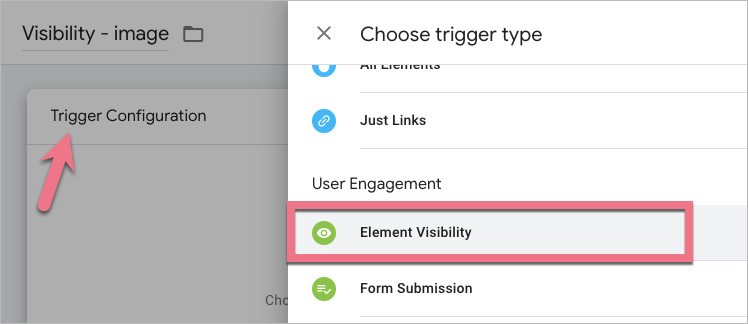
4. Name it and click Trigger Configuration. Choose Element Visibility as a trigger type.
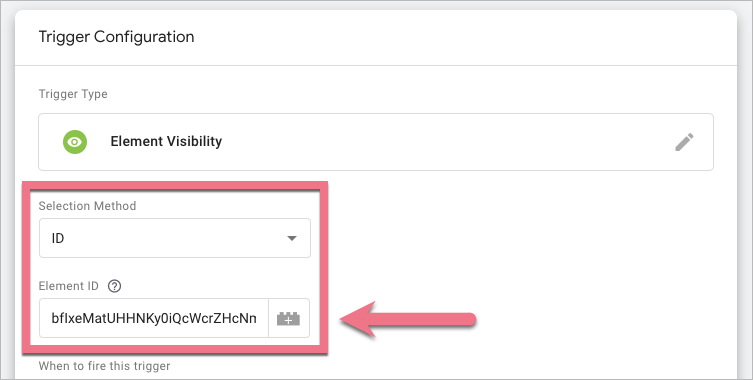
5. In the Element ID field, paste the number copied from your landing page.
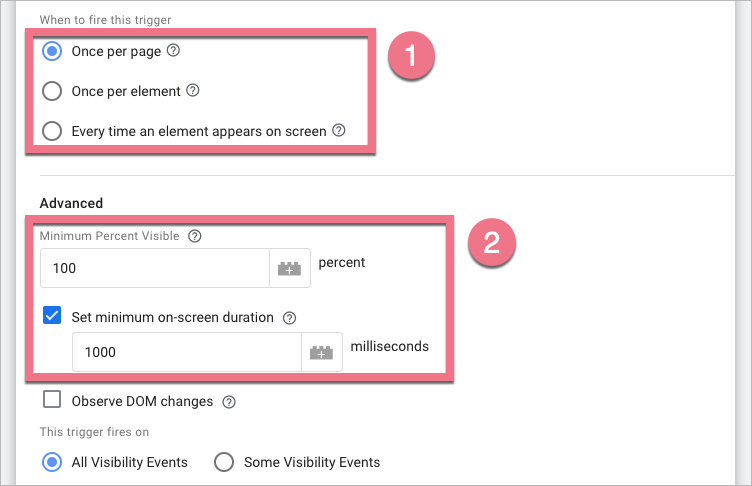
6. Decide when to fire the trigger (1). You can also define the Minimum Percent Visible and set a minimum on-screen duration for the tracked element (2).
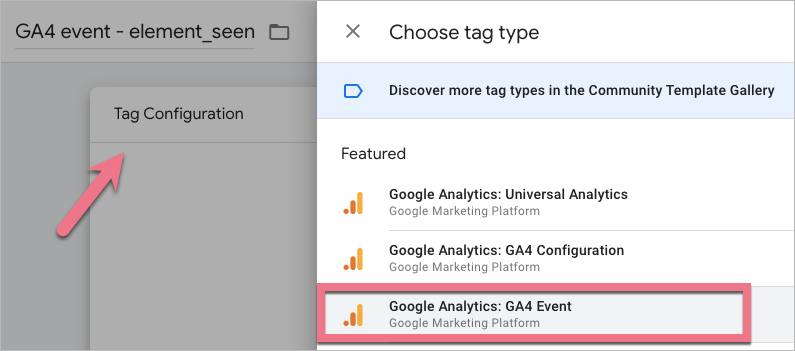
7. Now you have to create a tag that will send an event about the trigger you have just created. Go to Tags and click New.
8. Name the tag and go to its configuration. Select Google Analytics: GA4 Event as a tag type.
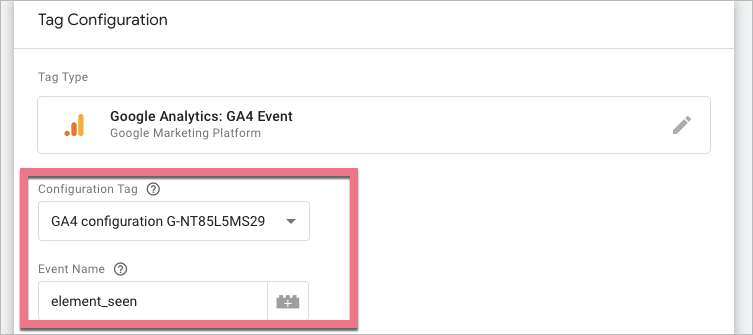
9. As a Configuration Tag, choose the tag created in the first step. Name your event – you can use a custom event name, e.g. element_seen (this is the name you will see in your GA4 reports).
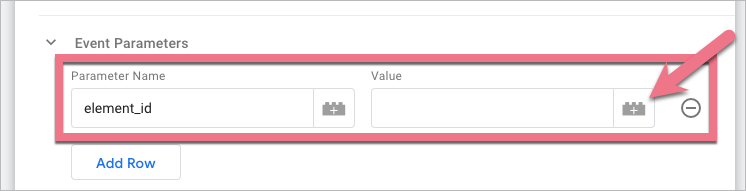
10a. If you want to track additional information, like element ID, you can add some Event Parameters. To create a new event parameter, click Add row. Name the parameter (you can type any custom name). Then click the plus icon next to the Value field.
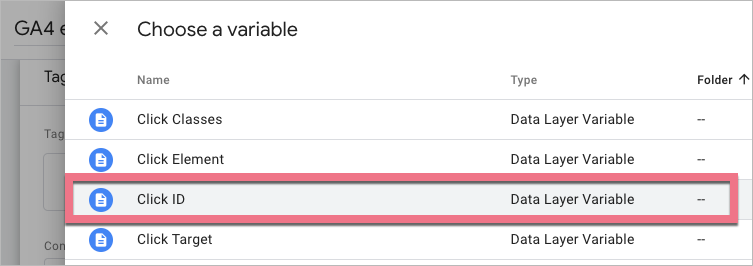
10b. Select the Click ID variable.
Once added, it should look like this:

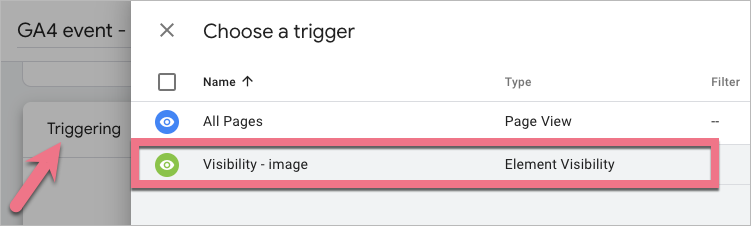
11. Scroll down and click Triggering. Select your trigger. Save the changes.
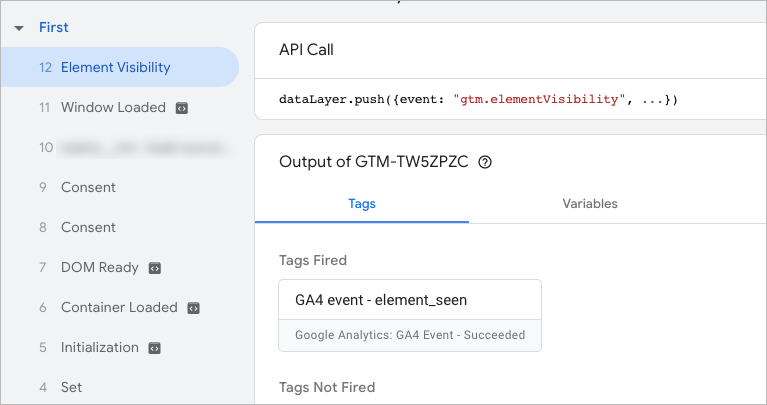
12a. Click Preview to check if your tag and trigger work correctly (you can also check the event in GA4 Debug View).

12b. Connect your page with Tag Assistant. Once the page is opened, scroll down to the tracked element.
12c. Tag Assistant should show the fired tag.
Now, your GA4 is capable of tracking a custom event: element visibility. You can mark the events as a conversion. Read this guide to learn how to do this.
Add custom dimension in GA4
If you want to use your custom parameters in Google Analytics 4 reports, you have to add this parameter to custom definitions.
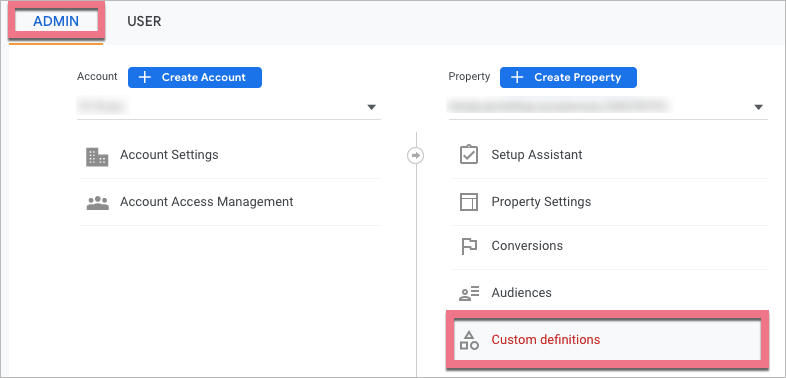
1. In GA4, go to Admin and click Custom definitions under your property.
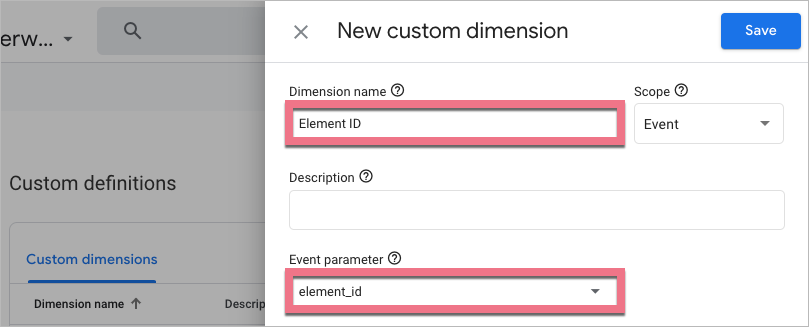
2. Create a new custom dimension. Name it. In the Event parameter field, type the exact name of your parameter – in our case, element_id.
Save the changes.
From now, you can use your custom parameters in GA4 reports.
Browse all integrations in our Integrations Catalog to see tools you can connect Landingi with.
