
Some of you may already be following our live webinars, and others don’t. As it usually turns out, there is no foolproof method of delivering helpful information. Some of you may prefer reading the article to watching a video. That is why I thought you might welcome this form of getting to know more about Landingi, landing pages, and how to improve yours.
However, if you have not seen the video yet and that is something you’d prefer, simply click below to watch, and do not forget to subscribe to our YouTube channel.
But now, without further ado, let’s get cracking!
Make your sections smartable and let go of mundane manual tasks with Smart Sections! An easy way to manage bulk changes.
How to add an animation effect to your landing page elements?
Before we get to the main point, if you are wondering if the time you will spend on adding such “fireworks” to your page makes sense, please read the article on How to enhance landing page design and why?
It should tell you more about the overall concept and give you some additional information and insights.
Now, back to the animations…
Detailed, step-by-step instructions on “how-to” can also be found in our excellent Help Center. Whenever you have an idea or a question regarding the landing page at Landingi, don’t forget to start your quest for an answer there. I am pretty sure we have most of your queries already covered.
To animate an element on the page, you will need two things. First, the browser displaying a part “needs to know” should be animated. Secondly, it should “understand” how to animate it.
You do it by adding a specific JavaScript and CSS script.
What is JavaScript? Without getting into too much detail — you will not need it to add your animations to your landing page — JavaScript is a programming language that can be used to create interactive and dynamic websites. It allows web developers to add animations, create forms, and respond to user actions like clicks and scrolling. With JavaScript, you can make your website more engaging and user-friendly and provide a better user experience. JavaScript can be combined with HTML and CSS, which are the building blocks of a website.
Ok… so what is CSS?
CSS stands for Cascading Style Sheets, a language used to describe how a website should look. It controls web page layout, design, and presentation, including colors, fonts, and spacing.
JavaScript is responsible for making a webpage interactive and dynamic, while CSS focuses on the visual appearance and styling of the elements on the webpage. JavaScript adds functionality and behavior, like making things move or changing content dynamically, while CSS enhances the design, ensuring that elements are visually appealing and appropriately arranged.
Or, to put it in even simpler terms, JS enables animation, and CSS describes how a specific element or elements should be animated.
Let’s start with CSS.
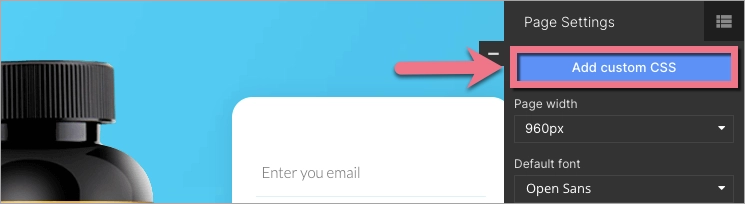
Add the following CSS code to the CSS section in the landing page editor:
@import 'https://s3-eu-west-1.amazonaws.com/landingi-ftp/script/wow/v2/animate.min.css';This code tells the browsers where the actual information about the type of specific animations is stored. This way, you do not need to add more lines to your page.
If you wish for your animation to be looped, add the following code below the first one:
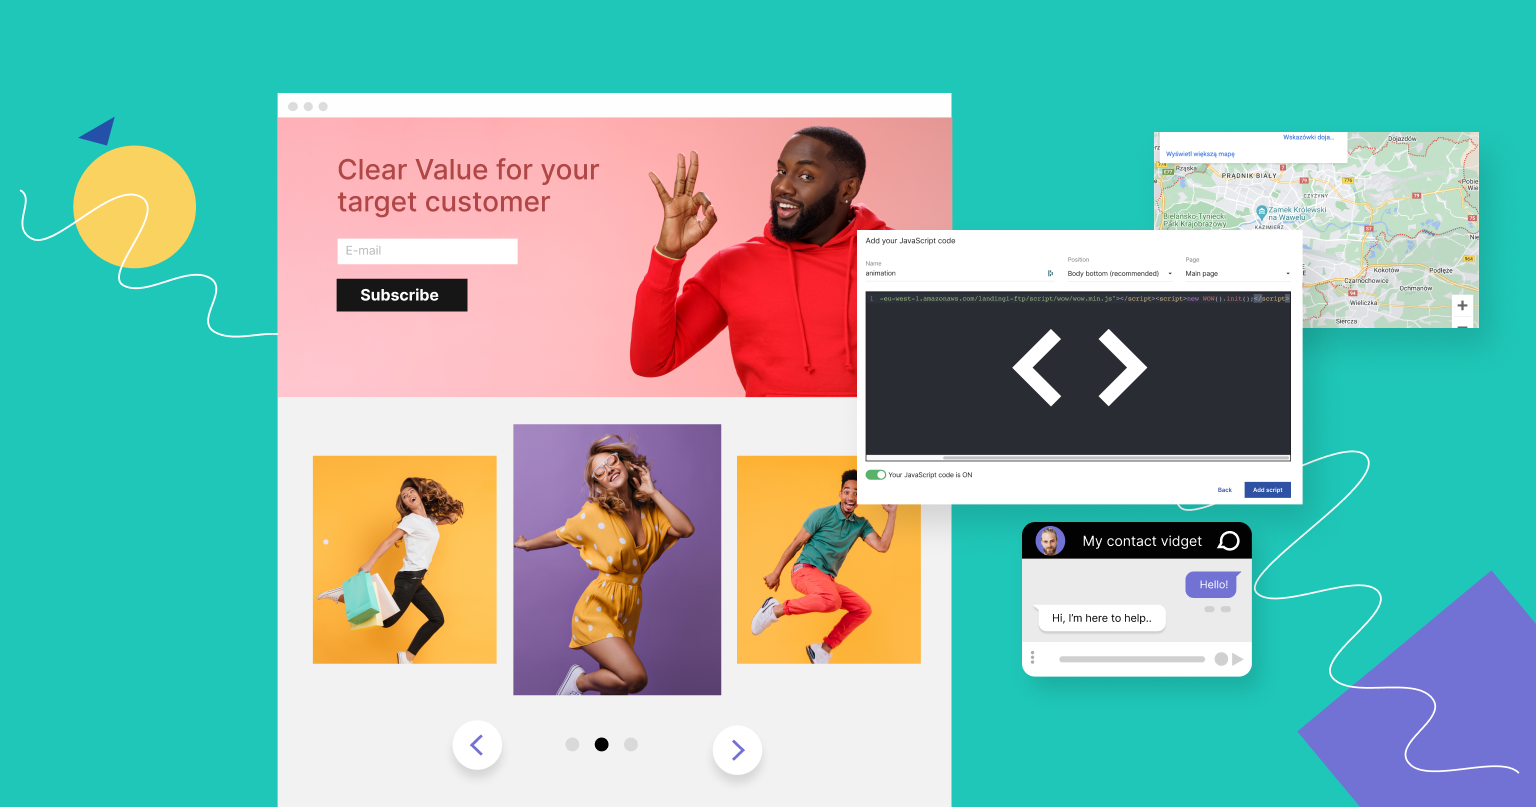
.animation_name { animation-iteration-count: infinite; }Now it is time to add the following JavaScript code to your page (position “Body top” — you will find it in the options while adding your code).
<script src="https://s3-eu-west-1.amazonaws.com/landingi-ftp/script/wow/wow.min.js"></script><script>new WOW().init();</script>You can do it in two ways.
Directly in the editor:
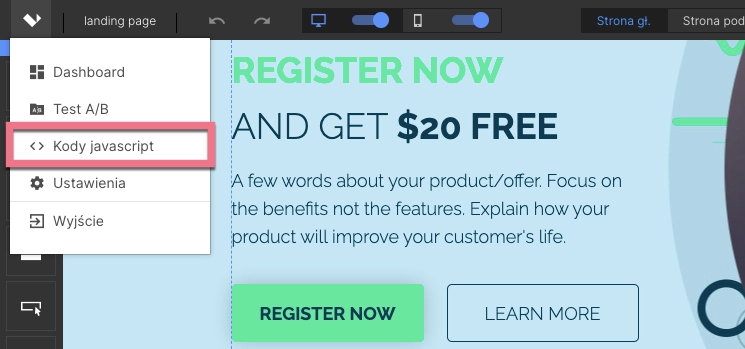
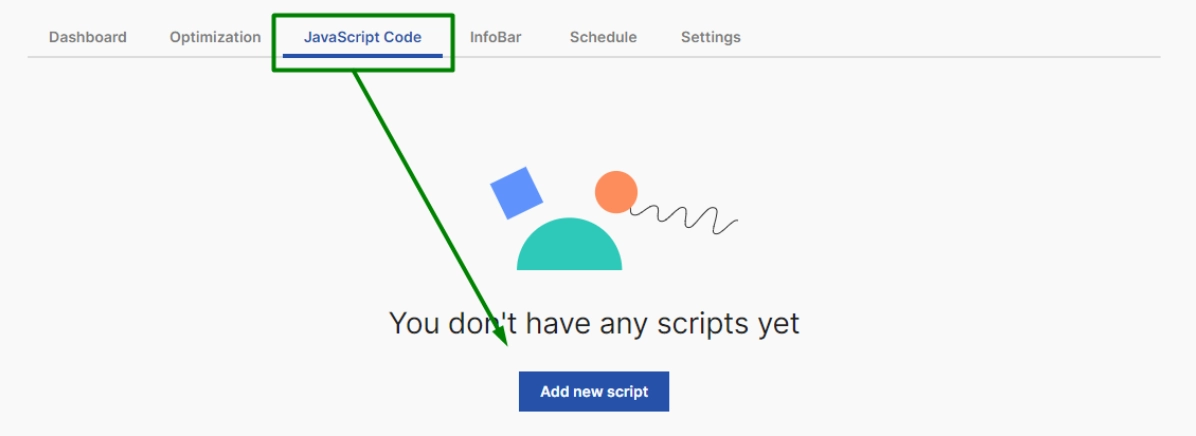
Or in your landing page Dashboard:
The two above are all the codes you will need.
Once we have that, we can start to animate the elements.
First, preview the available animations. To do it, click this link and browse the examples.
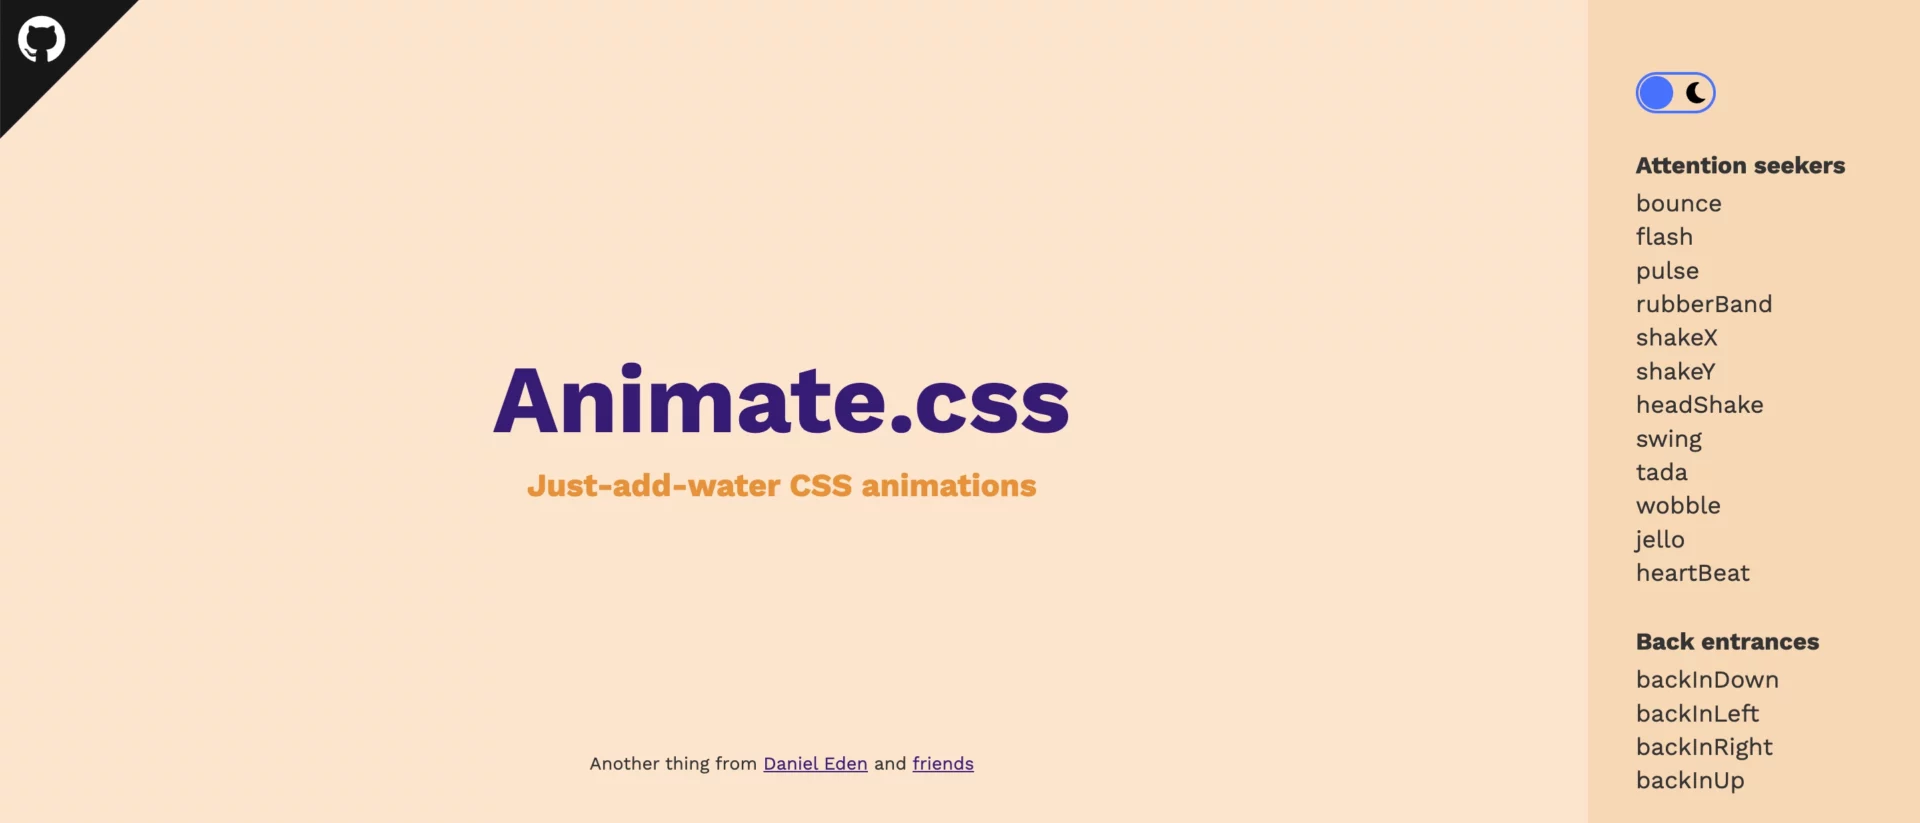
Click on the menu on the right to see the effect. Please note that each effect/animation has its own specific name. You will need it later on. Once you have the name of the animation you wish to apply to the one (or more) element on your page copied, go back to the landing page editor.
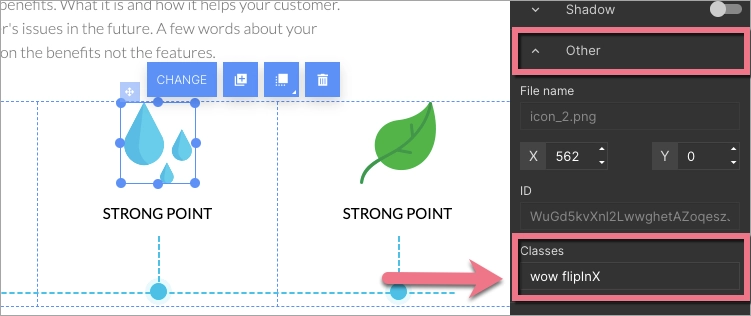
Select chosen element — an image, icon, or text — and find the tab Other and Classes in the menu on the right.
In the Classes tab, write the word wow, add space and paste the name of your desired animation for the previous page. For example: wow flipInX
Don’t forget to save all the steps and publish your page for the changes to take effect. Once you are done, preview your page in the browser.
HEY!!! Animated gifs work too!
Another type of animation that may be super cool for visitors is the one showcasing how a product or service works. It can be easily done through the use of animated gifs.
If you wish to use an animated gif on your page, all you have to do is to add it the same way you add photos and pictures. No codes or any other operations are necessary.
Not too complicated, is it?
Get 111 Landing Page Examples—The Ultimate Guide for FREE
How to add a chat widget to your landing page?
Occasionally, you may wish to speak to the visitors of your landing page directly and in real-time. The best way to do it is to add a chat option to your page.
Adding a chat option on a landing page can be beneficial in several situations, such as:
- To provide customer support: If your landing page promotes a product or service, having a chat option can allow potential customers to ask questions and get immediate answers. This can help address any concerns and increase their likelihood of purchasing.
- To capture leads: Adding a chat option on your landing page can also be an effective way to capture leads. By engaging with visitors through chat, you can obtain their contact information and follow up with them later.
- To improve the user experience: Some visitors may prefer to communicate through chat rather than filling out a form or making a phone call. By offering a chat option, you can improve their experience and make it easier for them to interact with your business.
Adding a chat option on a landing page can enhance customer engagement and provide a more personalized experience. However, it’s essential to consider the resources and staffing required to manage the chat effectively. Adding a chat option may not be advisable if you need the capacity to respond promptly and provide quality support.
You may be familiar with this solution from other web pages, including the Landingi home page. In our example, we used Freshchat as a host for this service. However, you can use other services in a similar way.
First, you need to have an account with such a service provider and make sure they (most of them do) have the option to implement their chat to a web page.
In the case of Freshchat, you will find one option to copy the JS code for the chat to work on a selected page.
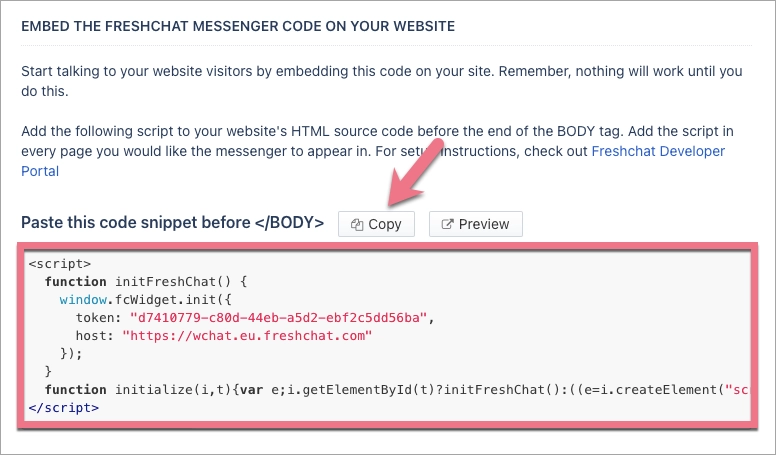
Once you have the code, all you need to do is to add it to your landing page. You do it the same way as with the animation. The only (yet very important difference!!!): the placement of the code. Make sure it is added in the “Head” position (the animation code was added to the “Body top”).
Once the code is added, the Freshchat widget will be displayed on the landing page.
Check a list of other chat services you might be interested in, with links to detailed instructions on adding them to a landing page.
How to add a calendar to your landing page?
Adding a booking option like Calendly to a landing page can be beneficial in several situations, such as:
- To schedule appointments: If your business offers services that require appointments, such as consulting or coaching, adding a booking option like Calendly can make it easier for potential clients to schedule a meeting with you. This can help reduce the time and effort required to coordinate schedules and increase the likelihood of converting leads into customers.
- To streamline the booking process: Adding a booking option to your landing page can simplify the booking process and reduce the risk of errors or miscommunications. Calendly, for example, can automatically send confirmation emails and reminders to you and your clients, ensuring everyone is on the same page.
- To improve customer experience: Adding a booking option to your landing page can also improve the overall customer experience by providing a convenient and hassle-free way for customers to schedule appointments. This can build trust and credibility with your brand and increase the likelihood of repeat business.
Adding a service like Calendly to your landing page is super easy. Calendly and other similar services can create a partial HTML code to be placed on other web pages — like Landingi landing pages. It’s a sort of — works like an option you may know or remember from the TV — picture in picture. On TV, you can display one channel and preview a different one in a section of your screen. On the web page, a portion of that main page opens content from a different page/source. Read detailed instructions on the Calendly integration.
But what you need to do is:
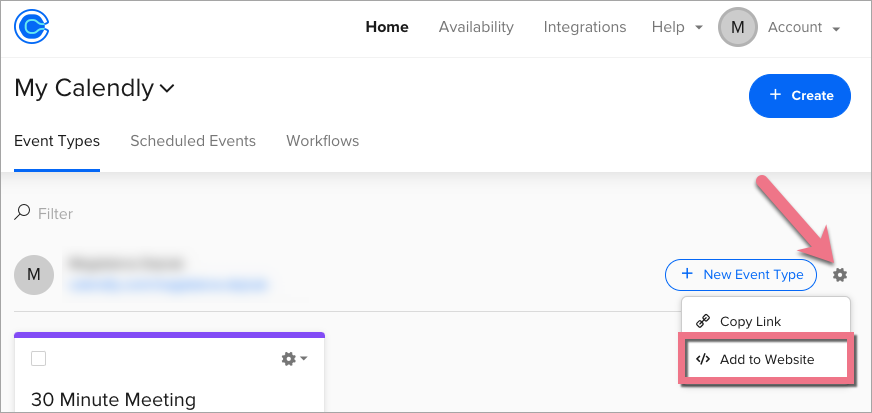
- Log in to your Calendly account.
- Select the calendar you wish to use.
- Copy the code you will find under the “Add to website” option.
Once you have the code go to the landing page editor, select the section you wish your Calendly calendar to appear on, and add the HTML widget.
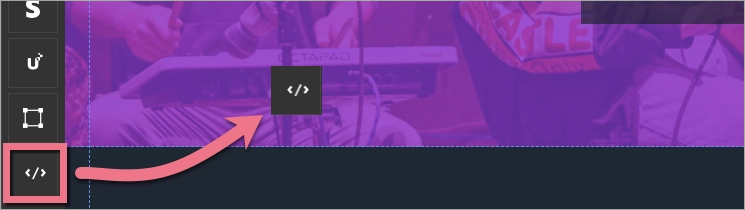
Paste the code, click save, and publish your landing page — that is it!
How to embed a Google Map on your landing page?
Adding a Google Maps map to your page is equally easy (more on that in our step-by-step guide on embedding a map).
But before I tell you “how” let’s start with “why” and when you may want to do it.
Embedding Google Maps into a landing page can be beneficial in various scenarios where you want to provide location-based information or enhance user experience. Here are a few examples of when and why you might consider embedding Google Maps:
- Business Location: If you have a physical business location, embedding Google Maps can help visitors find your establishment easily. This is particularly useful for restaurants, retail stores, hotels, or any business that relies on foot traffic. By providing an interactive map, you make it convenient for users to visualize your location, get directions, and plan their visit.
- Event Venue: When organizing an event, embedding Google Maps on the event’s landing page helps attendees identify the venue and plan their route. This is especially important for conferences, concerts, or gatherings that may attract attendees from different locations. Including a map can reduce confusion and ensure attendees promptly arrive at the correct location.
- Real Estate Listings: For real estate agencies or property listings, embedding Google Maps allows potential buyers or renters to view the property’s location accurately. It enables users to explore the surrounding area, nearby amenities, and transportation options and understand the neighborhood better. This helps potential clients assess the property’s location and make informed decisions.
- Travel and Tourism: In websites related to travel and tourism, embedding Google Maps can provide interactive destination guides. Users can explore popular attractions, nearby hotels, restaurants, and other points of interest. It helps travelers plan their itinerary, visualize the location’s layout, and get a sense of distances between attractions or landmarks.
- Delivery Services: If you offer delivery services or operate an e-commerce business with a local presence, embedding Google Maps can be helpful. It allows customers to input their location or address and visualize their proximity to your service area. This helps manage expectations regarding delivery timeframes and confirms whether you can cater to their location.
Remember, embedding Google Maps should be done to enhance the user experience and serve a purpose relevant to your landing page’s content. It can provide convenience, improve engagement, and assist visitors in navigating or understanding geographical information effectively.
Now, let’s see how you can do it.
First, find the address or location you wish to share on the map that you will add to your landing page.
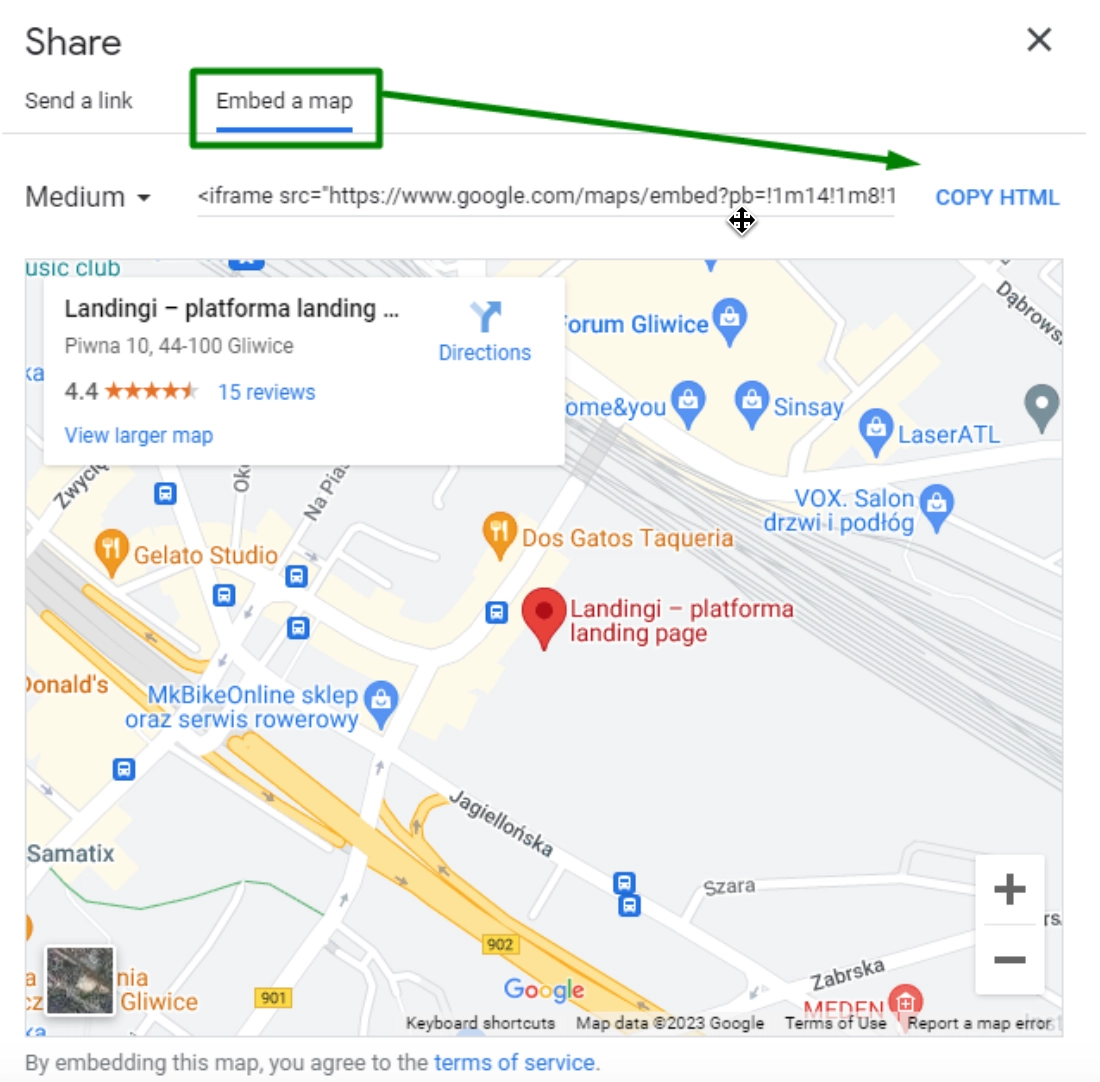
Click on the location and choose Share.

In the next step, choose the Embed a map tab and copy the generated HTML code.
Return to the editor, select the HTML widget (the same way you did with Calendly), paste the code, and publish your landing page.
That is it! The base version of the map is on your page.
In our Help Center, you can also learn about adding a map with multiple locations and more about making the map responsive on mobile devices.
To summarize
In this article, you learned about the options of adding animations and additional widgets like chat, Calendly, or maps to your pages.
More importantly, you also learned the reasons and scenarios for which those features are worth implementing.
If you have questions or doubts about your landing pages, please remember that our Technical Support and Success teams are always available to help you.