With A/B tests in Landingi, you can compare different versions of your landing page and check which one converts better, a.k.a. brings more leads. Thanks to A/B testing, you can optimize your landing pages and increase the conversion rate.
- If you would like to know more about A/B tests, check our article What is A/B testing?
- A/B/x test can be tracked via Google Analytics 4 – check this guide to learn how to track landing page events during such a test and distinguish these events by page variants.
A/B tests in the Landingi platform
1. Log in to your Landingi account. Click More (three dots icon) next to your landing page and select Optimization.
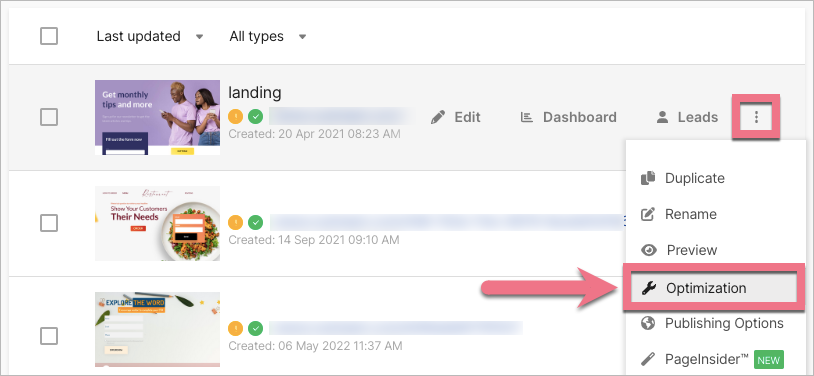
2. You can also access A/B tests from the Dashboard of your landing page.

In the Dashboard, go to the Optimization tab.
Create variants
1. The main variant is marked by a yellow label, and by default, it is the landing page from which you start the test. You can change it before, during, and after the test.
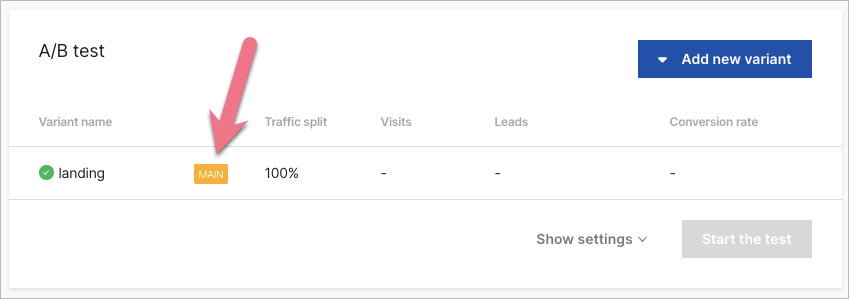
You cannot delete your main variant or assign zero traffic to it. To remove the main variant, set a different landing page as the main variant and then delete the previous main variant.
To start the test, you have to add at least one additional variant, but nothing prevents you from testing more than two variants.
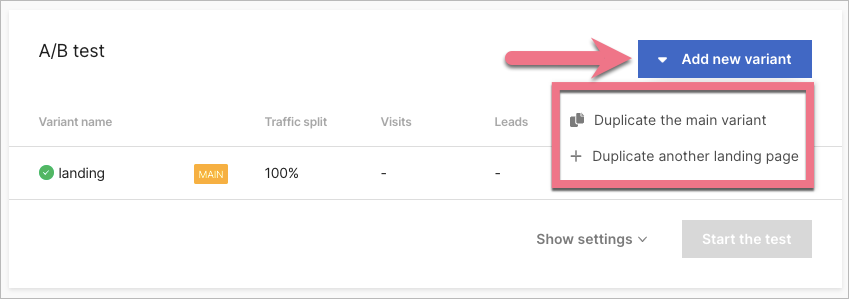
2. Click Add new variant. You have two options:
- duplicating the current main variant;
- duplicating another previously created landing page.
This action does not affect the original landing page, based on which the new variant is created.
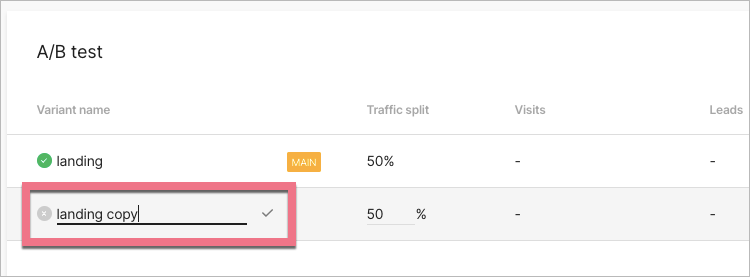
3. You can change the variant’s name. Click on its name, enter the new one, and confirm.
During the test, you can edit all variants without stopping the test.
Every variant has the same URL address as the main variant.
Edit variants
Variants in A/B testing can differ in small details, e.g., headline text, CTA, colors, etc., or in something bigger like background or whole sections.
Once you click Edit (1), you will be moved to the Landingi editor, where you can edit your landing page as usual. Remember to publish your landing page after all the changes.
Besides editing, you can perform more actions on each variant – you will find them in the drop-down menu when clicking More (2) (three dots icon) on the test management panel.
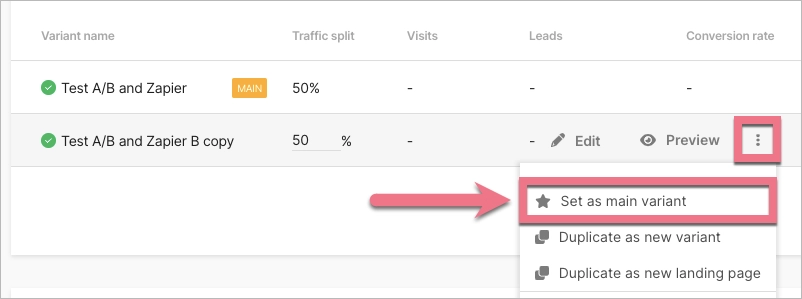
- Set as main variant – sets the given variant as the main one and marks it with the star icon.
- Duplicate as new variant – copies the current variant and creates a new one.
- Duplicate as new landing page – creates a new landing page from the variant, with separate statistics and a different URL. This option is useful if you would like to publish any tested variants as a separate landing page.
- Delete – removes the variant. This action is unavailable for the main variant.

How do you know from which variant a lead comes?
To know from which variant of the landing page the leads come, add hidden fields to forms and assign them values to distinguish between variants. Users will not see the hidden field in the form, but its value will be assigned to the lead details.
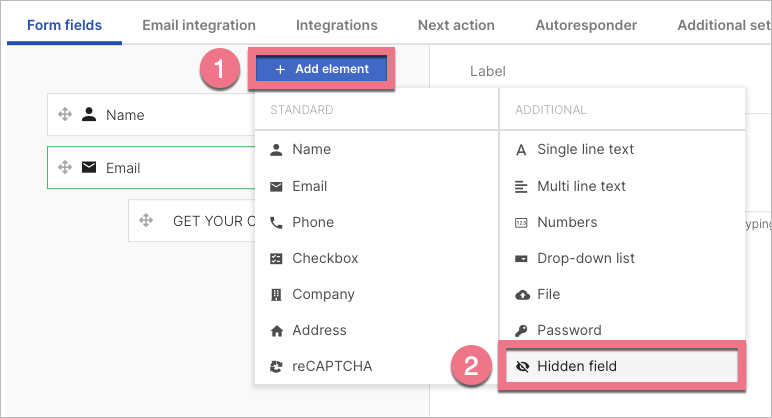
1. Add a hidden field to every variant of a landing page: in form settings, click Add element (1) and choose Hidden field (2).
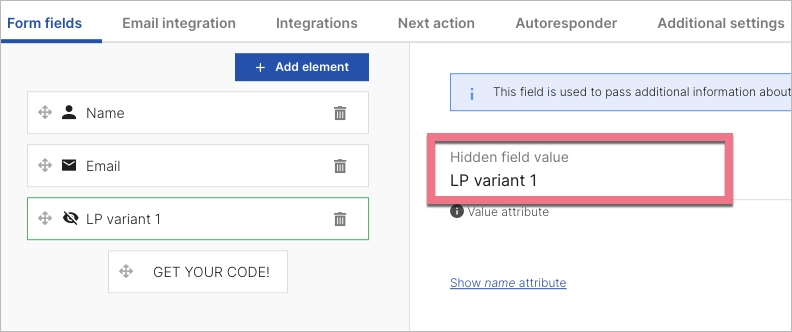
2. Set a unique value for the field in this variant.
3. Save the changes and publish the landing page. Repeat for all variants.
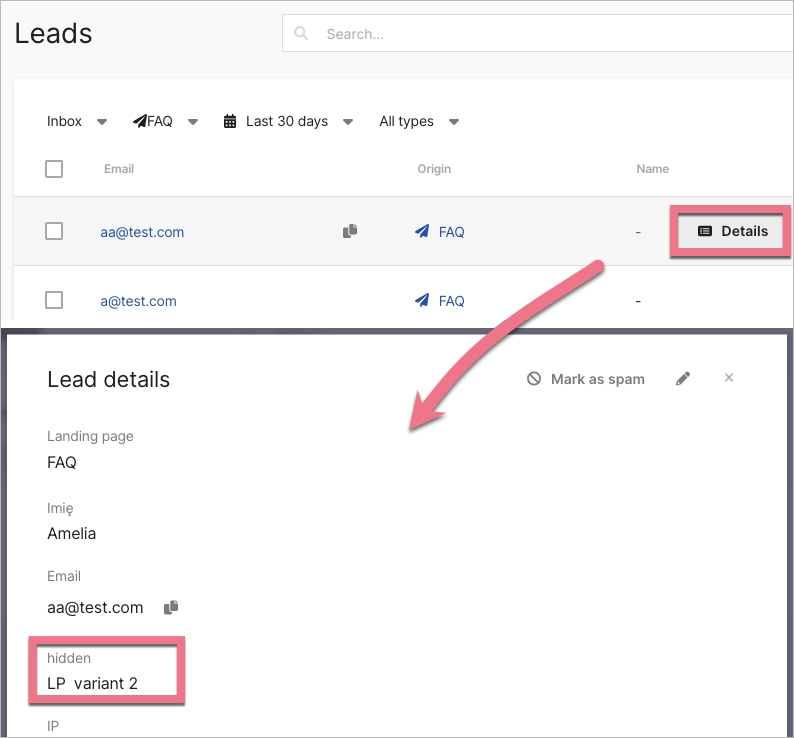
4. When a user completes a form, the value will be added to their data. Go to lead details to see the hidden field value.
Distribute traffic
By default, traffic distribution is evenly split among all variants.
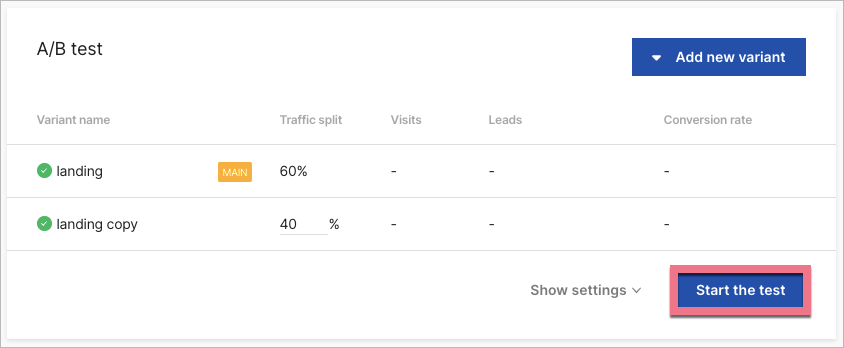
1. You can manually specify the traffic split for each variant. To do this, click on the percentage box and enter the appropriate value.

Traffic distribution does not mean the exact percentage targeting of users to individual variants, but the probability of loading a specific variant during the new user’s visit.
For example, a 50% traffic split between two variants does not mean that half of the participants will go to variant 1 and the other half to variant 2, but that both variants have a 50% chance of being displayed during a new user’s visit.
2. We recommend running A/B tests on heavy traffic when you can accumulate several hundred conversions on each of the tested variants. In the case of low traffic, the test results will be unreliable.
Start the A/B test
1. After setting up your A/B test details, click Start the test.
2. During the test, a small red icon will appear next to the landing page name.

Finish the test
1. To finish the A/B test, click Stop the test.
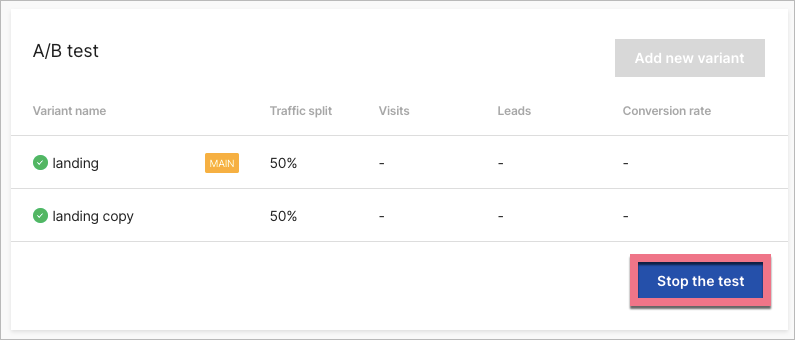
2. After the test, you can manually choose the winner from the tested variants and set it as the main variant. Such a landing page will display at the given URL when the test is not active.
Analyze test statistics
Each of the variants has specific parameters that you can track in the test management panel:
- Traffic split – percentage value that determines the probability of displaying the variant.
- Visits – number of unique visits.
- Leads – number of conversions; depending on the conversion goal you set, this may be filling out a form or clicking a button.
- Conversion rate – a value that indicates what percentage of users converted.

After completing the test and restarting it on the same landing page, the statistics for every variant reset.
Track micro conversion
EventTracker is our built-in tracking feature that will provide you with information about all events on your landing pages.
EventTracker allows you to track user interactions, such as button clicks and scroll depths, to gain precise insights. This data can then be analyzed to optimize and enhance your landing pages.

If you want to learn how to create better pages, check out our article about 5 steps of landing page optimization.
A/B/x tests and Zapier
Learn more about how to integrate your landing page and Zapier.
If you run an A/B/x test and want to send leads to Zapier from all landing page variants, you need to create a distinct Zap for each variant. This is because Zapier creates a Zap using the landing page name and form ID, and the variant created for A/B testing is not recognized as a separate landing page, so it is not included in the list of pages:
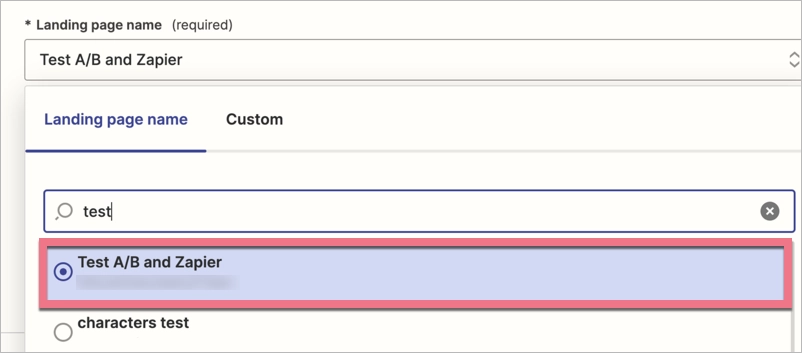
To change this, you need to temporarily switch a variant to a main one, to make it appear in the Zap configuration.
1. Go to Dashboard and access the Optimization tab for the landing page you are testing.
2. Stop the test if it is running.
3. Click More (three dots icon) next to a landing page variant and select Set as main variant.
4. Now, configure a Zap for your landing page variant.
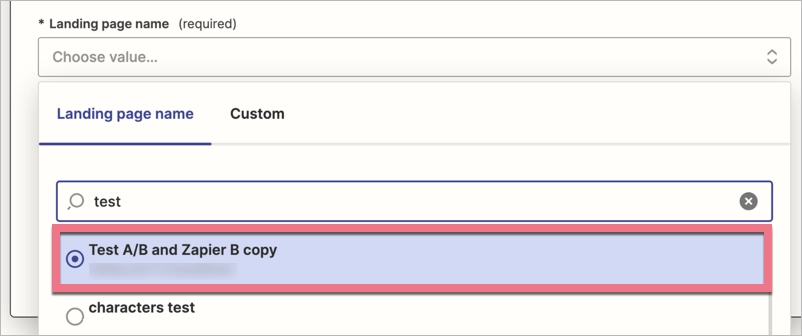
After configuring all Zaps with test variants, you can set the correct main variant and run the test. Zaps will remain active.
