In order to track landing page events during an A/B/x test via Google Analytics 4 and distinguish these events by page variants, add new elements to the landing page variants.
This guide covers only a few ways of event tracking during A/B/x tests. These methods will give you a general idea of how to set up events and tracking, and then use them for your custom dimensions or reports in Google Analytics 4.
Before you start, read the guide on A/B/x tests.
Button clicks tracking on landing page variants
1. Follow this guide to set up button clicks tracking for the main variant of your landing page.
2. Create a landing page variant for A/B/x testing. Navigate to its editor.

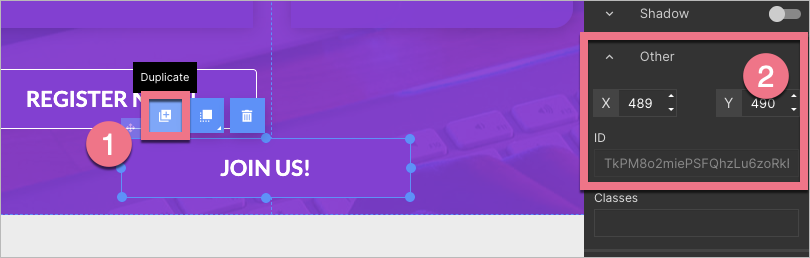
3. Duplicate or create a new button (1) that you want to track (you can edit it freely). Delete the old button.
Click the duplicated/new button, unfold the Other tab and copy its ID (2).
When you’re ready, publish the landing page.
4. Go to Google Tag Manager and follow this guide (starting with pt 6). As the ID, enter the button ID copied from the landing page variant.

5. Do not forget to click Submit.
6. From now, your Google Analytics 4 will be capable of tracking two button-click events. You will see the first data in GA4 right away in Reports > Realtime > Event count.
Conversion tracking (form submission tracking)
1. Follow this guide to connect your landing page with GA4 and GTM.
Make sure, that in the Enhanced measurement settings, the Form interactions option is enabled.

2. In Landingi, go to the editor of the main landing page.

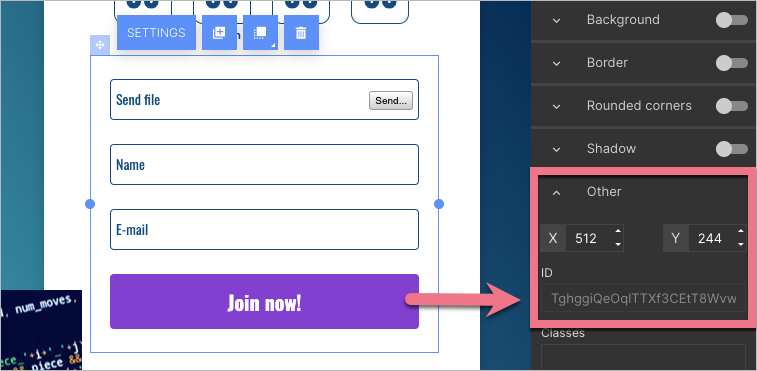
3. Click your form. In the right-side menu, unfold the Other tab. Copy and save the ID number.
4. Go to the editor of a landing page variant.
5. Find, copy, and save the form ID.
If the variant has been created by duplicating the main landing page, make sure the form has a different ID. If the IDs are the same, create a new form (you can do this by duplicating the form).

6. You will see the forms IDs in form_submit events in your GA4 panel (Reports > Realtime > Event count).
- In Event count, click form_submit.
- Then click form_id.
- You will see the ID numbers of your forms.


Data in the Reports snapshot needs up to 24 hours to update.
Page views tracking
To track page views and distinguish them by A/B/x test variants, name the landing page variants with various SEO titles.
1. In Landingi, go to the editor of the main landing page.
2. In Page settings, unfold the SEO / Social share tab. In the Title field, enter a unique title for this landing page. After the changes, publish the landing page.

While editing, you can go back to Page settings by clicking the arrow:
3. Go to the editor of the landing page variant.
4. Enter a unique title for this landing page. After the changes, publish the landing page.
5. You will see the landing page variants titles in page_view events in your GA4 panel (Reports > Realtime > Event count).
- In Event count, click page_view.
- Then click page_title.
- You will see the titles of your landing page variants.


Data in the Reports snapshot needs up to 24 hours to update.
Browse all integrations in our Integrations Catalog to see tools you can connect Landingi with.

