To track clicks on your landing page via GA4, you need to create tags and triggers in GTM that will fire the event in your Google Analytics 4.
This guide starts with creating a GA4 configuration tag in GTM – if you have already done that, you can jump right into configuring tags and triggers.
Create GA4 configuration tag in GTM
1. Go to your GA4 panel and navigate to the property dedicated to your landing page. Click Data Streams (1) and choose your stream (2).

2. From Stream details, copy the Measurement ID.
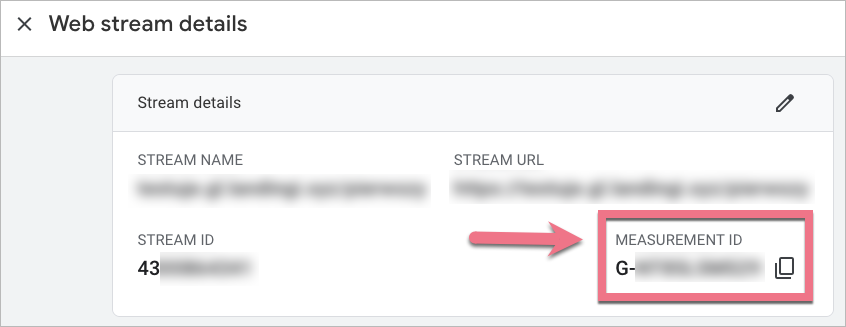
If you haven’t done it yet, scroll down and in Enhanced measurements settings (the gear icon), enable all options.

3. In a new browser tab, open your GTM. Go to Tags and click New.
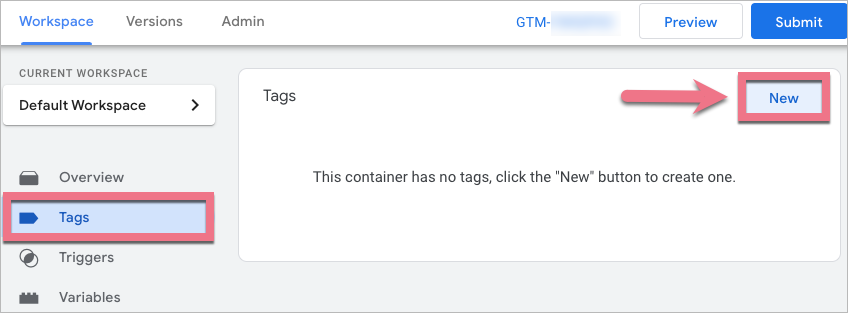
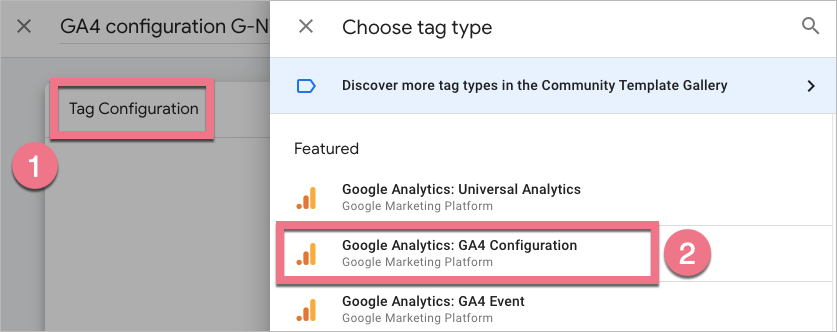
4. Click Tag Configuration (1) and select Google Analytics: GA4 Configuration (2).
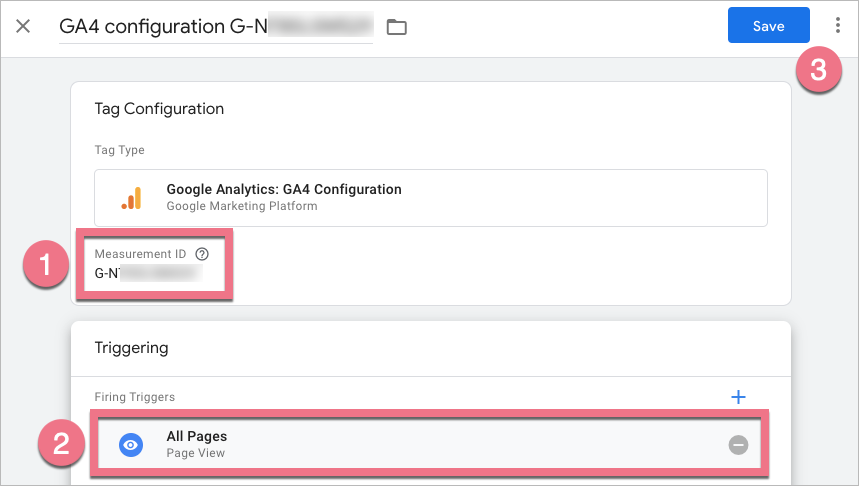
5. Paste the copied ID in the Measurement ID (1) field. Then choose All Pages (2) as the trigger. Name the trigger and click Save (3).
6. When the tag is saved, click Preview. In a Tag Assistant pop-up window, paste your website’s URL and click Connect. Then click Continue.

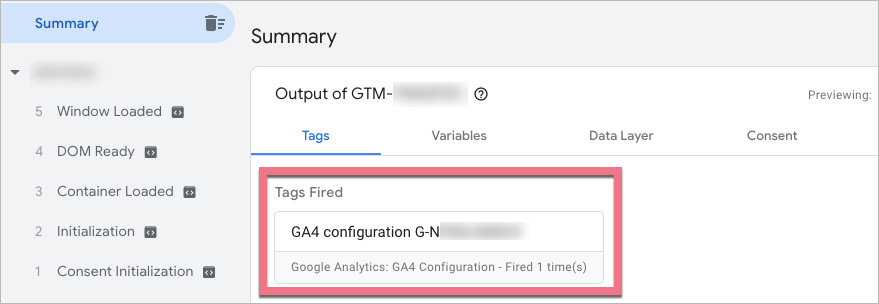
7. Tag Assistant will open a new window with your website. Do not close it and go back to Tag Assistant. You should see the fired tag.
Configure tags and triggers in GTM and pass them to GA4
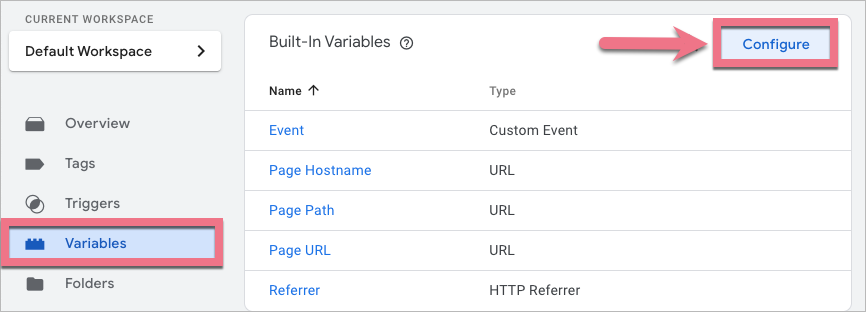
1. In your GTM panel, go to Variables and click Configure.
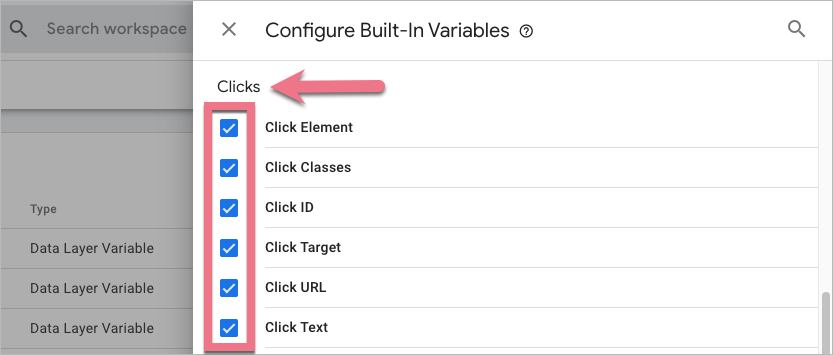
2. Find Clicks and enable all variables.
3. Click Preview one more time.

4. In a Tag Assistant debug view, click the button you want to track.

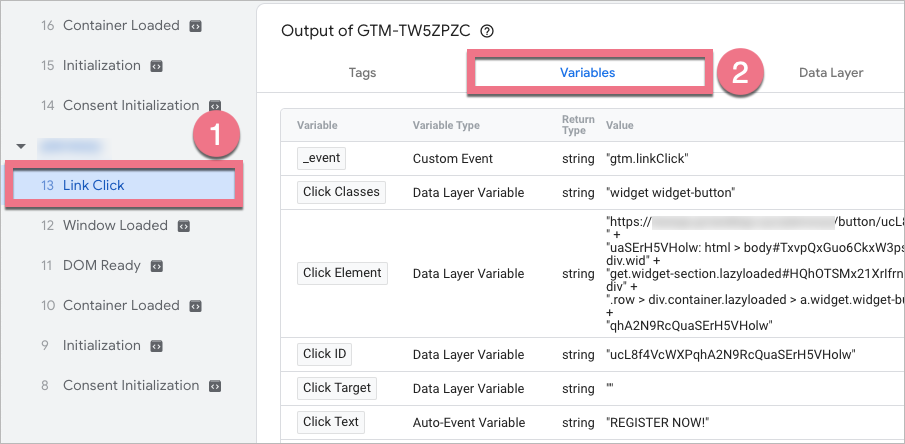
5. You should see a Link Click (1) event in your Tag Assistant. Click it and go to Variables (2). There is all information from the event. In a few seconds, we will use the Click ID variable in a trigger.
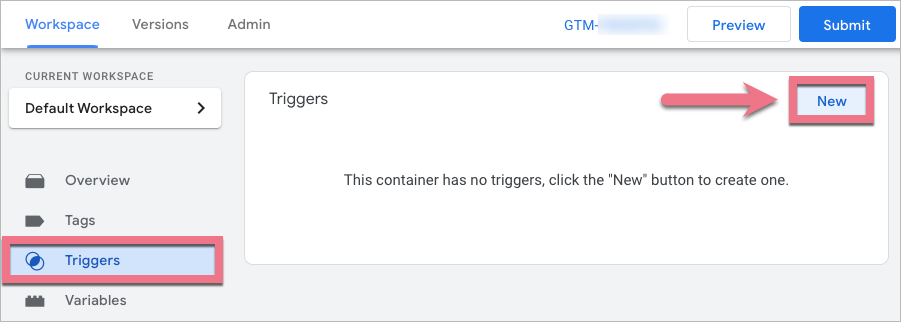
6. In your Google Tag Manager, go to Triggers and click New.
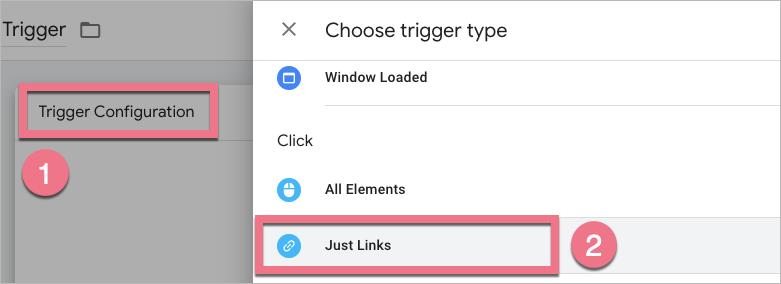
7. Click Trigger Configuration (1) and select Just Links (2).
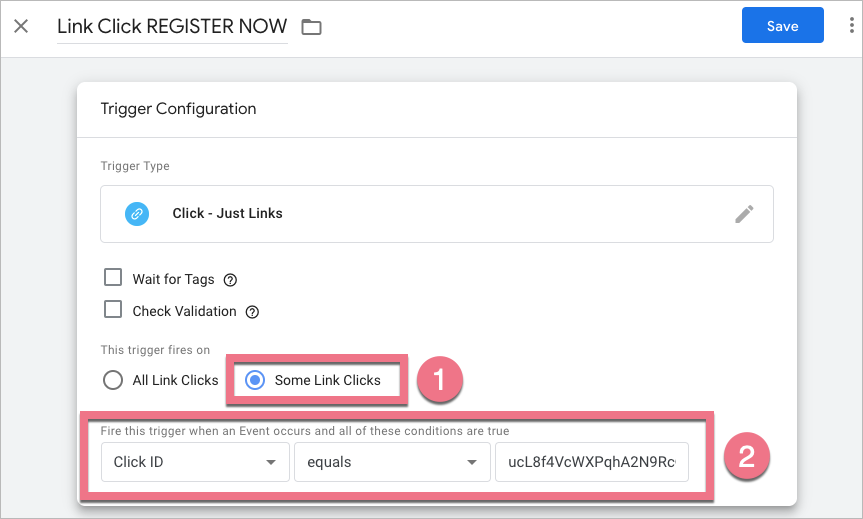
8. Select Some Link Clicks (1).
Then enter condition (2). In our case, the easiest way is to use the Click ID variable: select Click ID > equals > paste the ID number from variables seen in Tag Assistant (see pt 5).
Name the trigger and click Save.
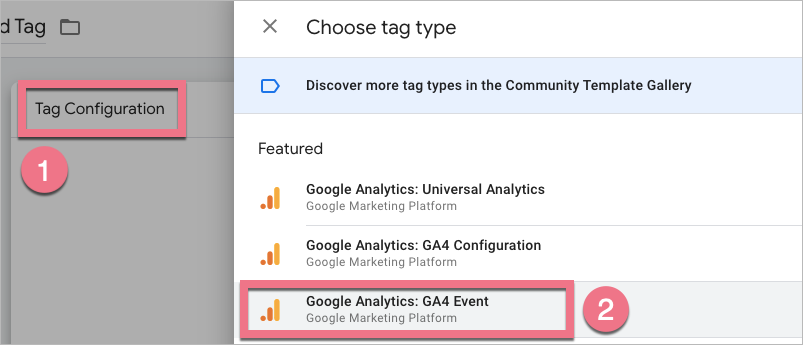
9. Now you have to create a tag, that will send an event about the trigger you have just created. Go to Tags and click New.
10. Click Tag Configuration (1) and select Google Analytics: GA4 Event (2).
11. As a Configuration Tag (1), choose the tag created in the first step. Name your event (2) – you can use a custom event name, e.g. calltoaction_button_click (this is the name you will see in your GA4 reports).
If you want to track some additional information (e.g. the URL of the button, the text of the button), you can add some Event Parameters (3).
To create a new event parameter, click Add row. Name the parameter; you can reuse parameters of the events already existing in GA4 (see Google guide on Events measurement and parameters). For example, we chose link_url and link_text.
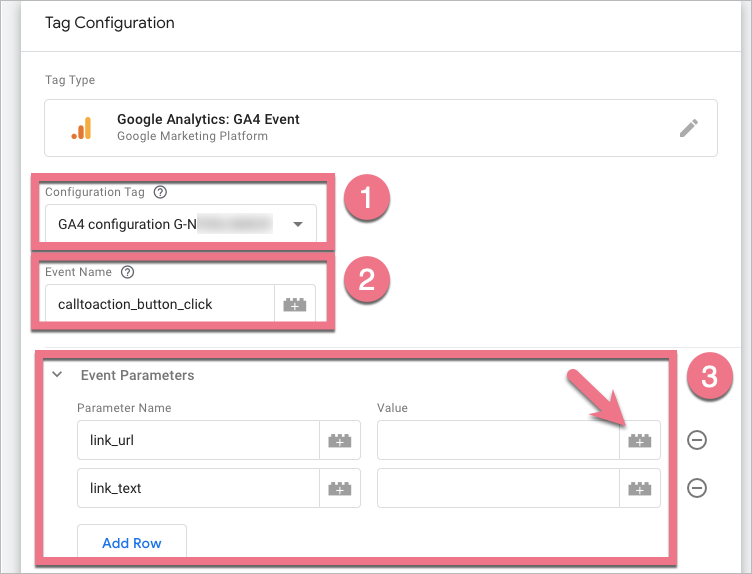
Click the plus icon next to the Value field, to insert a relevant variable. In our case, we will need respectively Click URL and Click Text.

Once added, they should look like this:

12. Scroll down, click Triggering (1) and select the trigger you have created previously (2).
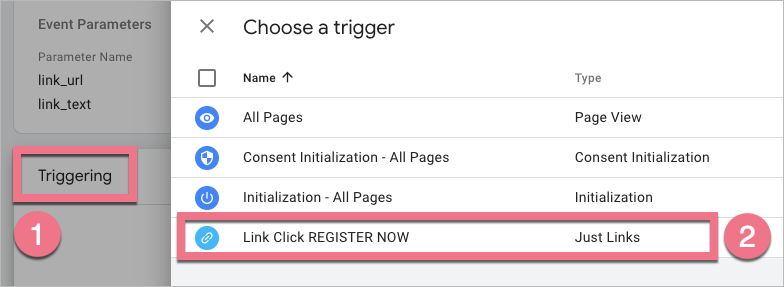
13. Name the tag and click Save.

14. You can one more time go to preview mode and check if everything works properly. You can also check the event in GA4 Debug View. When you are sure everything works correctly, click Submit in GTM.
Now, your GA4 is capable of tracking click events every time a visitor clicks a button that leads them somewhere else on your domain. You can also mark the events as a conversion. Read this guide to learn how to do this.
15. You will see the first data in GA4 right away in Reports > Realtime > Event count.
Data in Reports snapshot will be updated within 24 hours.
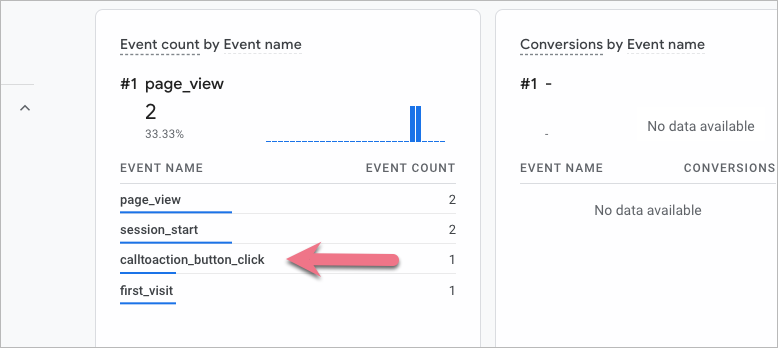
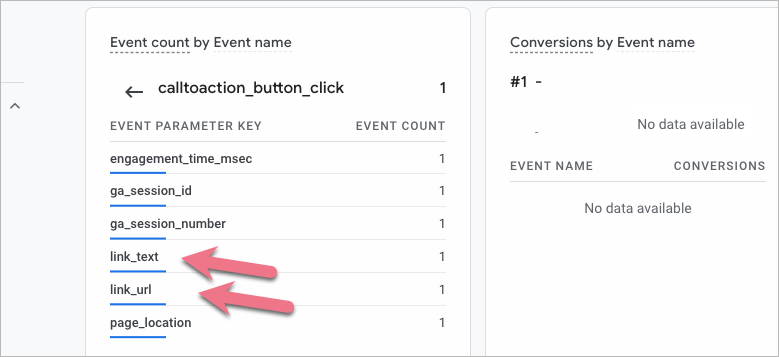
16. In Reports, you can also check other parameters of the button click event. Click the name of the event, then the name of the parameter to see the details.
Browse all integrations in our Integrations Catalog to see tools you can connect Landingi with.
