The Web Content Accessibility Guidelines (WCAG) are an internationally recognized set of recommendations that, when followed, make websites and online content more accessible to people with disabilities. Creating user-friendly web content is, of course, regarded as good practice globally; however, some countries may adjust their laws to WCAG differently. That being said, when creating your landing page, make sure that it is compliant with the legal standards of your country.
Following WCAG standards allows you to be certain that your landing page is understandable to the widest possible audience.
This article will walk you through a few ways of making your Landingi landing page more accessible.
Remember that if you have any questions about the Landingi editor or platform, you can always contact our Support team.
Fulfilling major accessibility principles
WCAG-compliant pages should fulfill four major accessibility principles: Perceivable, Operable, Understandable, and Robust.
Basics: navigation
Your page should be easy to navigate and use without a mouse or a touchpad. Make sure that visitors can move around your landing page with a keyboard – you can check such navigation availability by pressing Tab or Shift+Tab keys. Remember to add alternative links to phone numbers, email addresses, and menus, thus this navigation method does not work with plain text.
In Landingi, form (including all fields), buttons, links, or video widgets can be used with a keyboard.
HTML element order
The order in which users navigate through elements using the Tab key depends on their order in the HTML code. In Landingi, you can adjust this order directly in the Elements list.
Here’s how to do it:
1. Open the Elements list in the editor.
2. Here, you have two options:
a) Use the arrows next to each element to move it up or down within the HTML structure.
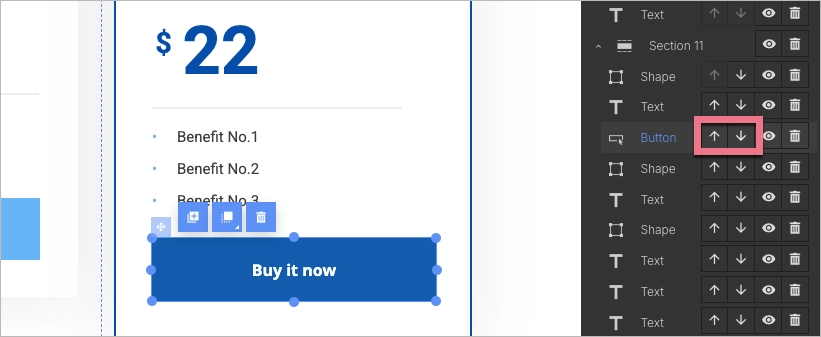
b) Use the automatic sorting of elements within a section (shapes icon) – after enabling this option, remember to check the order of elements and adjust it if needed (by clicking the arrows).
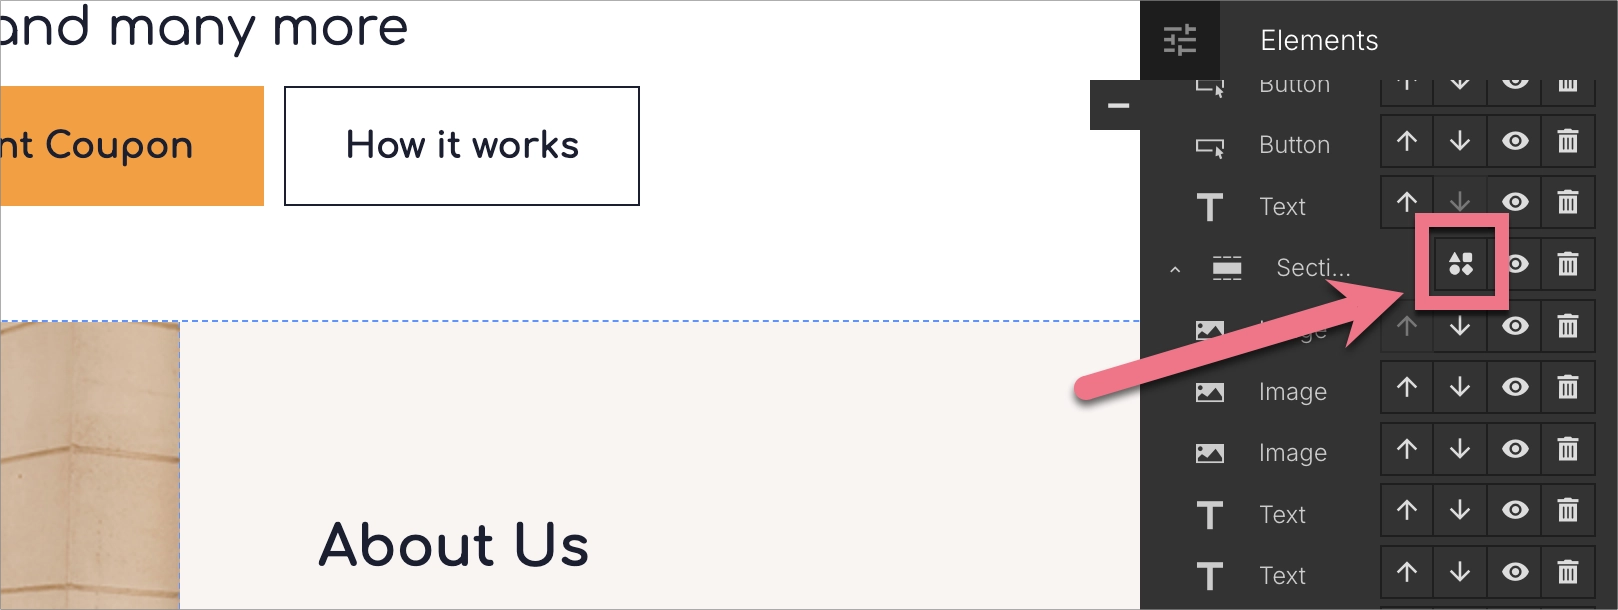
This only affects the HTML structure – it won’t change the visual layout or layers on your landing page.
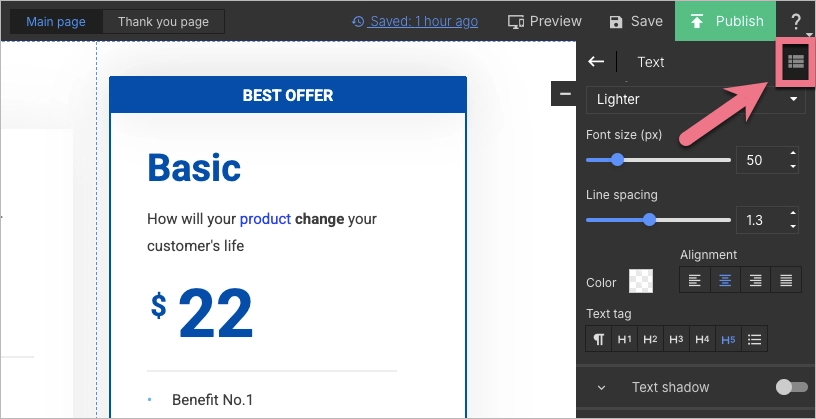
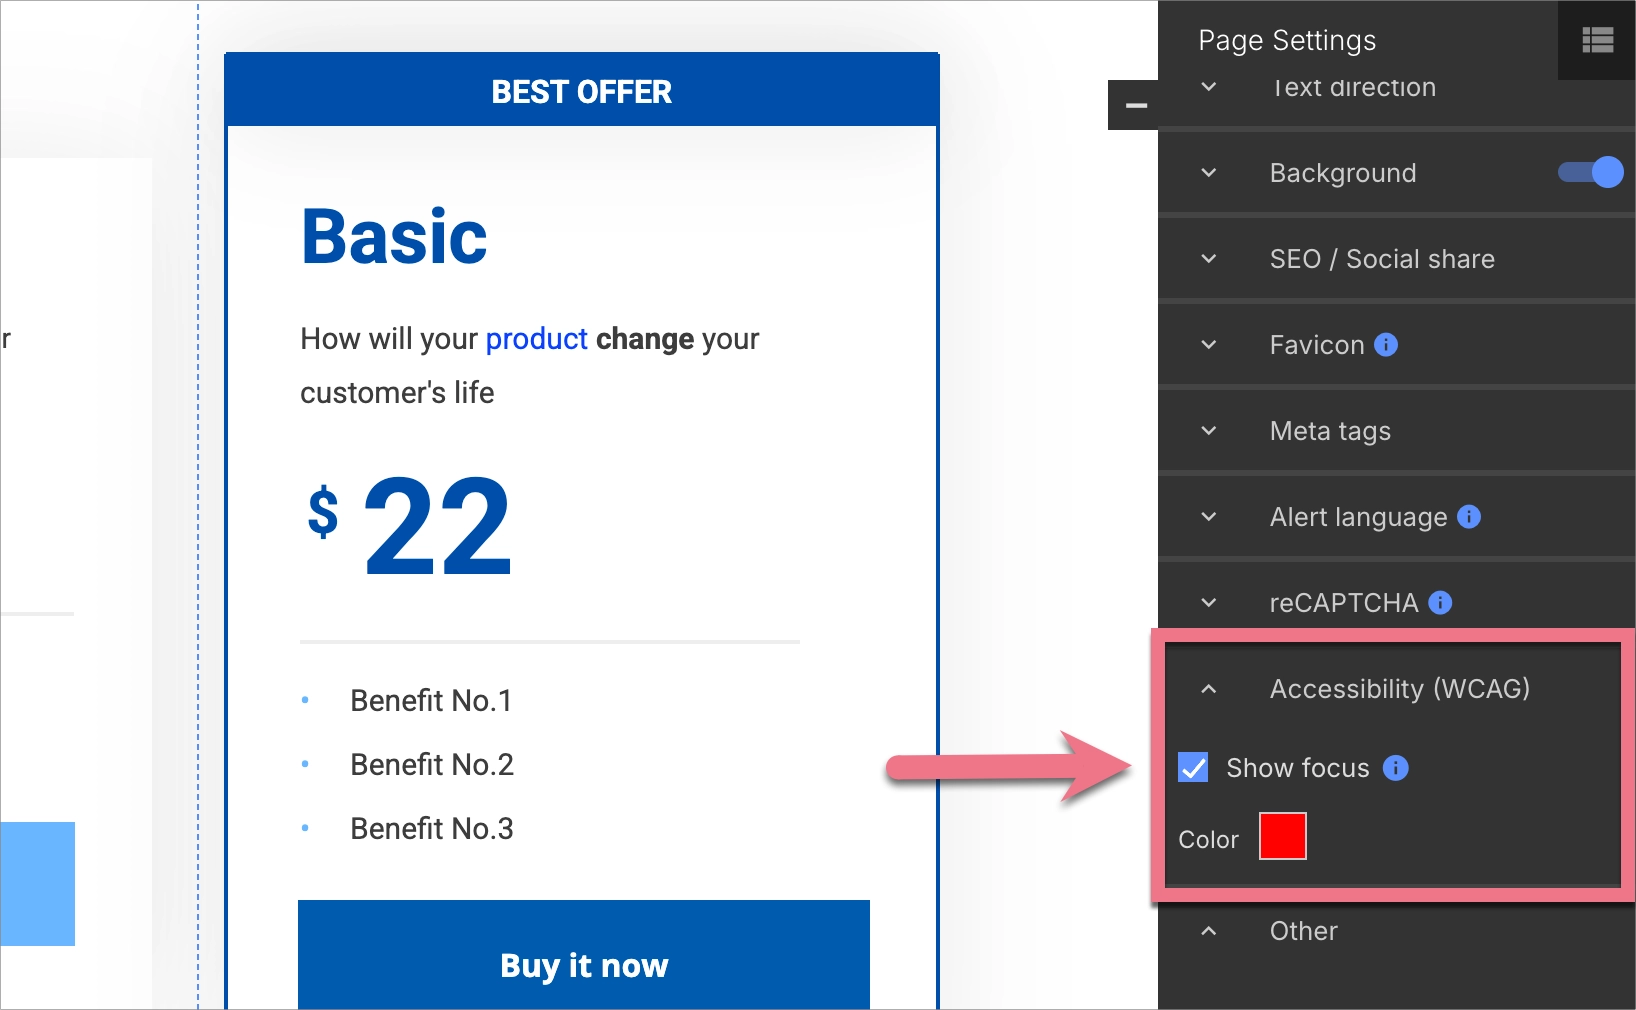
Focus Style
You can set the border color that appears around an active (focused) element on your landing page – for example, when navigating with the Tab key. This can be done in the Accessibility (WCAG) tab under Page Settings.
1. To open Page Settings, click the arrow in the editor.
2. Go to the Accessibility (WCAG) tab, enable the focus, and choose the border color for focused elements.
Now test it on your published landing page – tab through the elements to make sure the border appears in your chosen colors.
Focus Style for a specific section
You can also set an individual focus color for each section of your landing page.
Here’s how to do it:
1. Click the selected section.
2. Choose the border color for active elements in the Accessibility (WCAG) tab.

Skip for screen readers (Shape widget)
The Shape widget includes the Skip for screen readers option. When enabled, this option adds the following attribute to the widget: role=”presentation”. As a result, the element is hidden from screen readers and ignored by assistive technologies.
1. To enable or disable this option, click the Shape widget you want to edit.
2. In the right-hand panel, expand the Accessibility (WCAG) tab.
3. Select or clear the Skip for screen readers checkbox.
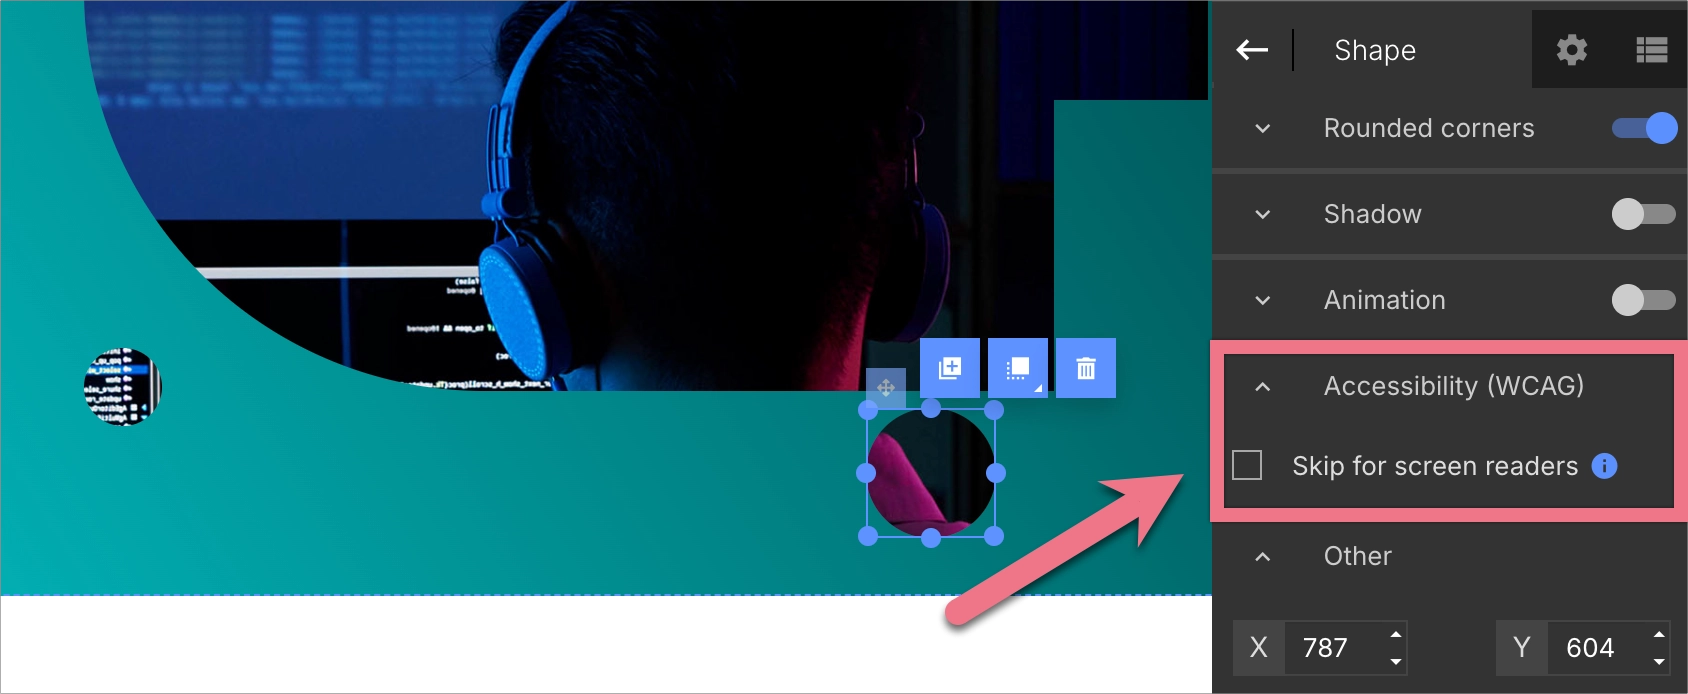
This option should be used only for decorative elements that do not convey any information or provide any functionality – such as background shapes, dividers, separators, or purely visual decorations.
By default, Skip for screen readers is enabled for new Shape widgets.
Why this matters
When multiple widgets are placed close to each other, screen readers may interpret them as a single group and read them in a confusing or illogical way. Hiding decorative elements helps to:
- simplify the page structure for screen reader users,
- reduce unnecessary or misleading announcements,
- improve the clarity and logical flow of the content.
Landmark role
A landmark role is a special designation in the page code (ARIA attribute) that informs screen readers and other assistive technologies about the function of a given part of the page. It allows users of such tools to quickly jump between key areas of the page – for example, go directly to the menu, form, or main content without having to browse through all the content.
Examples of landmark roles:
- banner – the page header, usually with a logo and main menu
- contentinfo – the page footer
- navigation – a menu or navigation links
- form – a contact form or another type of form
- search – a search field
- region – a distinct content area with its own title
- complementary – additional content, such as a sidebar
- main – the main content of the page
By default, each section is set to none (no role):

To set a landmark role:
1. Click the section where you want to add a landmark. Then select the appropriate role from the Landmark role list (navigation, region, form, complementary, search) in the Accessibility (WCAG) tab.

2. In the Aria label field, enter a short, descriptive text for this section (e.g., “Main menu,” “Newsletter signup form”).

For the banner, main, and contentinfo roles, the aria-label field is not required. However, these roles can only be used once per page. Once assigned to one section, they will become unavailable in the others.
Recommendation:
Even if a role appears only once (except for banner, main, and contentinfo), it’s a good idea to add an aria-label. This helps assistive technology users quickly identify the section’s content.
Multi-step form
If you opt to use a multi-step form (funnel), do not request the previously entered data to be re-entered.
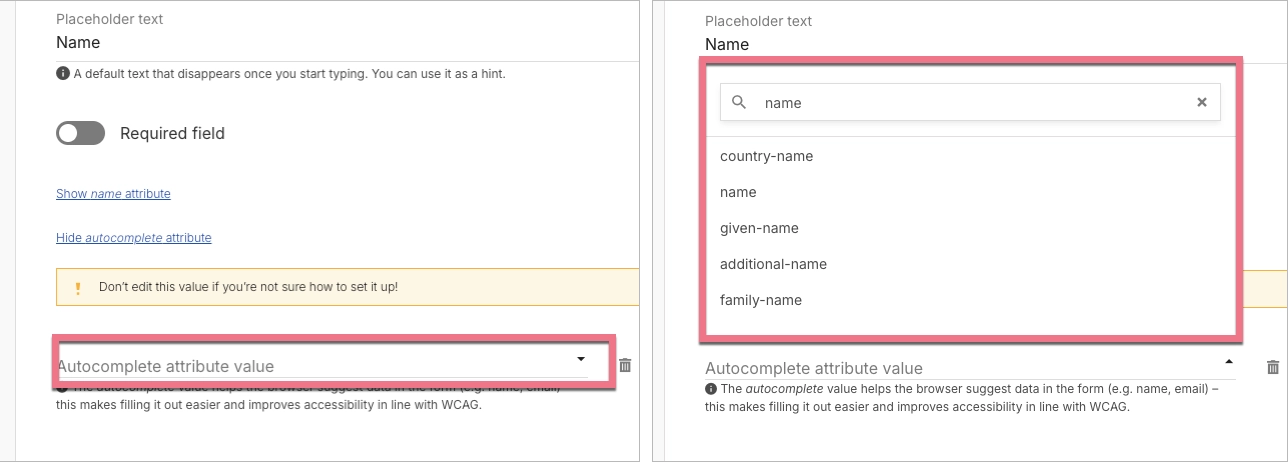
Autocomplete option
In the editor, you can also enable the autocomplete option for form fields. This allows data like name, email address, or phone number to be automatically filled in by the browser or password managers (such as Dashlane).
To enable autocomplete:
1. Go to Form Settings.
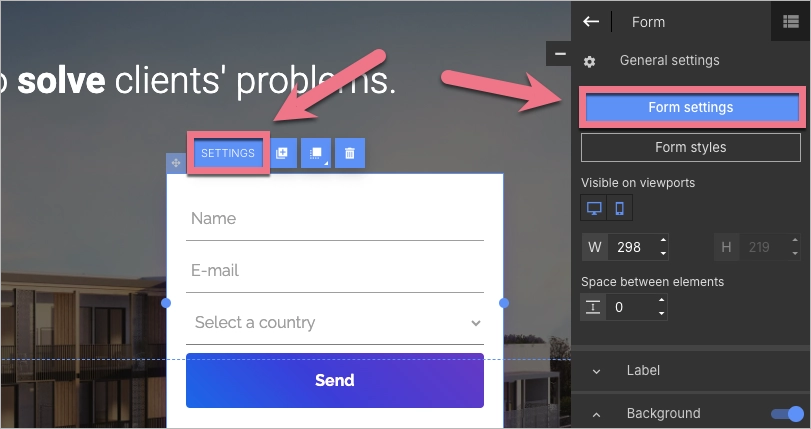
2. Select the field you want to edit, then click Show autocomplete attribute.
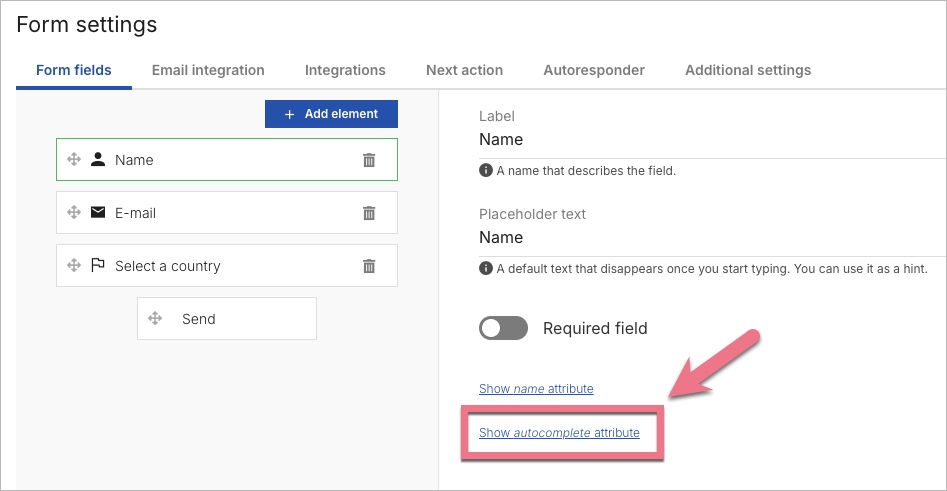
3. Open the dropdown menu and choose the appropriate value for that field – for example, name for a first name, or email for an email address.
- If you’re not sure which value to use, select on: The browser is allowed to autocomplete this field.
- If you want to prevent the browser from suggesting a value (e.g. for a national ID number), select off: The browser is not allowed to autocomplete this field.
Don’t forget to save your changes.
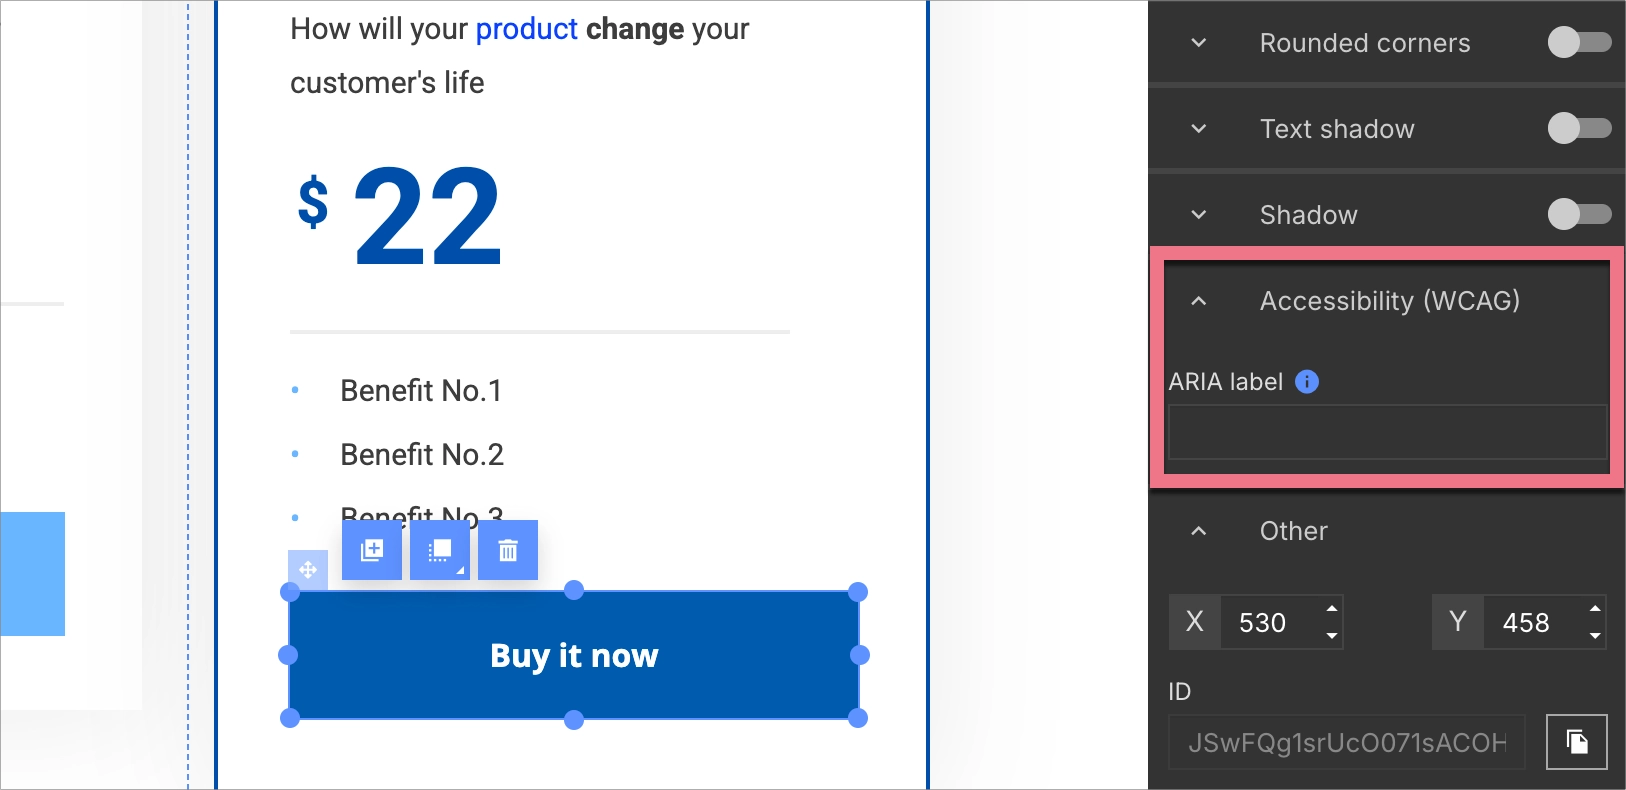
ARIA label for buttons
In the editor, the Button widget allows you to add an ARIA label. This attribute helps screen readers understand the button’s purpose – especially when the visible text is unclear (e.g. just a single word like “More”).
Use it to provide concise, descriptive text (e.g., aria-label=”Read more about our services”).
NOTE: Avoid overusing the ARIA attribute – if your button already has a clear label, additional ARIA text may be unnecessary or even confusing.
To add an ARIA label, click on a button and unfold the Accessibility (WCAG) tab in the right-side panel.
Alternative access: contact data
Check all elements’ accessibility – if one of them is not usable enough, you should provide an alternative. This particularly applies to contact data.
If the “help” and “contact” information are located on multiple subpages, they should always be placed in the same order and in the same position on the page.
Contact data in a fixed menu/footer
Phone number, correspondence address, or email address can be placed in a menu or a footer of your landing page, and pinned to the top or the bottom of the page. Fixed elements are always visible on a website, even during scrolling. Remember that you can not pin two elements at once.
Read more about fixed menu in Landingi.
Active contact links
To make contact data available from a keyboard, write them in an active alternative link form. That way, a user navigating with Tab and Enter is able to open the default email software or start a new SMS.
Check how to use alternative redirect links in Landingi.
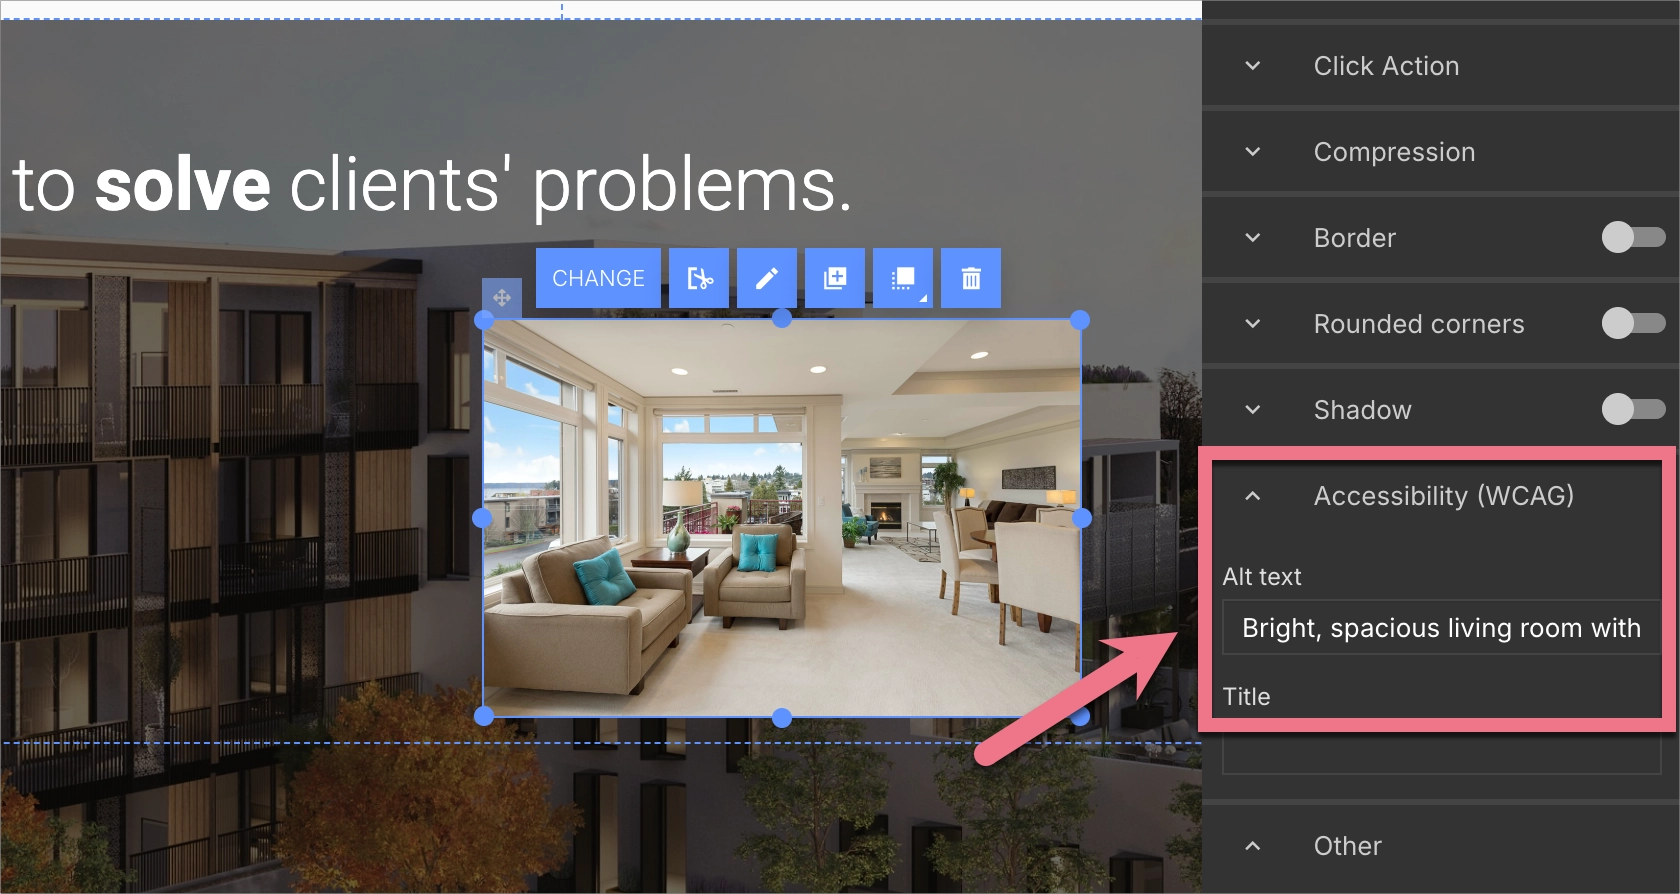
Alternative texts
Provide text alternatives for visual content – that way, images and icons on your landing page can be understood even by people with blindness and impaired vision. Alternative texts should briefly and relevantly describe graphic elements or their function.
Best practices for writing ALT text:
- Be specific and describe the image’s content or purpose.
- Avoid generic phrases like “image of…” or “this icon shows…”.
- Decorative images and icons should have an empty ALT attribute (
alt="").
For more details, check out the WAI tutorial on images.
Sometimes, alternative text is not enough. If your image is more complicated, add text next to it and create a more detailed description.
ALT for images
In the editor, click your image. Then, in the right-hand panel, go to the Accessibility (WCAG) tab. Expand the section and enter your description.
ALT for icons
In the editor, click your icon. Then, in the right-hand panel, go to the Accessibility (WCAG) tab. Expand the section and enter your description.
Mobile view
More and more users visit landing pages on mobile devices. Ease their experience by adapting mobile view both for horizontal and vertical orientation.
To switch to mobile view editing, click the smartphone icon in the top bar.
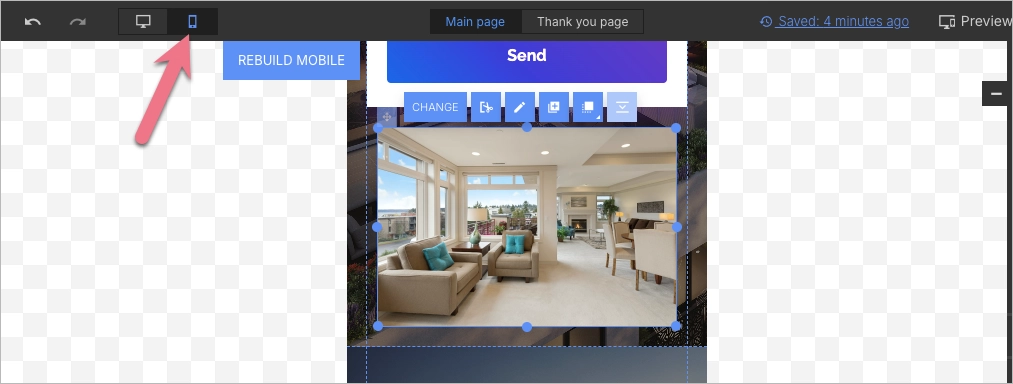
Read more about mobile view in the Landingi editor, adjust and publish your landing page, and check on your smartphone if your page works correctly.
Page title
Provide ways to help users determine where they are. For a disabled or inexperienced visitor, being capable of recognizing the page they are browsing is not mainly a matter of comfort, but first and foremost, it is their basics for web navigation.
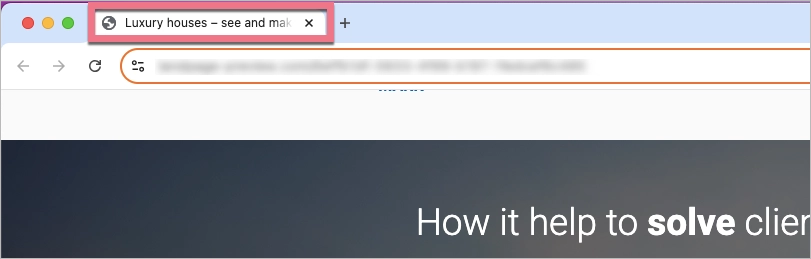
You can distinguish between landing pages by assigning them clear titles – these appear on browser tabs.
To set a title for your landing page and for a thank you page, go to Page Settings.
1. While editing your page, click the arrow to open Page Settings.
2. Expand the SEO / Social share tab. Enter the title manually or use AI to generate it.
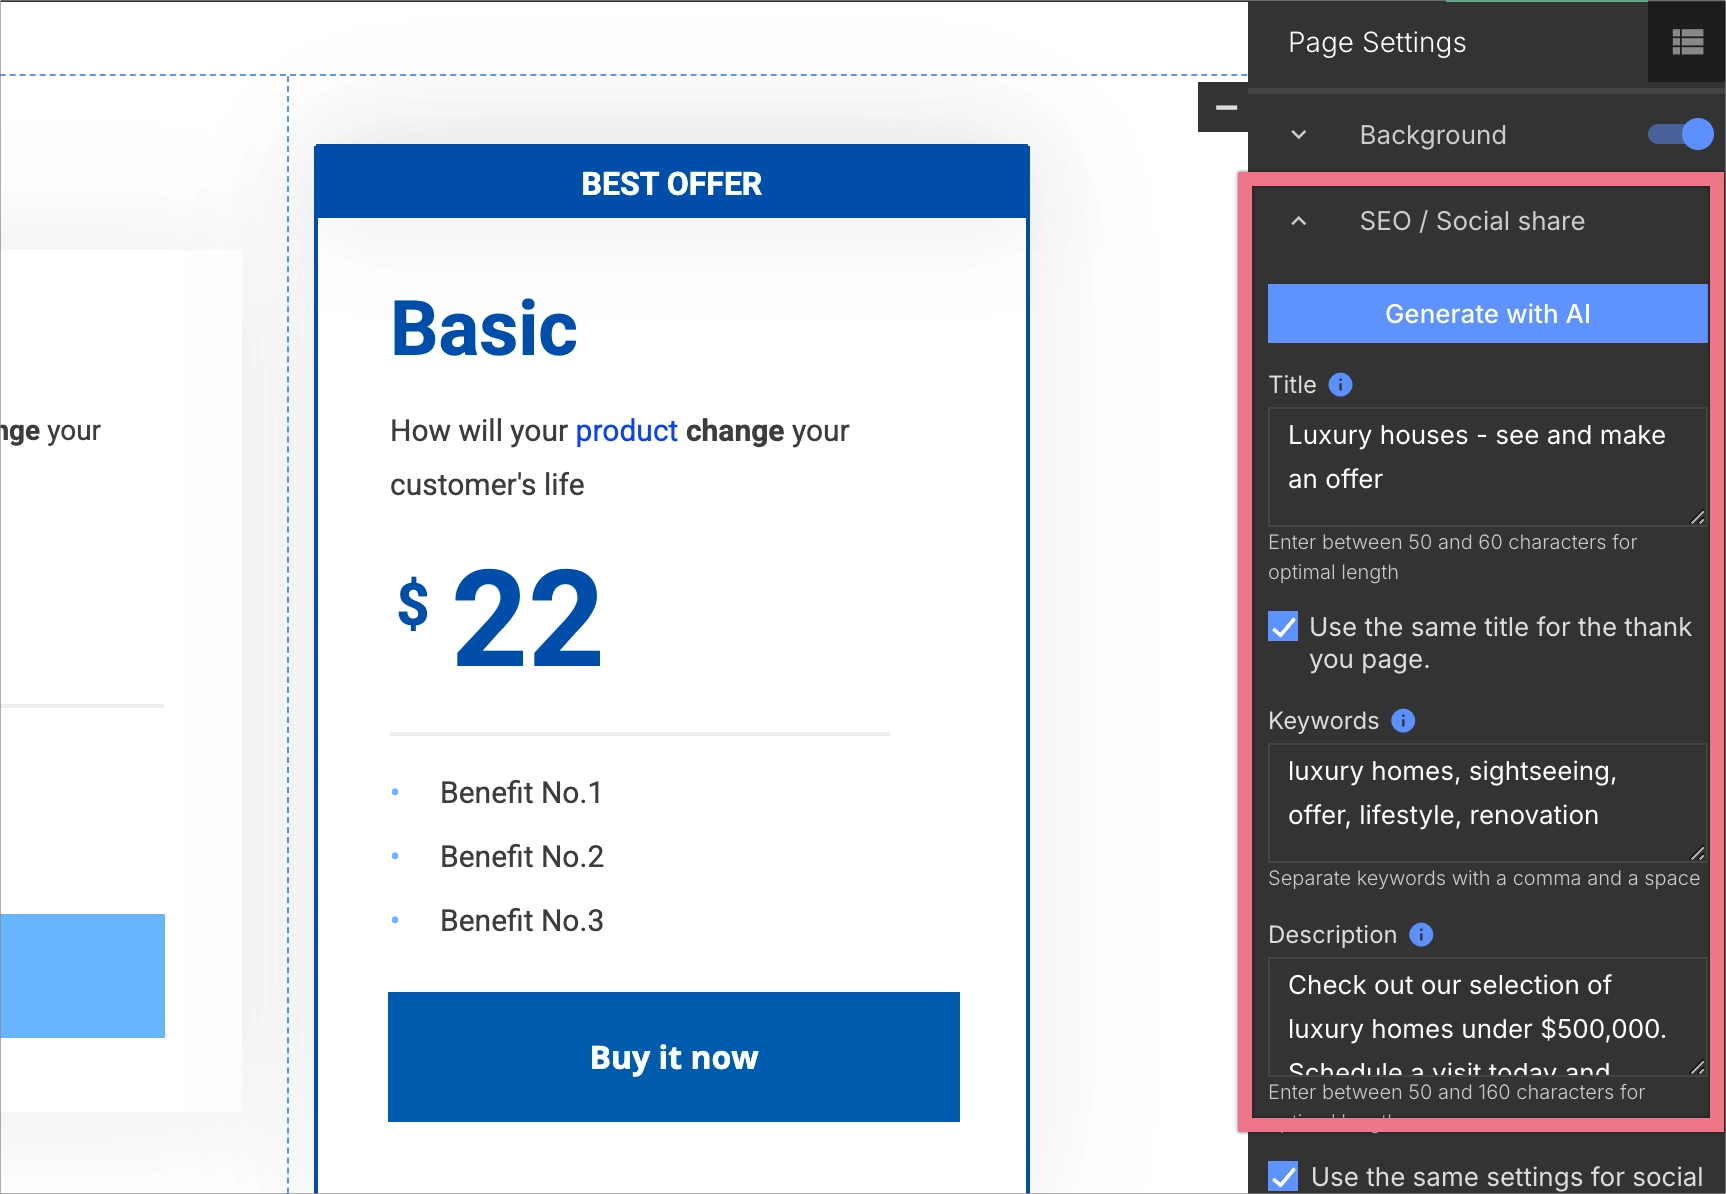
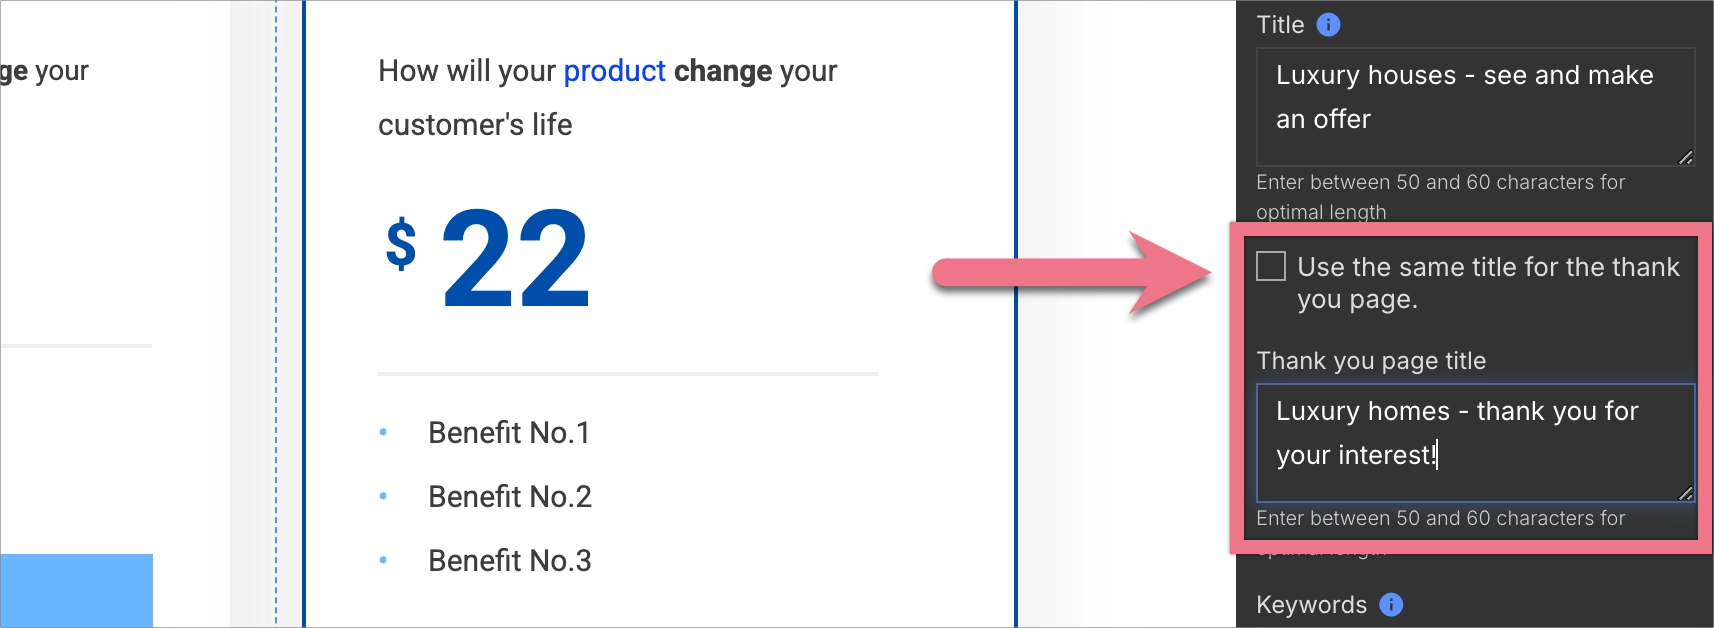
3. To set a different title for the thank you page, uncheck the option Use the same title for the thank you page and enter a new title.
Unexpected elements: sounds, animations
Surprising your visitors with unexpected sounds or moving and flashing objects may draw their attention. However, it is not recommended if you want to create a page that meets accessibility standards. For people with blindness and impaired vision or for elders, those unexpected elements are highly uncomfortable. Therefore, limit video and sound autoplay and animations on your landing page.
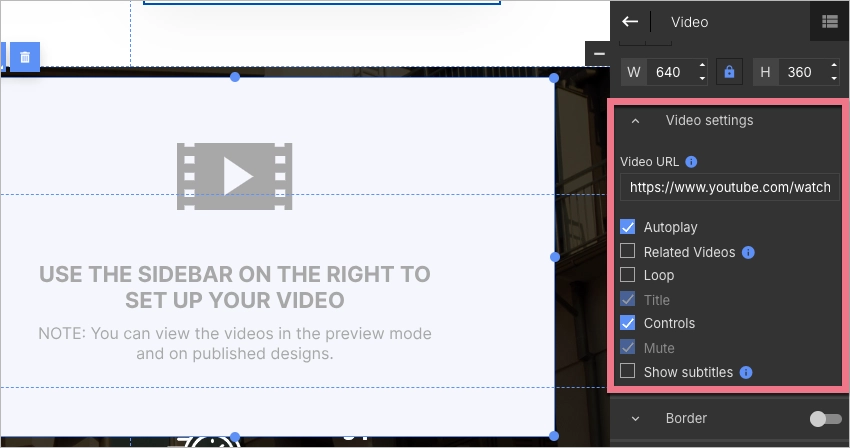
After adding a video to the Video widget, you can enable the following options:
- Autoplay – the video starts automatically;
- Related Videos – displays related videos from other channels;
- Loop – means that your video will be displayed again and again;
- Title – the video title appears;
- Controls – control buttons appear;
- Mute – the video starts mute automatically (enabled automatically with autoplay);
- Show subtitles – works only for YouTube videos and for subtitles added by a video owner.
If you want to optimize your landing pages for more leads, more sales, and more revenue, get a 30-minute demo – tailored specifically for your business.
