The name attribute is the type of attribute that is added to an HTML element and to which a certain value is assigned. In this case, the attribute specifies the name of the element. By using this name, you can refer to the element in the JavaScript code.
In Landingi form, our system captures these names (in the form fields) and then uses them in integrations with external tools. That way, the external tool can identify what values belong to a particular field.
Find the name attribute
1. In the editor, click your form and navigate to its Settings.
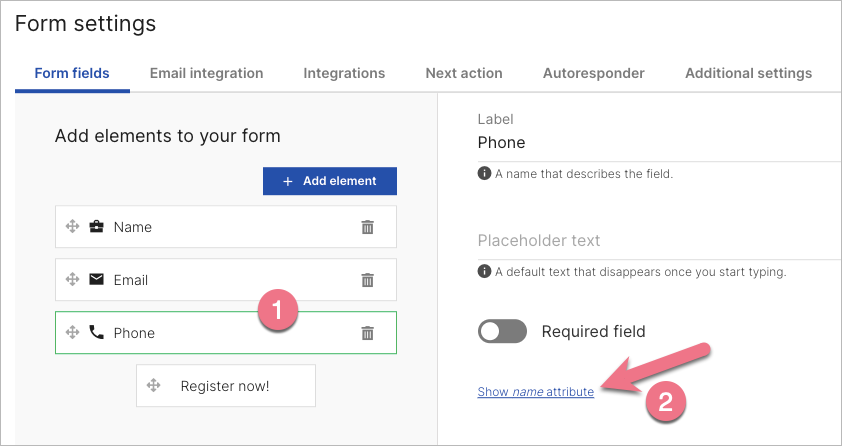
2. In the Form fields tab, select a field (1) and click Show name attribute (2).

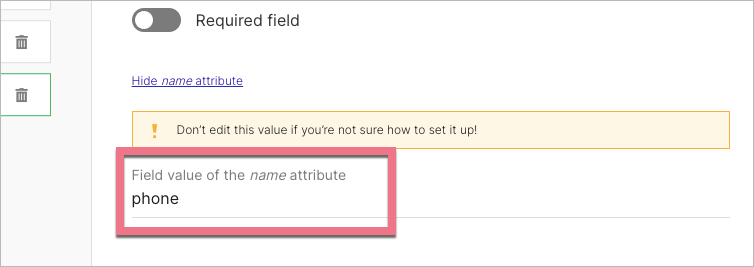
3. You will see the Field value of the name attribute.

Name attribute and integrations
When you connect a tool with Landingi, the name attribute adjusts to the integration – not the other way around. It means that after you integrate your form with an external tool, the tool will overwrite (change) the name attribute and assign it its own value. The name attribute will remain as the integration impose. As a user, you are not able to change it in the integration as long as the tools are connected.
Mostly, the name attribute is used to identify fields by JavaScript codes. If this is how you use it (the installed JavaScript decides what happens with certain values), remember that you have to adjust the name attribute in your JavaScript code – make sure it matches the last version it will adopt after creating the integration.
Name attribute usage
Here are some examples of usage:
