In digital marketing, a landing page is a standalone web page created for one specific campaign goal. Visitors usually land on it after clicking an ad, email link, social media post, or search result – and the page guides them toward one action, such as signing up, downloading a resource, booking a demo, or making a purchase.
Landing pages are used when a business wants to turn focused traffic into measurable results. Unlike a homepage, a landing page removes distractions and keeps the message, offer, and CTA tightly connected. That is why landing pages are so important for conversion – they give every campaign a clear destination instead of sending visitors into a general website experience.
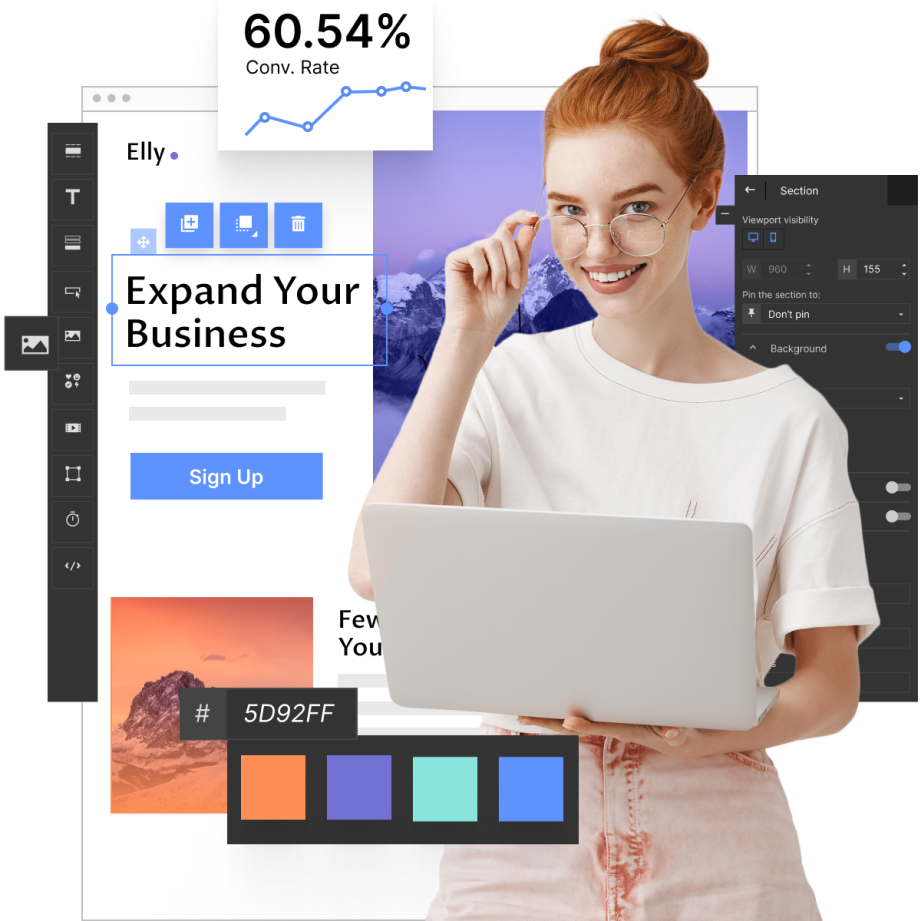
According to Unbounce, the average landing page conversion rate across industries is 6.6%, while HubSpot reports that businesses with 10-15 landing pages generate 55% more leads than those with fewer than 10. In 2026, this also explains why landing pages are moving beyond static templates. With an AI landing page operation system like Landingi, teams can create, publish, track, and optimize campaign pages faster, while keeping control over the whole conversion workflow.
In this guide, you’ll learn the landing page definition, what a landing page is used for, the most common landing page types, best practices, examples, benefits, costs, and how to create a landing page that supports real campaign performance.
Key facts
- Businesses with 10-15 landing pages generate 55% more leads than those with fewer than 10, according to HubSpot.
- A landing page is built around one goal: conversion.
- Landing pages are mainly used in ads, email campaigns, social media campaigns, lead generation, product launches, and sales funnels.
Lunar is almost here!

What Is a Landing Page in Digital Marketing?
A landing page is a web page built with one goal in mind – conversion. It’s where a visitor lands after clicking a link in an ad, email, or social post, and it’s designed to turn that interest into action.
Unlike regular web pages, which often offer multiple paths, a landing page keeps things simple. One message, one offer, one call to action. That focus is what makes it one of the most effective tools in digital marketing.
What really drives performance is clarity. A good landing page removes distractions and matches the message to a specific audience and intent. Whether you’re collecting leads or driving sales, everything on the page should support that single goal.
Even though landing page types vary depending on the campaign, most of them rely on the same core elements:
- A clear, attention-grabbing headline
- A supporting subheadline
- A strong value proposition (USP)
- A relevant image or video
- A benefits section focused on outcomes
- Social proof (reviews, logos, testimonials)
- A visible, action-driven CTA
- A simple lead form (if needed)
- A short closing section reinforcing the offer
When these elements work together, a landing page becomes more than just a page – it becomes a conversion-focused environment.
Use Landingi to design landing pages that drive real results for your business.
What is a landing page on a website?
A landing page on a website is a standalone page created for a specific marketing goal – usually to drive conversions, like sign-ups, downloads, or purchases. A landing page is focused and intentionally stripped down to keep attention on one action.
Most often, landing pages are used in paid campaigns or email marketing. Instead of sending users to a general website, you send them to a page that matches exactly what they clicked on. That consistency makes the experience smoother – and more effective.
What is the function of a landing page?
At its core, a landing page has one job – turn visitors into results. But depending on the campaign, that can mean different things:
- Lead generation – collecting emails or contact data
- Sales conversion – encouraging users to buy or sign up
- Market testing – validating a new idea or offer
- Content delivery – giving access to resources like ebooks or webinars
What makes landing pages so effective is their focus. Instead of sending traffic into a complex website, they create a clear path from interest to action.They also give marketers something just as important – data. Every click, scroll, or form submission can be tracked and used to improve performance. Tools like EventTracker make it possible to see how users actually behave on the page, which helps refine both the page and the campaign over time.

What Are the Types of Landing Pages?
Landing pages come in many forms, but in practice most of them fall into a few core categories based on what you want the user to do. In 2026, the difference isn’t just in layout – it’s in intent. The best-performing pages are built around a very specific action and audience.
Instead of thinking in dozens of variations, it’s more useful to focus on the main types used in real campaigns:
Lead generation pages
These pages are designed to collect contact details – usually through a simple form. You’ll see them offering something in return: an ebook, webinar, discount, or access to content.
This is still one of the most common use cases – according to HubSpot, lead generation is the main goal for over 40% of marketers using landing pages.
Click-through pages
Click-through landing pages warm users up before the final step, usually a purchase. Instead of pushing for an immediate conversion, they explain the offer and guide users toward the next action.
They’re widely used in SaaS, ecommerce, and subscription-based products.
Sign up and use Landingi to craft your high-converting pricing landing page!
Sales pages
Sales landing pages are built to close. They focus on one offer and include everything needed to make a decision – benefits, visuals, social proof, and a strong CTA.
This includes both short-form and long-form pages, depending on the complexity of the offer.
Product pages
A product landing page focuses on a single product or product category. Unlike ecommerce listings, it’s designed to tell a clear story and highlight value – not just display options.
Pricing pages
Pricing pages help users compare options and make a decision quickly. In SaaS especially, they often act as a key conversion point rather than just an informational page.

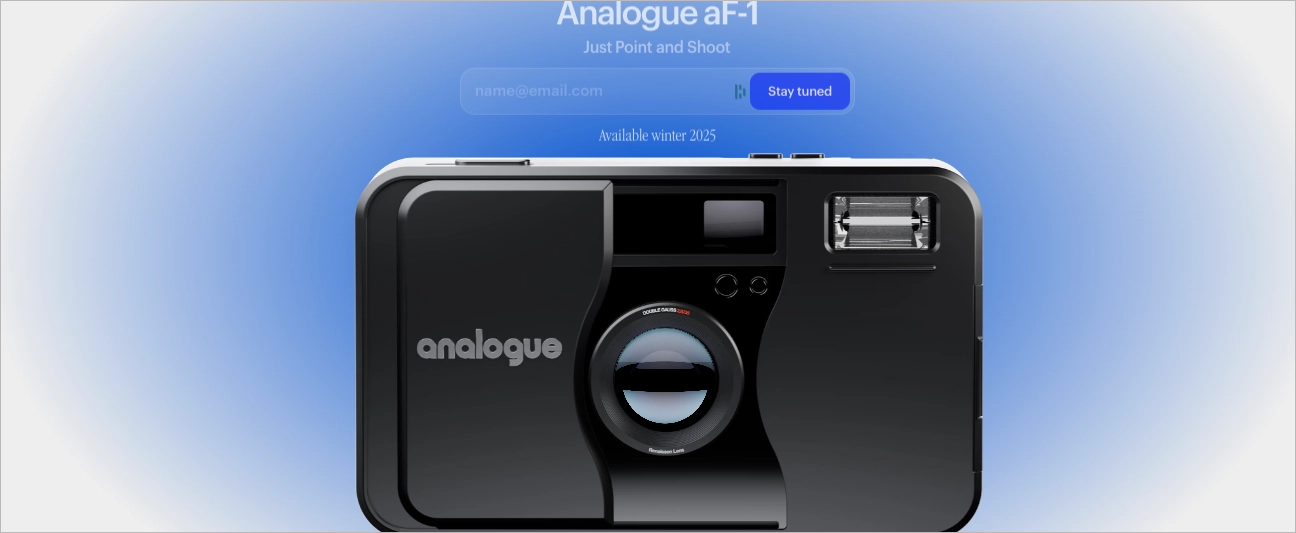
Coming soon pages
These pages are used before launch to build interest and collect early leads. They’re simple, but effective – especially when paired with a clear value proposition and early access incentive.

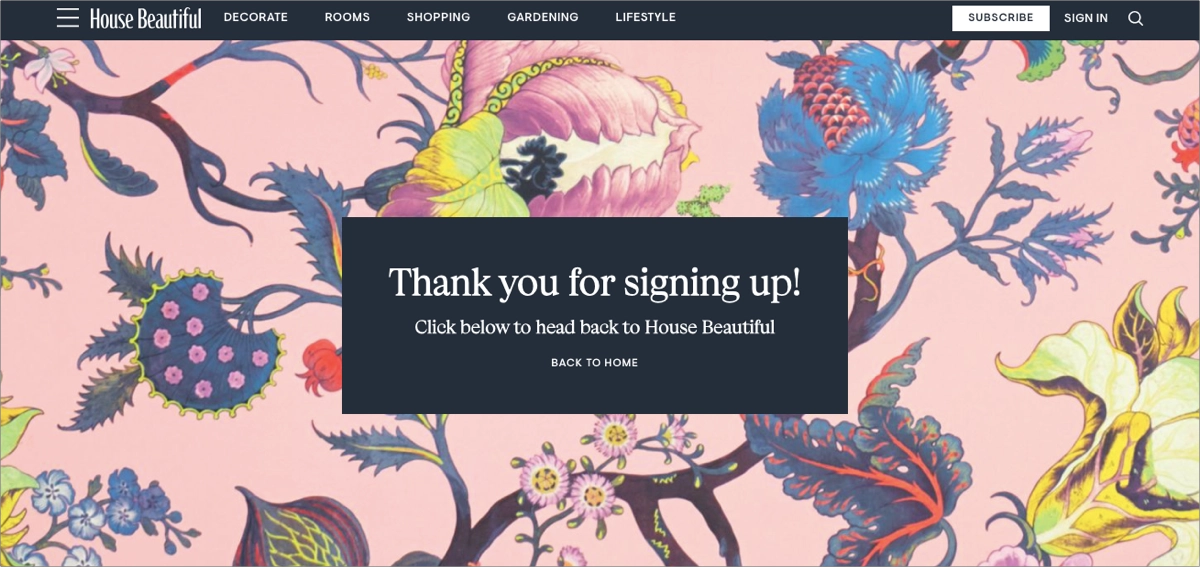
Thank you pages
Often overlooked, thank you pages appear after conversion and can drive additional actions – upsells, referrals, or further engagement.
Video landing pages
Pages built around video are becoming more common, especially in 2026. Video helps explain complex offers quickly and can significantly improve engagement and conversion rates.

Other supporting pages
Some landing pages serve more functional roles, like:
- unsubscribe pages
- 404 pages
- login pages
- referral pages
- splash pages (e.g., age verification or region selection).

They’re not always conversion-focused, but they still shape the overall user experience and can impact retention and trust.
Build your page and start tracking conversions with EventTracker today!
What Are The 7 Benefits Of A Landing Page?
Landing pages remain one of the most effective tools in digital marketing – but today their real strength lies not just in conversion itself, but in how quickly you can build, test, and improve them.

Here are the key benefits that actually drive results:
1. Higher conversion rates
Landing pages convert better than standard web pages because they focus on one goal. Instead of offering multiple paths like a website, they guide visitors toward a single action, reducing friction and making decisions easier.
2. Increased focus on the audience
A landing page can be tailored to a specific audience segment, campaign, or traffic source. This makes the message more relevant and aligned with user intent – which directly impacts conversion performance.
3. Effective and scalable lead generation
Landing pages are one of the simplest ways to generate leads at scale. By offering something valuable – like an ebook, webinar, or discount – you can consistently capture contact data and build a pipeline for future campaigns.
In 2026, this process is even faster, as AI tools allow teams to generate and launch multiple variations without starting from scratch.
4. Better campaign measurement
Because each landing page has one goal, it’s easier to track performance. You can clearly see what’s working – from conversion rates to user behavior – and make improvements based on real data.
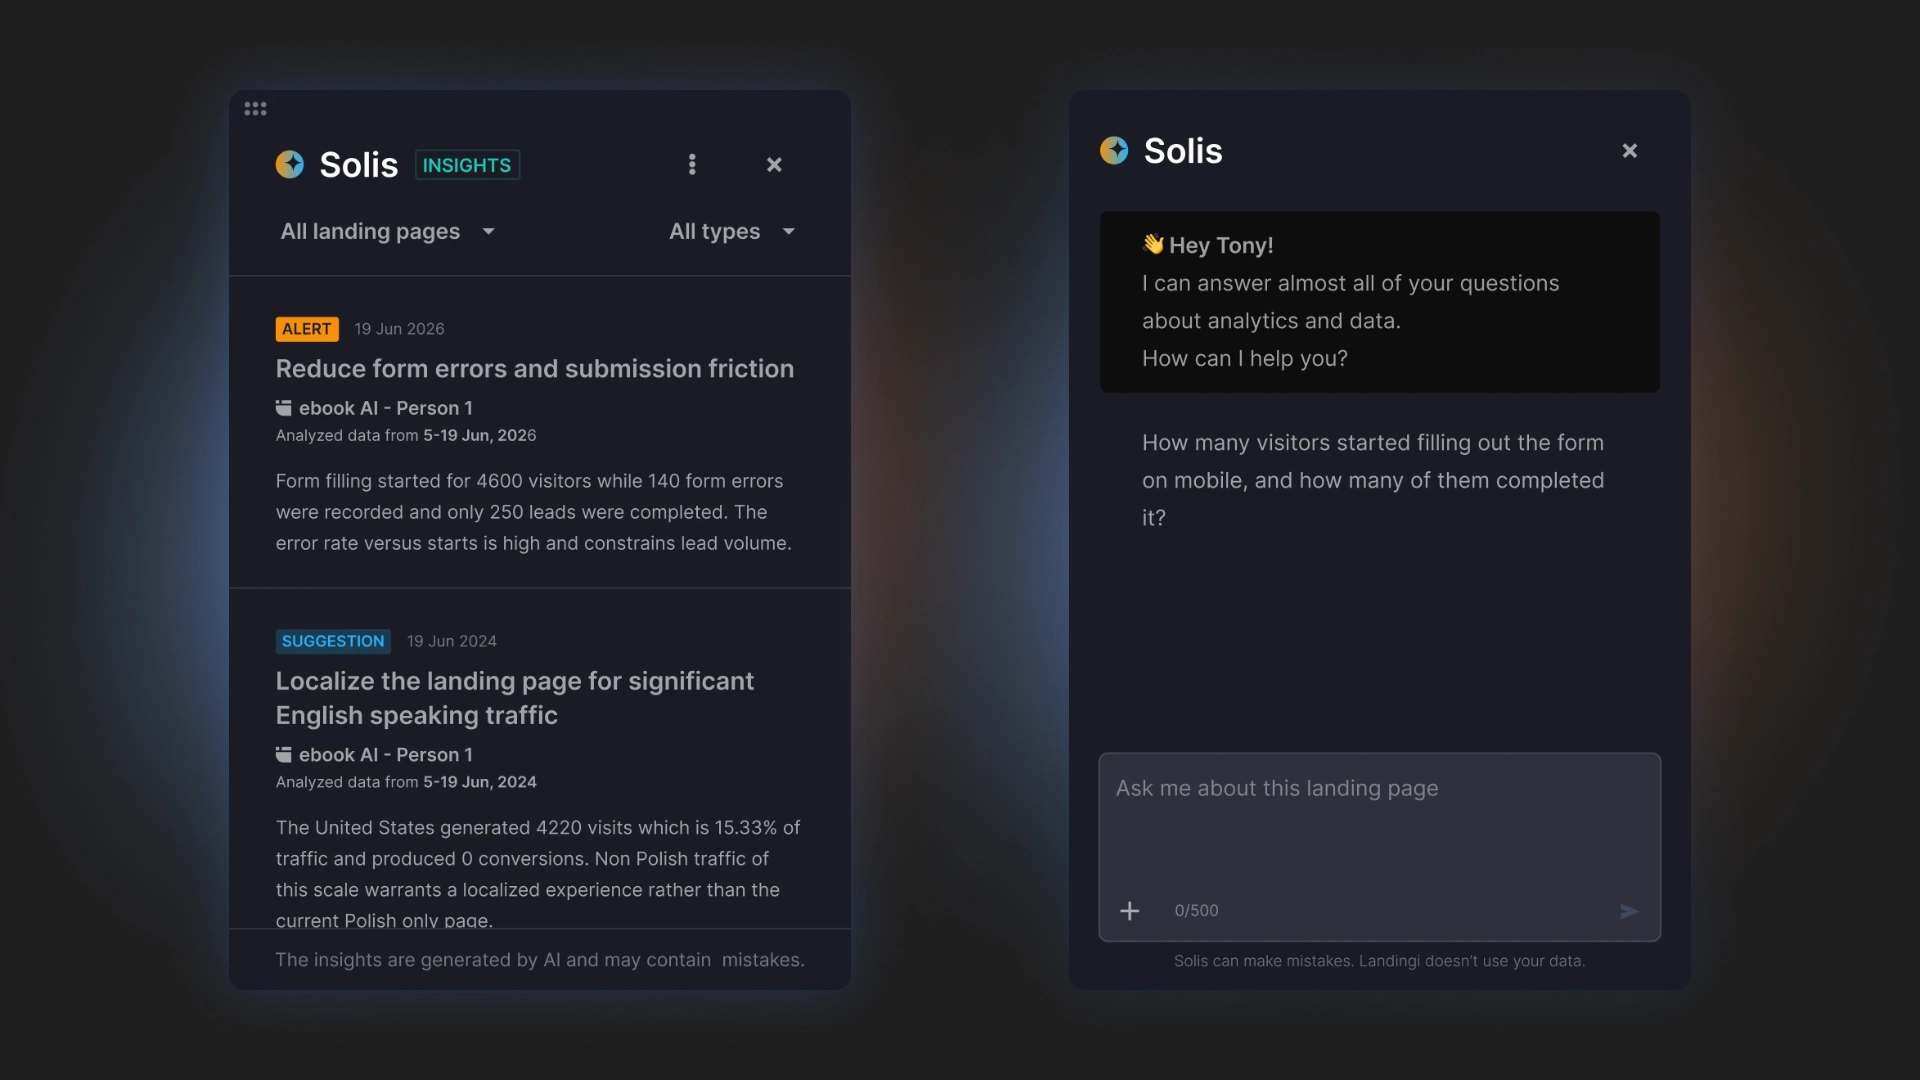
In Landingi, EventTracker collects this behavioral data, while Solis analyzes it in the context of the landing page and campaign. Solis highlights alerts, discoveries, and practical optimization suggestions, so marketers can see what works, what blocks conversions, and what to improve next.
5. Lower bounce rates and higher engagement
A focused page with a clear message and CTA keeps users engaged longer. With fewer distractions than a full website, visitors are more likely to stay, interact, and complete the desired action.
6. Flexibility across campaigns
Landing pages can be quickly adapted to support different goals – from product launches and lead generation to event promotion or paid campaigns. This flexibility makes them a core element of almost every digital strategy.
7. Built-in testing and optimization
Landing pages are ideal for A/B testing. You can experiment with headlines, layouts, offers, or CTAs and continuously improve results.
Today, conversion optimization is less about manual guesswork and more about iteration. With the right tools, landing pages become part of an ongoing optimization process rather than a one-time build.
| If you use landing pages… | What changes in practice |
| You send traffic to one focused page | Users are less distracted and more likely to convert |
| You match the page to a specific campaign | Your message feels more relevant to the visitor |
| You create separate pages for different audiences | You can test what works for each segment |
| You collect leads directly on the page | You build a database for future campaigns |
| You track user behavior on a single goal page | You quickly see what blocks conversions |
| You run A/B tests on key elements | You improve results without redesigning everything |
| You launch pages faster (often with AI support) | You can test more ideas in less time |
Where to Create a Landing Page?
Today, you can create a landing page using tools like WordPress, Wix, or more advanced solutions like Landingi – an AI landing page operation system – with it’s Lunar, a 100% AI-native landing page generator. The real difference in 2026 is not where you build a page – it’s how fast you can create, test, and improve it.
Traditional tools still focus on manual design and templates. That works, but it’s slow. Modern workflows are shifting toward AI-driven creation and continuous optimization.
If your goal is to launch pages quickly and actually improve performance over time, you need more than a builder – you need a system.
Landingi connects creation, tracking, and optimization into one workflow.
Instead of switching between tools, you can:
- create landing pages
- publish them instantly
- track user behavior
- optimize performance based on data
all in one place.
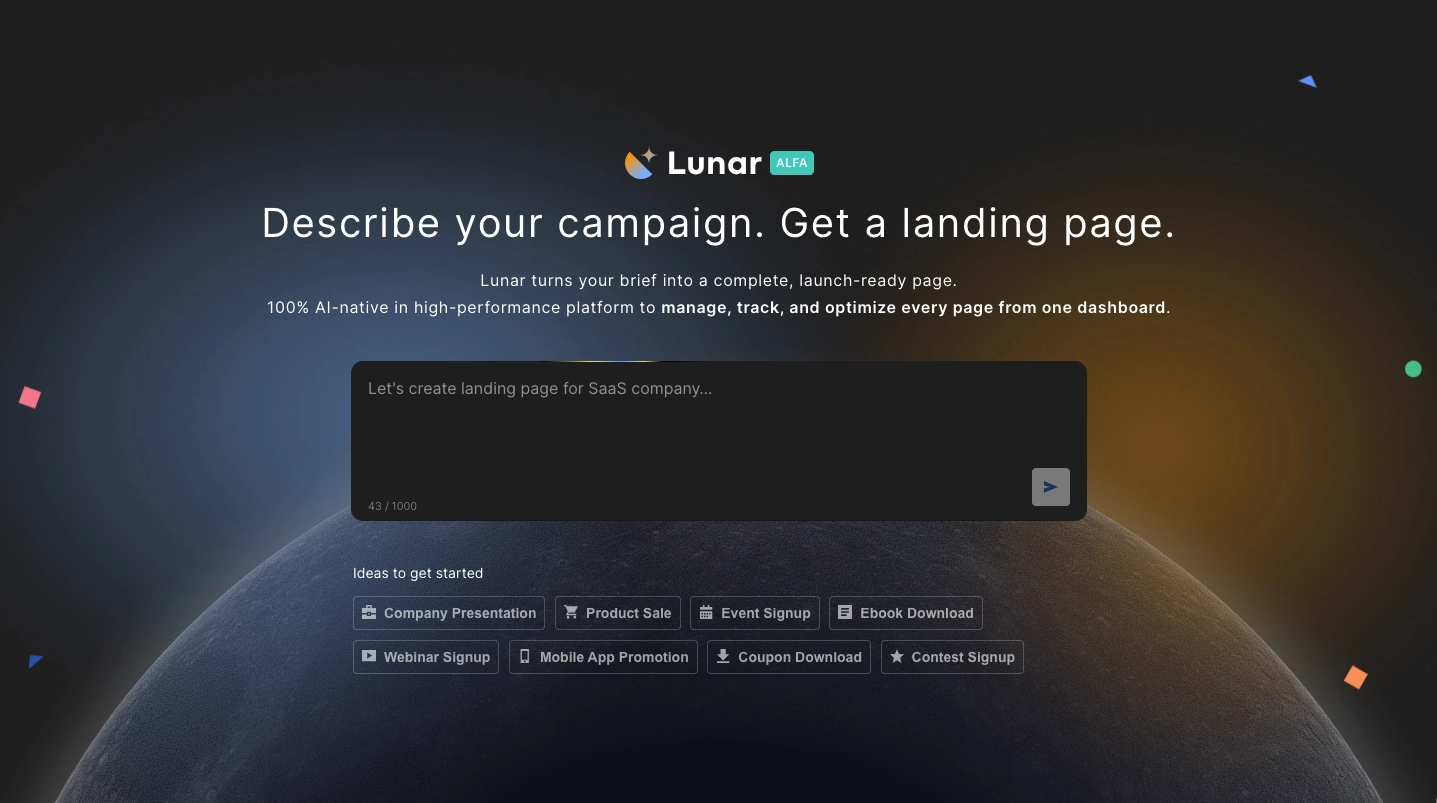
The biggest shift comes from how landing pages are created. With Lunar, you describe your campaign, and the system generates a complete, ready-to-publish landing page – including structure, copy, and layout aligned with your goal. You can then refine the content, adjust sections, and publish the page on your own domain in minutes.
This approach removes the biggest bottlenecks in traditional workflows. Instead of spending hours building a page, you can focus on testing different ideas and improving results.
What makes it even more effective is what happens after launch. Every landing page becomes part of a broader workflow, where user behavior is tracked and analyzed. You can see exactly how users interact with your page and make informed decisions about what to change next. This means faster launches, more iterations, and better-performing campaigns.
Generate high-converting landing page tailored to your offer in minutes!
How to Create a Landing Page?
Creating a landing page today isn’t just about designing it from scratch. In 2026, you have multiple paths – from AI-generated pages, through templates, to fully custom or programmatic setups. The process stays strategic, but execution is faster and more flexible.
In practice, you can create a landing page in three main ways:
- generate it with an AI landing page generator (e.g., Lunar)
- build it using a template and customize it
- design it from scratch or at scale (programmatic landing pages)
No matter which approach you choose, the core principles stay the same.
Here’s how to do it right:
1. Define your goal
Start with one clear objective. Whether it’s lead generation, sales, or sign-ups, your entire page should revolve around that action. Even when using AI, your input (prompt or brief) defines the outcome.
2. Choose how you want to build it
This is where modern workflows differ:
- AI-generated landing pages – fastest option; you describe your campaign and get a ready-to-publish page
- Templates – good balance between speed and control
- Programmatic pages – good for scaling campaigns across multiple segments or locations
The choice depends on how quickly you need to launch and how many variations you plan to run.
3. Align message with your audience
Whether you’re writing manually or generating content with AI, the message must match user intent. The more relevant the page feels, the higher the conversion rate.
4. Keep the structure focused
A high-converting landing page is always simple: one offer, one message, one CTA.
Even when AI generates the layout, it’s worth reviewing whether anything distracts from the main goal.
Use Landingi to design landing pages that drive real results for your business.
5. Emphasize benefits, not features
Visitors don’t care how something works – they care what they get. Make sure the value is clear within seconds.
6. Add trust signals
Social proof still matters. Testimonials, numbers, recognizable brands – these elements reduce friction and support decision-making.
7. Make the CTA obvious
Your call-to-action should be easy to find and easy to understand. Strong, specific CTAs consistently outperform generic ones.
8. Optimize continuously
This is where the biggest shift happened.
Instead of “building and leaving it,” landing pages are now constantly improved based on data. With tools like EventTracker and and Solis, you can see how users behave and adjust your page accordingly.
In reality, most landing pages today are not built fully manually. They’re generated, tested, and refined in cycles. That’s why the key question is no longer just how to create a landing page, but how fast you can launch it, learn from it, and improve it.
Turn traffic into conversions! Build high-performing landing pages on Landingi and watch your results soar.
How to create a landing page without a website?
To create a landing page without a website, use a platform that handles both building and hosting – like Landingi, an AI landing page operation system. This way, you can launch a standalone page without setting up a full site, server, or infrastructure.
This approach is widely used in modern landing page in digital marketing, especially when speed matters. Instead of building a full website, you create a single, focused page and publish it instantly under your own domain or a shareable URL.
It’s a common solution for:
- PPC and paid ad campaigns
- lead generation funnels
- product validation and MVP testing
- event or webinar sign-ups
From a practical perspective, the process is simple:
- create your page (from a template or with an AI landing page generator like Lunar)
- publish it directly from the platform
- share the link in ads, emails, or social media
- track performance and optimize
What’s different in 2026 is how fast this happens. Instead of designing everything manually, you can generate a complete landing page from a short campaign brief. Tools like Lunar build the structure, write the copy, and prepare the layout – so you can go live in minutes, not days.
This makes landing pages one of the fastest ways to test ideas and run campaigns. Even without a website, they can effectively:
- capture leads
- drive conversions
- validate offers
- support full marketing funnels
And because everything is measurable from the start, you can immediately improve results based on real user behavior – which is where most of the gains come from today.
What are the best tools for creating a landing page?
The best tool for creating a landing page today is Landingi – an AI landing page operation system – with it’s Lunar, a 100% AI-native landing page generator designed for teams that want to go from idea to live page in minutes.
In 2026, the question is no longer just what is a landing page builder, but what system helps you create, test, and improve pages continuously. Tools like Wix, Leadpages, or Unbounce can handle page creation and increasingly offer AI features as well. However, most of them still focus primarily on building pages, while more advanced platforms are designed to support the entire landing page lifecycle – from creation to ongoing optimization and scaling.
Instead of separating creation from optimization, Landingi connects everything into one workflow:
- generate landing pages with AI (Lunar)
- publish them instantly
- track user behavior with built-in analytics (EventTracker)
- optimize performance based on real data (Solis)
At the core of this system is Lunar – a 100% AI-native landing page generator built not just for speed, but for quality and usability. It’s designed for:
- marketers running multiple campaigns at once
- teams that need to test offers quickly without sacrificing consistency
- founders and growth teams who want to launch and validate ideas without relying on developers
Lunar generates structured, conversion-focused landing pages with coherent copy, layout, and messaging. This doesn’t just save time – it reduces friction in the creation process and helps maintain a high standard across every page you launch.
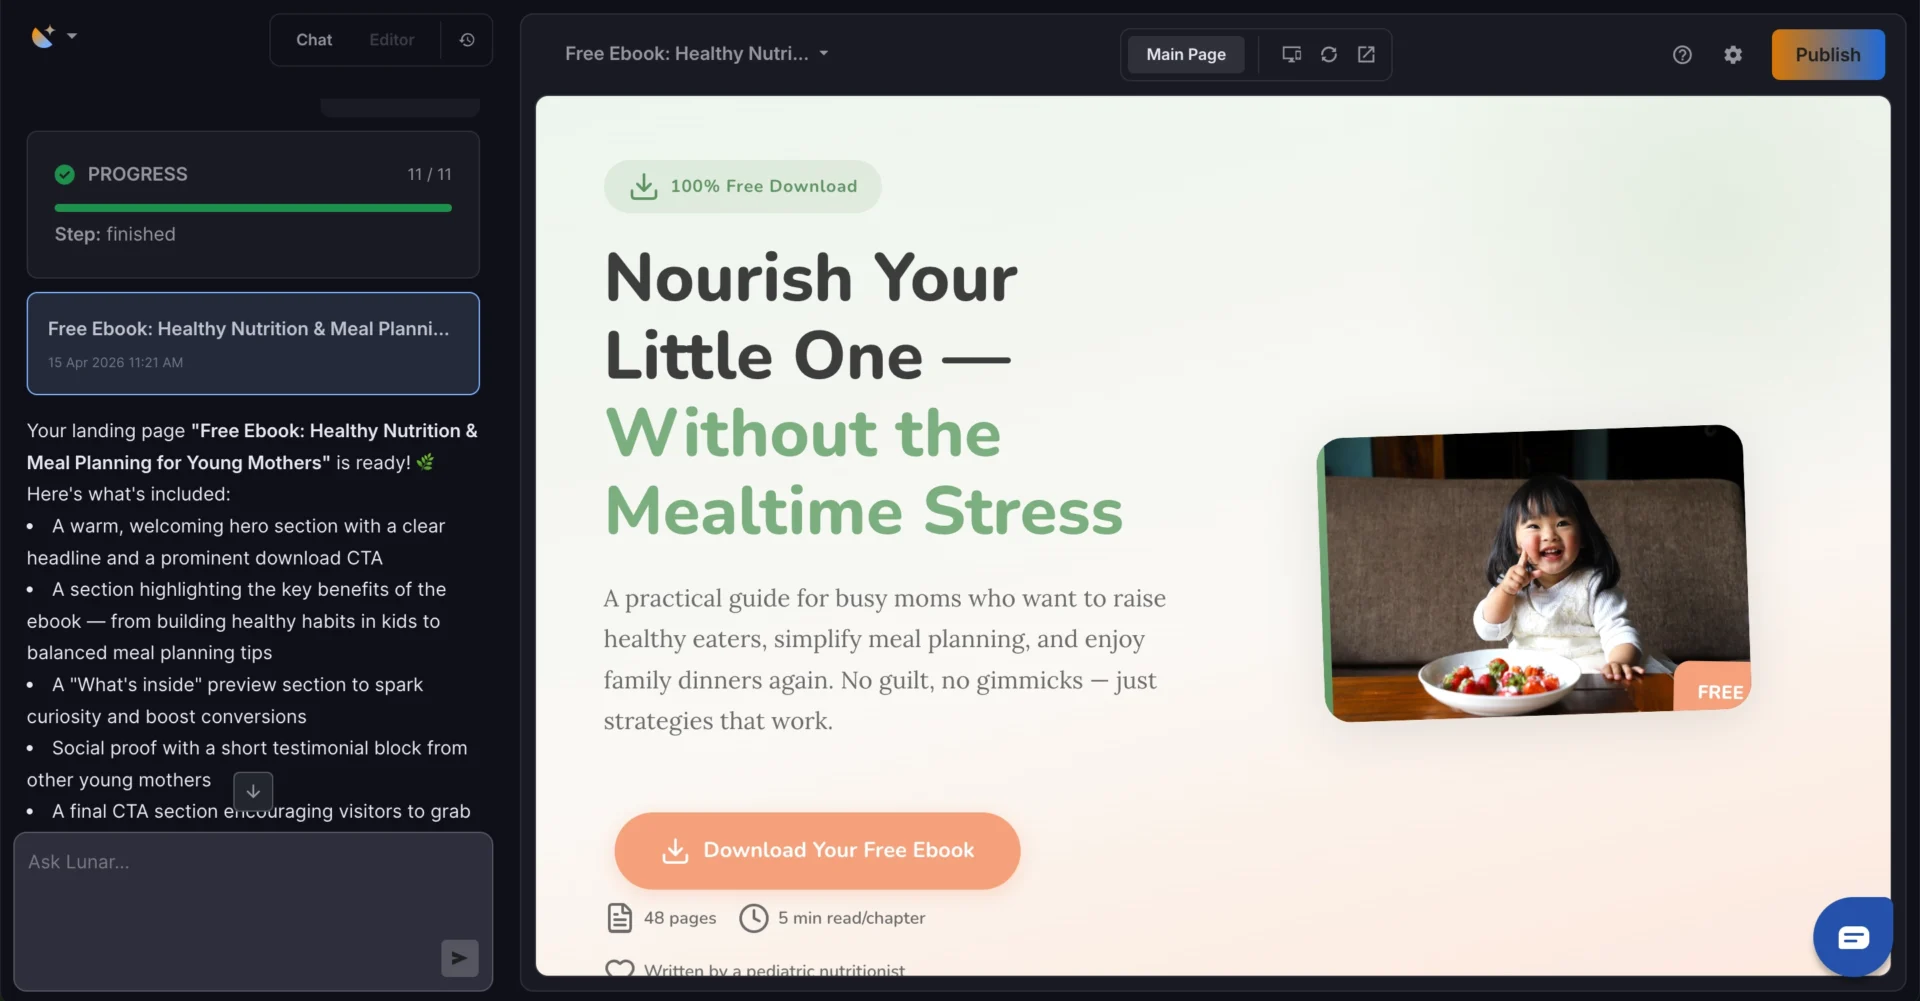
Rather than starting from a blank canvas, you describe your campaign and generate a complete landing page – including structure, copy, and layout. This dramatically reduces the time it takes to launch and iterate.
You can also speed up the briefing stage with a ready-made prompt. This works especially well when you want Lunar to generate a page that already reflects your product, audience, and conversion goal.
For example, for a product landing page, you could use a prompt like this:
Create a high-converting product landing page for [Product name].
[Product name] is a [Product category] created for [Target audience]. It helps users [Main benefit] by solving [Main pain point]. The key value proposition is [Unique value proposition].
The page should focus on one goal: [Primary conversion goal, e.g., purchase, demo request, preorder, add to cart].
Use a [Tone of voice] tone and a [Design style] visual direction. The page should include a clear hero section, benefit-driven headline, short product explanation, key features connected to outcomes, product visuals, social proof, FAQ, and a strong CTA.
Highlight these product details:
Main features: [Feature 1], [Feature 2], [Feature 3]
Main benefits: [Benefit 1], [Benefit 2], [Benefit 3]
Proof points: [Reviews, awards, customer logos, numbers]
Objections to address: [Price, setup, compatibility, delivery, trust]
Make the page mobile-first, easy to scan, and focused on helping visitors understand the product quickly and take action.
This prompt should be adjusted to the product context – a SaaS product page needs a different brief than an ecommerce product page, preorder page, or high-ticket service page.
What actually matters when choosing a tool?
Choosing the right tool comes down to three core capabilities:
Page creation
You should be able to create pages in different ways – from templates, from scratch, or via AI generation. Today, AI-generated pages are becoming the fastest and most scalable option.
Conversion optimization
A landing page is never finished. The best tools include A/B testing, behavior tracking, and clear performance insights so you can continuously improve results instead of guessing what works.
AI support
Modern landing page tools rely on AI not just for content generation, but for ongoing optimization. This includes analyzing user behavior, identifying friction points, and suggesting improvements based on real data.
That’s the real difference today.
The best landing page tools don’t just help you build pages – they help you run and optimize them as part of a complete marketing workflow.
Sign up and use Landingi to craft your high-converting pricing landing page!
What Is the Cost of a Landing Page?
The cost of a landing page in 2026 varies widely – from under $100 to several thousand dollars – depending on how you create it and how fast you need to iterate.
What changed recently is not just pricing, but the model. Thanks to AI and automation, you no longer pay only for design – you pay for speed, scalability, and the ability to optimize continuously.
Here’s how the main cost scenarios look today:
Creating a landing page yourself (AI or templates)
If you build a landing page using a platform like Landingi, your cost is typically a monthly subscription rather than a one-time expense.
Instead of paying for a single page, you get access to a system that can include:
- page creation and hosting
- analytics and user behavior tracking
- optimization features (like A/B testing – depending on the plan)
- AI support for generating and improving pages
The exact scope depends on the plan you choose, which allows you to match the toolset to your needs – from simple page creation to advanced optimization and scaling.
In practice, this is now the most cost-effective option – especially if you create multiple pages or run ongoing campaigns. AI landing page generators like Lunar reduce both time and production costs by generating complete pages instead of requiring manual work, while higher-tier plans unlock deeper optimization capabilities as your campaigns grow.
Hiring a freelancer
Freelancers typically charge between $300 and $1,500 per landing page, depending on experience and scope. This can work well for one-off projects, but becomes expensive if you need multiple versions or frequent updates.
Another limitation is speed – every change requires additional time, which makes rapid testing harder.
Working with an agency
Agency-built landing pages usually start around $1,000 and can exceed $3,000+, especially for custom designs, advanced integrations, or complex campaigns.
This approach offers high quality, but it’s the least flexible. Iterating, testing, and scaling campaigns often requires additional budget and time.
In reality, the biggest cost factor today is not building the page – it’s how often you need to update and optimize it.
Landing pages are no longer static assets. They evolve based on user behavior, campaign performance, and testing results. That’s why many teams are moving away from one-time builds toward systems that allow continuous iteration.
From that perspective, platforms that combine creation, tracking, and optimization in one place often deliver the best ROI – because they reduce both production costs and the cost of missed opportunities.
What Are the Best Practices for Creating Landing Pages?
The best practices for creating landing pages focus on clarity, relevance, and continuous optimization – all aimed at driving one specific action.
That hasn’t changed. What has changed is how quickly you can apply, test, and improve these practices using modern, AI-supported workflows.
Here’s what actually matters today:
1. Landing page design
A high-converting landing page is simple by design. Not minimal for the sake of aesthetics – minimal because it removes friction.
- Remove navigation and competing links
- Keep the layout clean and easy to scan
- Place your main CTA above the fold
- Design mobile-first (this is no longer optional)
- Use consistent colors and visual hierarchy
- Cut anything that doesn’t support conversion
Pages that feel obvious to use almost always outperform those that try to be clever.
2. Content that matches intent
Good content doesn’t just describe an offer – it aligns perfectly with what the user expected after clicking.
- Start with a clear, benefit-driven headline
- Answer “what is this and why should I care?” instantly
- Focus on outcomes, not features
- Match messaging to the traffic source (ads, emails, social)
- Use short, scannable sections instead of long paragraphs
- Support the message with visuals or short-form video
When content matches intent, conversions feel like a natural next step – not a decision.
3. Trust and credibility
Even the best-designed page won’t convert without trust.
- Add testimonials, reviews, or case studies
- Show logos, usage numbers, or recognitions
- Include privacy reassurance near forms
- Keep forms short and friction-free
Trust reduces hesitation. Less hesitation means more conversions.
4. Performance and continuous optimization
This is where modern landing pages really stand out.
- Make your CTA impossible to miss
- Optimize load speed – every second matters
- Ensure seamless mobile experience
- Keep forms as short as possible
- Apply basic SEO structure where needed
- Test variations of headlines, layouts, and CTAs
But most importantly – stop relying on assumptions.
Today, optimization is data-driven. You can track how users scroll, where they click, and where they drop off. Based on that, AI tools can surface weak points and suggest improvements without manual analysis.
Try Landingi now and start optimizing your landing page for higher conversion rates!
Best Landing Page Examples (Real Use Cases)
The best landing page examples are the ones that feel obvious to the user. You land on the page, and within a few seconds you know what it’s about, what you’ll get, and what to do next.
Looking at real use cases makes this much easier to understand.
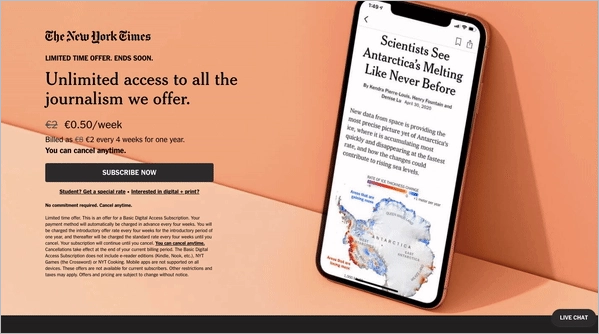
1. Free trial landing page (SaaS)
On the Kittl free trial landing page, the first thing you notice is how quickly it communicates value. The headline is simple and direct, and right below it you see visuals showing what you can actually create with the tool. Instead of listing features, the page focuses on outcomes.
The layout is clean, with plenty of space between sections, so your attention naturally moves toward the main CTA. There’s no overload of information – just enough to build interest and push you to try the product.
It’s a good example of how SaaS pages should work today: show the result first, explain later.

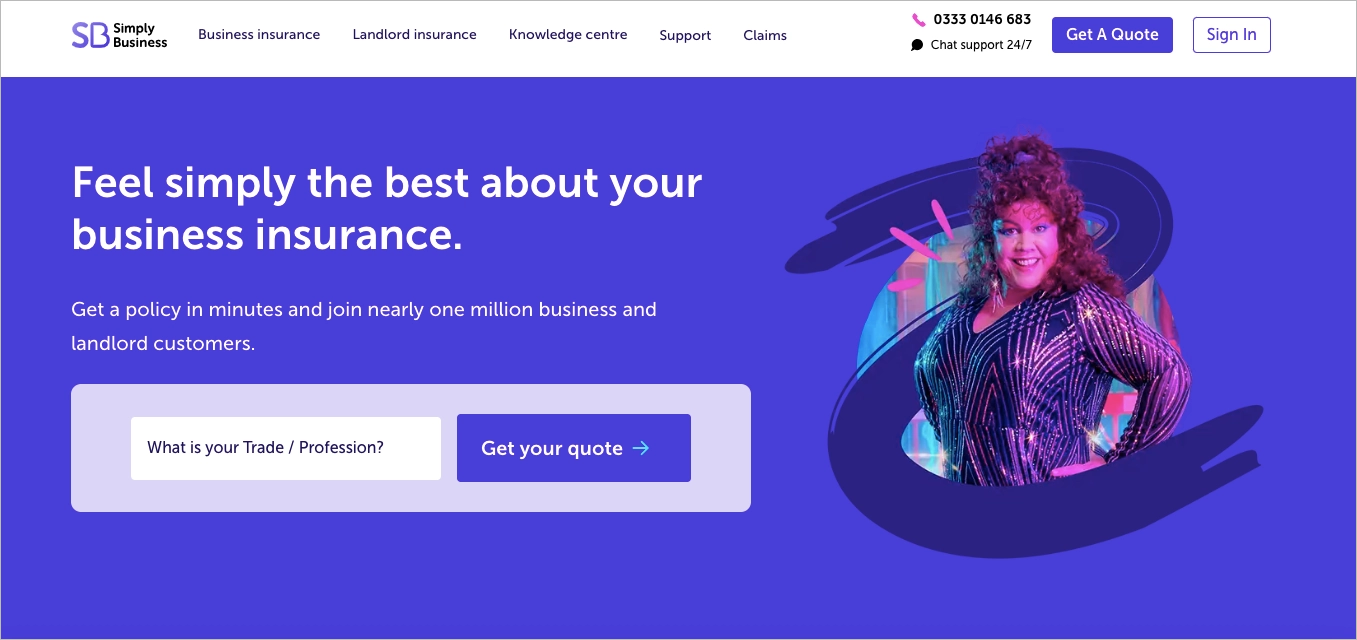
2. Service landing page (local or specialized services)
The Endodontics Northwest page works differently, because the user intent is different. Here, visitors are not exploring – they’re looking for a specific service and want to feel confident before taking action.
Right away, the page gives you practical options: how to contact the clinic, where it’s located, and who the doctors are. The “Meet the doctors” section builds trust, while the embedded map removes friction around finding the place.
The CTA is simple but effective – it’s tied directly to booking an appointment, not just “learning more.” That’s what makes it work.

3. Newsletter Landing Page
The Mrwhosetheboss newsletter page is a great example of how minimal a landing page can be – and still convert.
There’s no long explanation, no multiple sections. Just a short message, a clean form, and a clear CTA. The background visual adds personality, but it doesn’t distract from the main goal.
Everything here is designed to answer one question: “Why should I subscribe?” And it does that in seconds.

What Is the Difference Between a Landing Page and a Homepage?
The difference between a landing page and a homepage comes down to one thing – focus vs. exploration.
A landing page is built for a single goal. It’s created for a specific campaign, message, or audience, and everything on the page is designed to drive one action – whether that’s a signup, purchase, or download. That’s why landing pages usually remove navigation, limit distractions, and keep users on a clear path to conversion.
A homepage works differently. It’s the entry point to your entire website, so it has to serve multiple purposes at once. It introduces your brand, shows what you offer, and helps users navigate to different sections. Because of that, it includes menus, links, and multiple possible next steps.
The difference also shows up in traffic and intent. Landing pages are typically connected to campaigns – ads, emails, or social posts – and match the message users clicked on. Homepages, on the other hand, receive broader traffic, from direct visits to organic search, and need to speak to a wider audience.
In practice, both play different roles in a landing page in digital marketing strategy. The homepage builds awareness and helps users explore, while the landing page is where conversion actually happens.
And increasingly in 2026, this distinction is even more visible – teams generate and optimize landing pages per campaign, while the homepage stays relatively stable as the brand’s central hub.

What Is the Difference Between a Landing Page and a Website?
The difference between a landing page and a website is scale and purpose – a landing page is focused on one action, while a website supports many.
A landing page is a single, standalone page built to convert. It’s usually tied to a specific campaign and designed around one goal – for example, generating leads or driving sales. Because of that, it removes distractions, limits navigation, and delivers a message closely aligned with the traffic source.
A website, on the other hand, is a broader structure. It includes multiple pages – homepage, product pages, blog, contact – and is designed for exploration. Users can move between sections, learn about the brand, compare offers, and interact in different ways.
This difference also affects how they’re used in a landing page in digital marketing. Landing pages are created quickly, often in multiple versions, to support campaigns and test ideas. Websites evolve more slowly and act as a long-term content and brand hub.
What Are the Components of a Landing Page?
The main components of a landing page are the headline, visuals, copy, CTA, trust signals, form, layout, contact details, and footer. Each element has a job: explain the offer, build trust, reduce friction, and move the visitor toward one action.
1. Headline
The headline is the first message users see. It should clearly explain the offer and make the value obvious within seconds.
2. Visuals
Visuals show the product, service, or outcome in a way text alone cannot. Use images, product screenshots, short videos, or graphics that support the message instead of decorating the page.
3. CTA
The CTA tells users what to do next. It should be visible, specific, and tied directly to the offer, such as “Get the ebook,” “Book a demo,” or “Start trial.”
4. Trust signals
Trust signals reduce hesitation. Testimonials, reviews, logos, certifications, awards, and case studies help users feel safer before they share data or make a purchase.
5. Copy
Landing page copy should be short, persuasive, and focused on benefits. Good copy explains what the offer solves, why it matters, and what the user gains after taking action.
6. Design and layout
The layout guides attention. A strong landing page uses clear section order, enough white space, readable text, and visual hierarchy that naturally leads users toward the CTA.
7. Form
The form collects visitor data. Keep it as short as possible, especially for lead generation pages, and ask only for information you actually need at that stage.
8. Contact information
Contact details are especially important on service, local business, and high-trust landing pages. A phone number, email, location, or “Call now” button can remove uncertainty and make the next step easier.
9. Footer
The footer supports credibility and compliance. It may include privacy links, legal information, company details, or minimal navigation, but it should not distract from the main conversion goal.
The strongest landing pages don’t simply include these elements – they make them work together. In AI-assisted workflows, tools can generate the first structure quickly, but the final result still needs a clear offer, strong proof, and a friction-free path to conversion.
Why Is it Important to Test a Landing Page?
Testing a landing page is important because it shows what actually drives conversions.
In landing page in digital marketing, even small changes – like a headline, CTA, or layout – can impact results. A/B testing helps you compare versions and choose what works based on real data, not assumptions.
Today, testing goes beyond simple experiments. With tools like EventTracker in Landingi, you can see how users behave on your page – where they click, how far they scroll, and where they drop off. Based on this data, solutions like Solis suggest what to improve, making optimization faster and more precise.
In practice, a landing page is never “finished.” Testing is what turns it from a static page into a conversion engine.
Try Landingi now and experiment with various landing page versions!
How to Optimize a Landing Page to Increase Conversion Rates?
To optimize a landing page and increase conversion rates, focus on clarity, relevance, and continuous improvement based on real user data.
In 2026, optimization is no longer just about design tweaks – it’s an ongoing process supported by analytics and AI. Instead of guessing what works, you refine pages based on behavior, intent, and performance signals.
Here’s what actually moves the needle:
Start with the headline and value proposition
Your headline should immediately explain what you offer and why it matters. If users don’t understand the value in seconds, they won’t stay – no matter how good the rest of the page is.
Use visuals that support the decision
Images and videos should reduce uncertainty, not just decorate the page. Show the product, outcome, or experience clearly – especially in above-the-fold sections.
Keep content focused and scannable
Short sections, clear benefits, and structured layout help users process information quickly. Avoid long blocks of text – clarity always outperforms complexity.
Make the CTA obvious and specific
A strong CTA tells users exactly what happens next. “Start free trial” or “Get the demo” works better than generic phrases. Placement matters – it should always be easy to find.
Reduce friction in forms
Ask only for what you truly need. Every additional field lowers completion rates. If you need more data, collect it later in the funnel.
Add trust signals where decisions happen
Testimonials, logos, and proof points should appear close to key actions – not hidden at the bottom. Trust works best when it supports the moment of decision.
Optimize for mobile and speed
Most traffic is mobile, so the experience must be fast and effortless. Slow pages or poor responsiveness directly reduce conversions.
Test continuously, not occasionally
A/B testing headlines, layouts, and CTAs is still one of the most effective ways to improve performance. Even small changes can deliver measurable gains.
Use data, not assumptions
This is where modern tools make a real difference. With EventTracker, you can analyze clicks, scroll depth, and engagement patterns. Based on this data, Solis can highlight weak points and suggest what to improve – turning optimization into a faster, more structured process.
What Is the Right Dimension of a Landing Page?
The right landing page dimension is not a single fixed size but a responsive structure that adapts to different screen widths while keeping the content area clear, readable, and conversion-focused.
In practice, most high-performing landing pages in 2026 follow a proven layout pattern. On desktop, the content area is typically around 960–1200 px wide, placed within a wider frame (often up to 1440 px or more) to maintain visual balance on large screens. On mobile, the content is usually optimized for 320–390 px width, ensuring readability and easy interaction.

What matters more than exact numbers is consistency and usability:
- Content width should stay narrow enough for comfortable reading
- Key elements (headline, CTA, form) must remain visible and well-positioned
- Spacing and hierarchy should guide attention naturally
Height, on the other hand, is flexible. Some landing page examples are short and conversion-focused, while others use long-form layouts to explain more complex offers. The right length depends on your goal and audience, not a predefined limit.

In modern landing page in digital marketing workflows, you rarely set these dimensions manually. Systems like Landingi handle responsiveness automatically, so your layout adjusts across devices without breaking structure. Whether you generate a page with AI or start from a template, the framework ensures that proportions, spacing, and alignment stay optimized.
This matters even more when you scale. If you’re creating multiple pages or testing variations, maintaining consistent dimensions manually becomes inefficient. That’s why many teams rely on structured environments where layout rules are built-in rather than recreated each time.
Ultimately, the landing page meaning hasn’t changed – it still needs to guide users toward one action. But today, the “right size” is less about pixels and more about how well the page adapts, loads, and performs across devices.
Use Landingi to create mobile-friendly landing pages effortlessly!
How to Create a Landing Page Wireframe?
To create a landing page wireframe, define your goal, plan the user flow, and arrange key elements in a simple structure that leads to one action.
A wireframe is not about visuals but about logic. You start by deciding what the page should achieve, then map how a user moves from headline to CTA. The layout should naturally guide attention – from value proposition, through benefits and trust signals, to a clear conversion point.
Once the structure is clear, you sketch a basic layout and position essential elements like the headline, visuals, form, and CTA. A simple grid helps keep everything readable and consistent. From there, you can refine the layout digitally or move straight into building.
In 2026, this step is often accelerated. Instead of manually creating wireframes, AI landing page tools can generate a complete page structure from a prompt. That shifts the process from designing layouts to evaluating and improving them – but the core principle stays the same: every element must support conversion.
How to Optimize Landing Page for SEO?
To optimize a landing page for SEO, align keywords, structure, and technical performance with user intent while keeping the page focused on conversion.
Start with keyword research, but focus on intent rather than volume. Long-tail phrases usually bring more qualified traffic and fit better with what is a landing page used for – converting specific audiences, not attracting everyone.
Next, structure the page clearly. Use one strong H1, logical H2s and H3s, and keep your URL short and readable. Meta title and description should be written to win clicks, not just rankings.
Content should stay concise and useful. Instead of stuffing keywords, naturally include phrases like what is a landing page or landing page in digital marketing where they make sense. Clarity and relevance matter more than density.
From the technical side, speed and mobile experience are critical. Slow pages or poor responsiveness will hurt both rankings and conversions.
From a technical perspective, speed, mobile responsiveness, and clean layout directly impact both rankings and conversions.
If you’re using Landingi, most SEO work happens inside Page Settings. You can quickly define your title, keywords, and meta description, add custom meta tags, and control how your page appears in search results. You can also set indexing options, configure social sharing (OG image, title, description, thumbnail), and optimize images by adding alt and title attributes with keywords. Even headline structure (H1, H2, etc.) can be managed directly in the editor.
This means you don’t need external tools to handle core SEO setup – it’s part of the page-building workflow. Combined with performance data from EventTracker and insights from Solis, you can refine both visibility and conversion based on real behavior.
Master landing pages! Use Landingi to design landing pages and optimize them to deliver real benefits.
What Is the Importance of Page Speed for Landing Pages?
Page speed is important for landing pages because slow loading directly increases bounce rate and lowers conversions.
Users expect the page to open fast, especially on mobile. If a landing page takes too long to load, visitors often leave before they even see the offer, CTA, or form.
Fast-loading landing pages improve user experience, support SEO, and make paid campaigns more efficient. In simple terms: the faster the page loads, the more traffic has a real chance to convert.
In 2026, page speed also matters because teams launch and test pages faster than before. A good landing page workflow should not only help you create pages quickly, but also keep them lightweight, responsive, and ready for performance-focused campaigns.
What Are Some Limitations of a Landing Page?
The main limitations of a landing page are narrow content scope, limited SEO reach, ongoing optimization needs, and campaign-related costs.
A landing page is built for one goal, so it usually cannot explain your full offer, brand, or product range. That focus helps conversions, but it can leave some visitors needing more context.
SEO can also be more limited than on a full website. Because landing pages are usually built around one offer or keyword cluster, they are not ideal for ranking across many broad search queries.
Landing pages also need regular testing and updates. Headlines, forms, CTAs, page speed, and mobile experience should be reviewed based on performance data. Without optimization, even a strong page can stop performing well over time.
Cost is another factor, especially when campaigns depend on paid traffic or frequent page variations. This is why modern teams often use AI-supported workflows – they reduce production time, make testing easier, and help teams improve pages without rebuilding everything from scratch.
How Does a Landing Page Work?
A landing page works by taking traffic from a specific source and guiding visitors toward one clear action.
In practice, it sits at the end of a campaign – someone clicks an ad, email, or social post, and instead of landing on a general website, they land on a page built exactly for that message. The headline, visuals, and copy all match the intent behind that click, so the user immediately understands what’s being offered and why it matters.
From there, everything on the page is designed to remove friction. The layout focuses attention, the content highlights benefits, and elements like testimonials or visuals build trust. The CTA becomes the natural next step, not a forced decision.
What makes landing pages especially powerful in 2026 is how measurable and continuously optimizable they are. Every click, scroll, and interaction can be tracked – for example through EventTracker – and analyzed by tools like Solis, an AI landing page optimization agent that turns raw data into actionable recommendations.
Instead of manually guessing what to change, teams get clear suggestions on what to improve – from headlines and layouts to CTAs or user flow. This shifts the process from trial-and-error to guided optimization, helping landing pages evolve faster and perform better over time.
Build Landing Pages With Landingi – An AI Landing Page Operation System
As we wrap up, it’s clear that landing pages are not just simple web pages – they are a core part of how modern marketing converts traffic into results.
In 2026, the real advantage doesn’t come from building a page once, but from how fast you can create, launch, and improve it. That’s where an AI landing page operation system like Landingi changes the game. Instead of relying on static builders, you can generate pages, publish them instantly, and optimize them continuously within one workflow.
At the center of this process is Lunar, an AI-native landing page generator that helps you create complete, high-quality pages from a campaign idea – not just faster, but with structure, messaging, and conversion logic already in place. Then tools like Solis support ongoing optimization, so your pages don’t stay static after launch.
Whether you’re testing new offers, running paid campaigns, or scaling growth, this approach lets you move from idea to live, optimized landing page much faster – and with better results.
Start building landing pages with Landingi and turn your campaigns into a system that improves with every iteration.